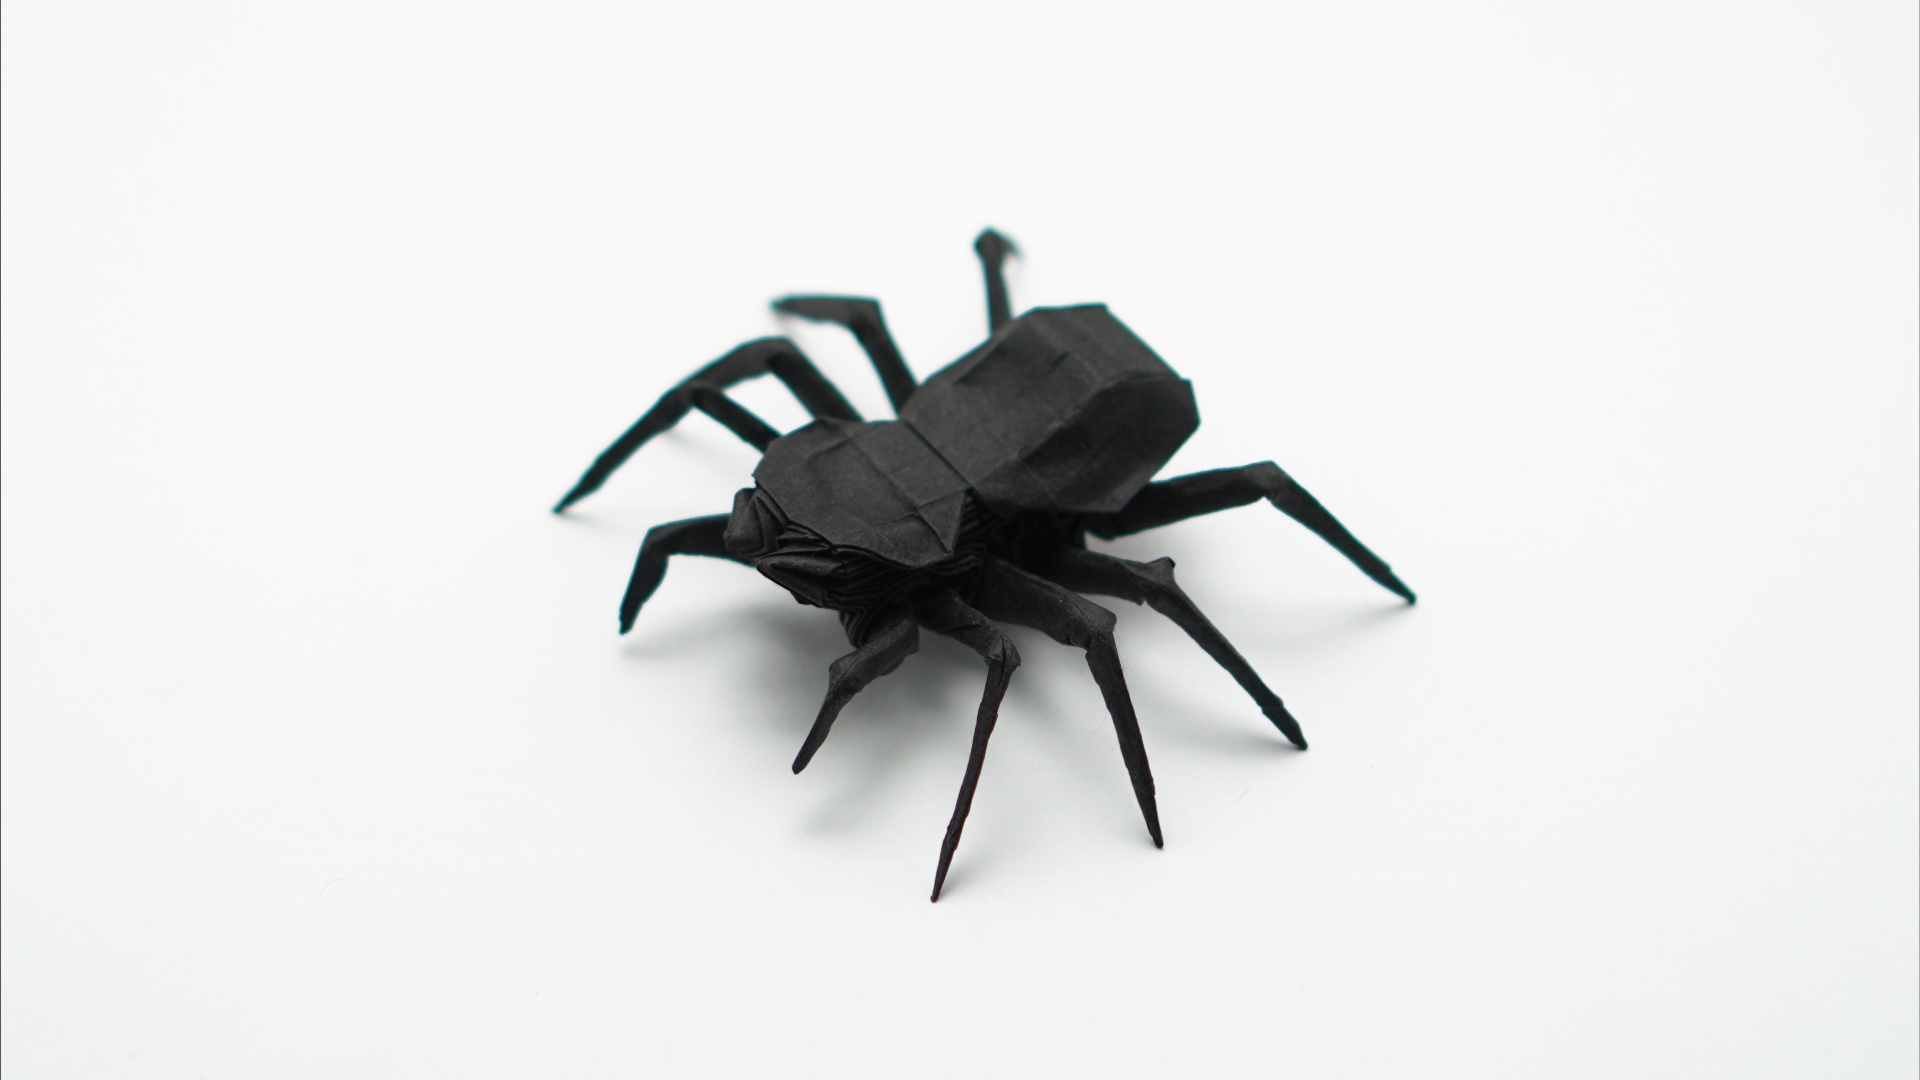
Designed by Jo Nakashima (07/2022)
Level: Complex
I recommend using some high quality thin paper of 30cm x 30cm (minimum of 24cm x 24cm if your paper is excellent) for this origami spider.
It takes me more than 3 hours to fold this model completely, so be patient and try to fold it precisely. I’m using partial crease patterns to demonstrate some steps and make the instructions clearer and easily, but you’ll probably struggle a bit more to handle the complete sheet of paper.
The hardest steps are the chelicerae and spinnerets. The procedure is the same for both, but spinnerets are a bit harder to make (optionally you can skip them and just hide the flap in the end). It may be easier to learn these steps if you print and fold the partial crease pattern (links below).
Paper used in this tutorial
- First origami spider: Black tissue-foil (30cm x 30cm)
- Grid and pre-creasing: Copper tissue-foil (20cm x 20cm – I don’t recommend this size!)
- Shaping: Kraft Alios (30cm x 30cm)
Crease Pattern
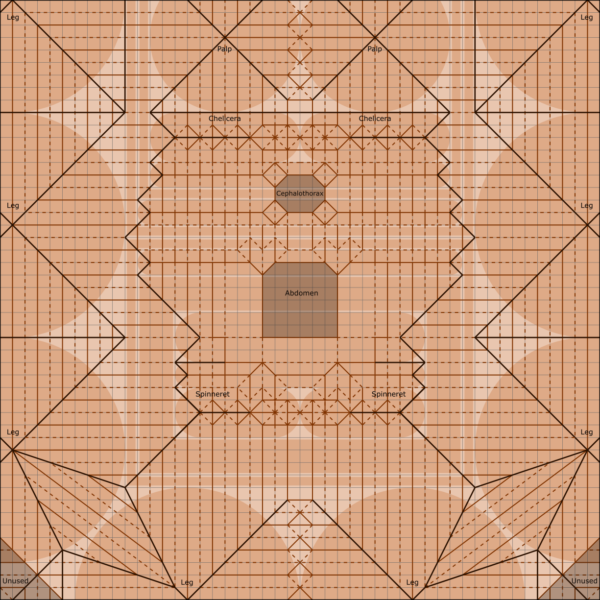
Partial Crease patterns
You can also download and print the partial crease patterns used in the video:
- Part 3: body
- Part 4: pedipalps, hind legs and legs from the side
- Part 5: chelicerae (same CP as the pedipalps) and spinnerets
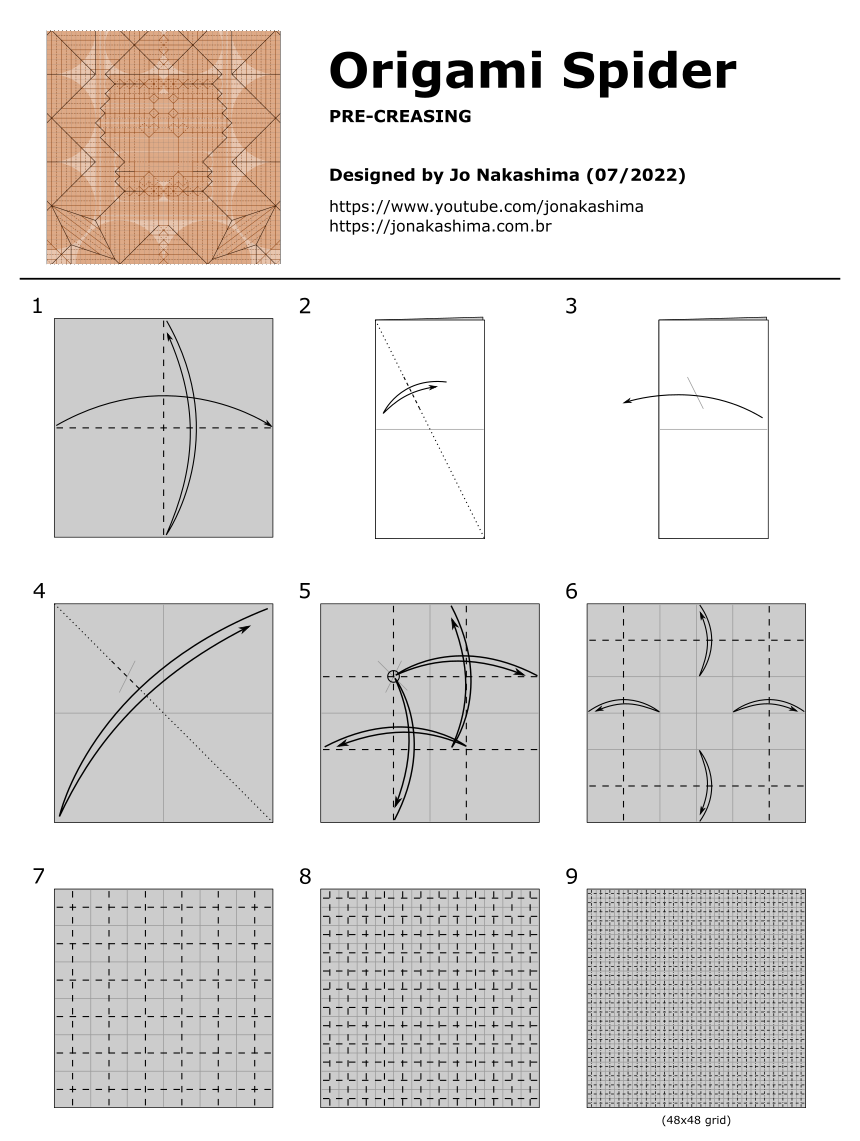
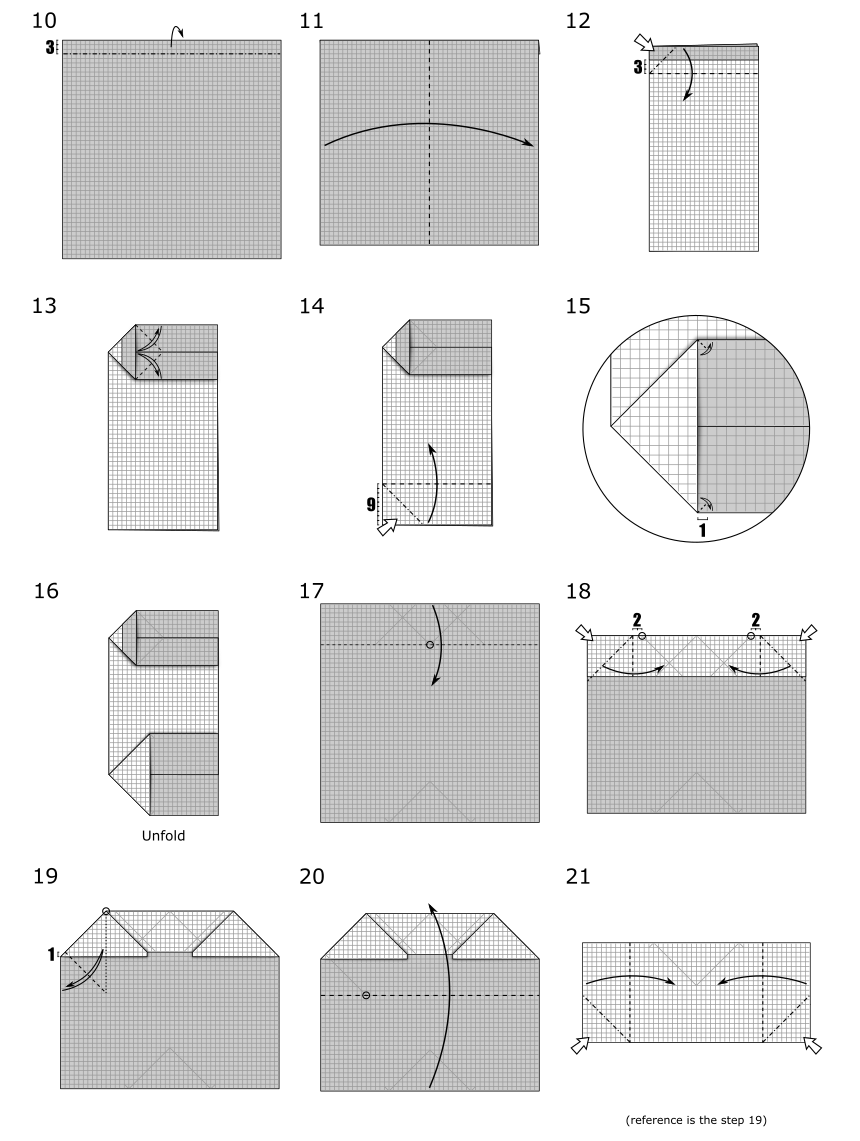
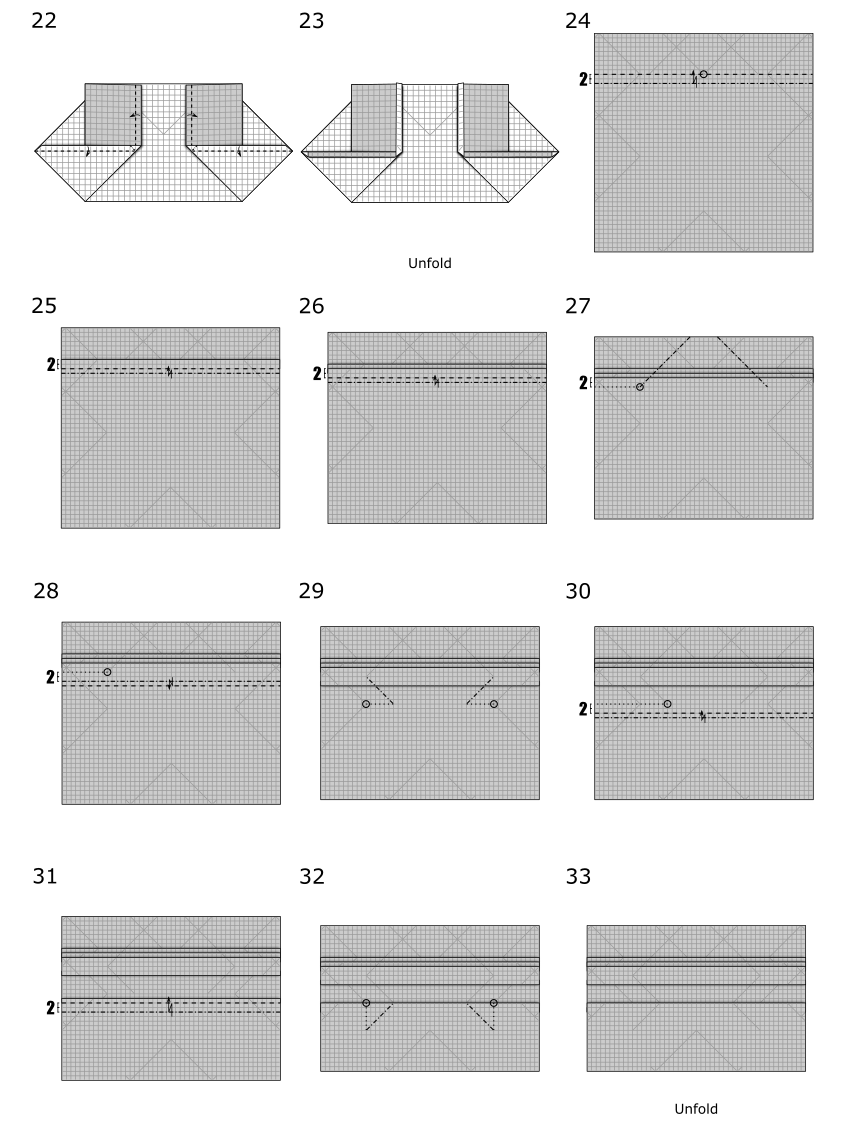
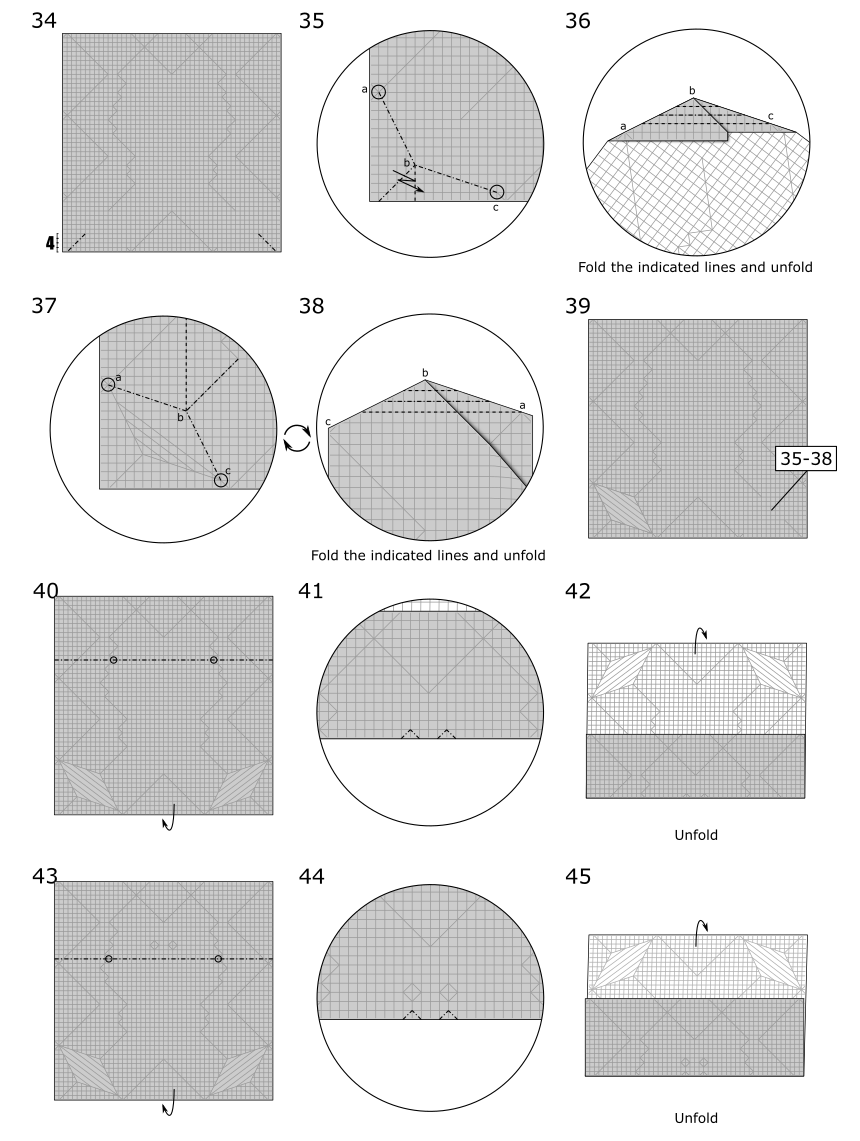
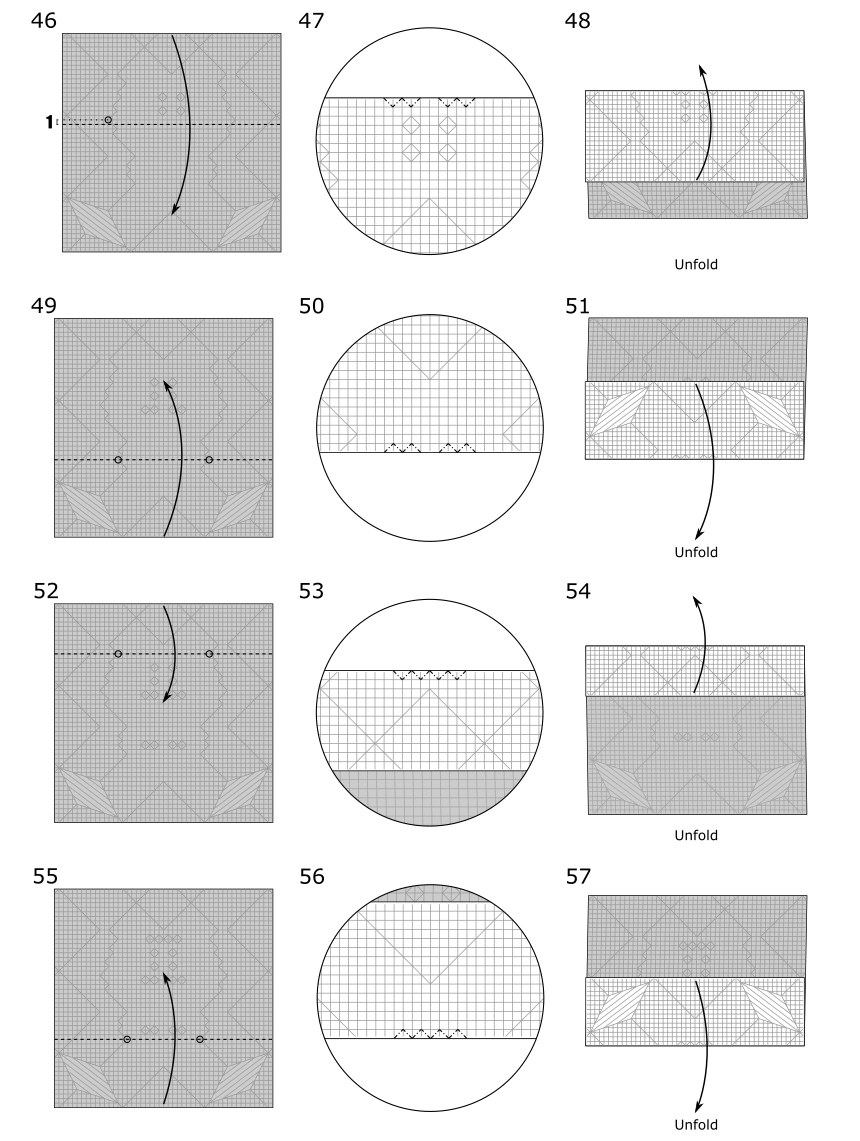
Origami Spider pre-creasing diagrams

Support my work!
If you like my work, please consider visiting and subscribing to my YouTube channel! You’ll find all my work, including models that are not in this website and also models from other origami artists. The easiest way to support my work is simply watching my videos, clicking the like button, leaving comments and subscribing to my channel!
You can also contribute with small donations on Patreon or YouTube Channel Membership. It’s basically like paying me a tip as a thanks for my work and get some rewards in return, like early access to my tutorials and your name in the video (the “thank you” list). They work with recurring payments, but you can cancel anytime so one-time donations are also possible.
