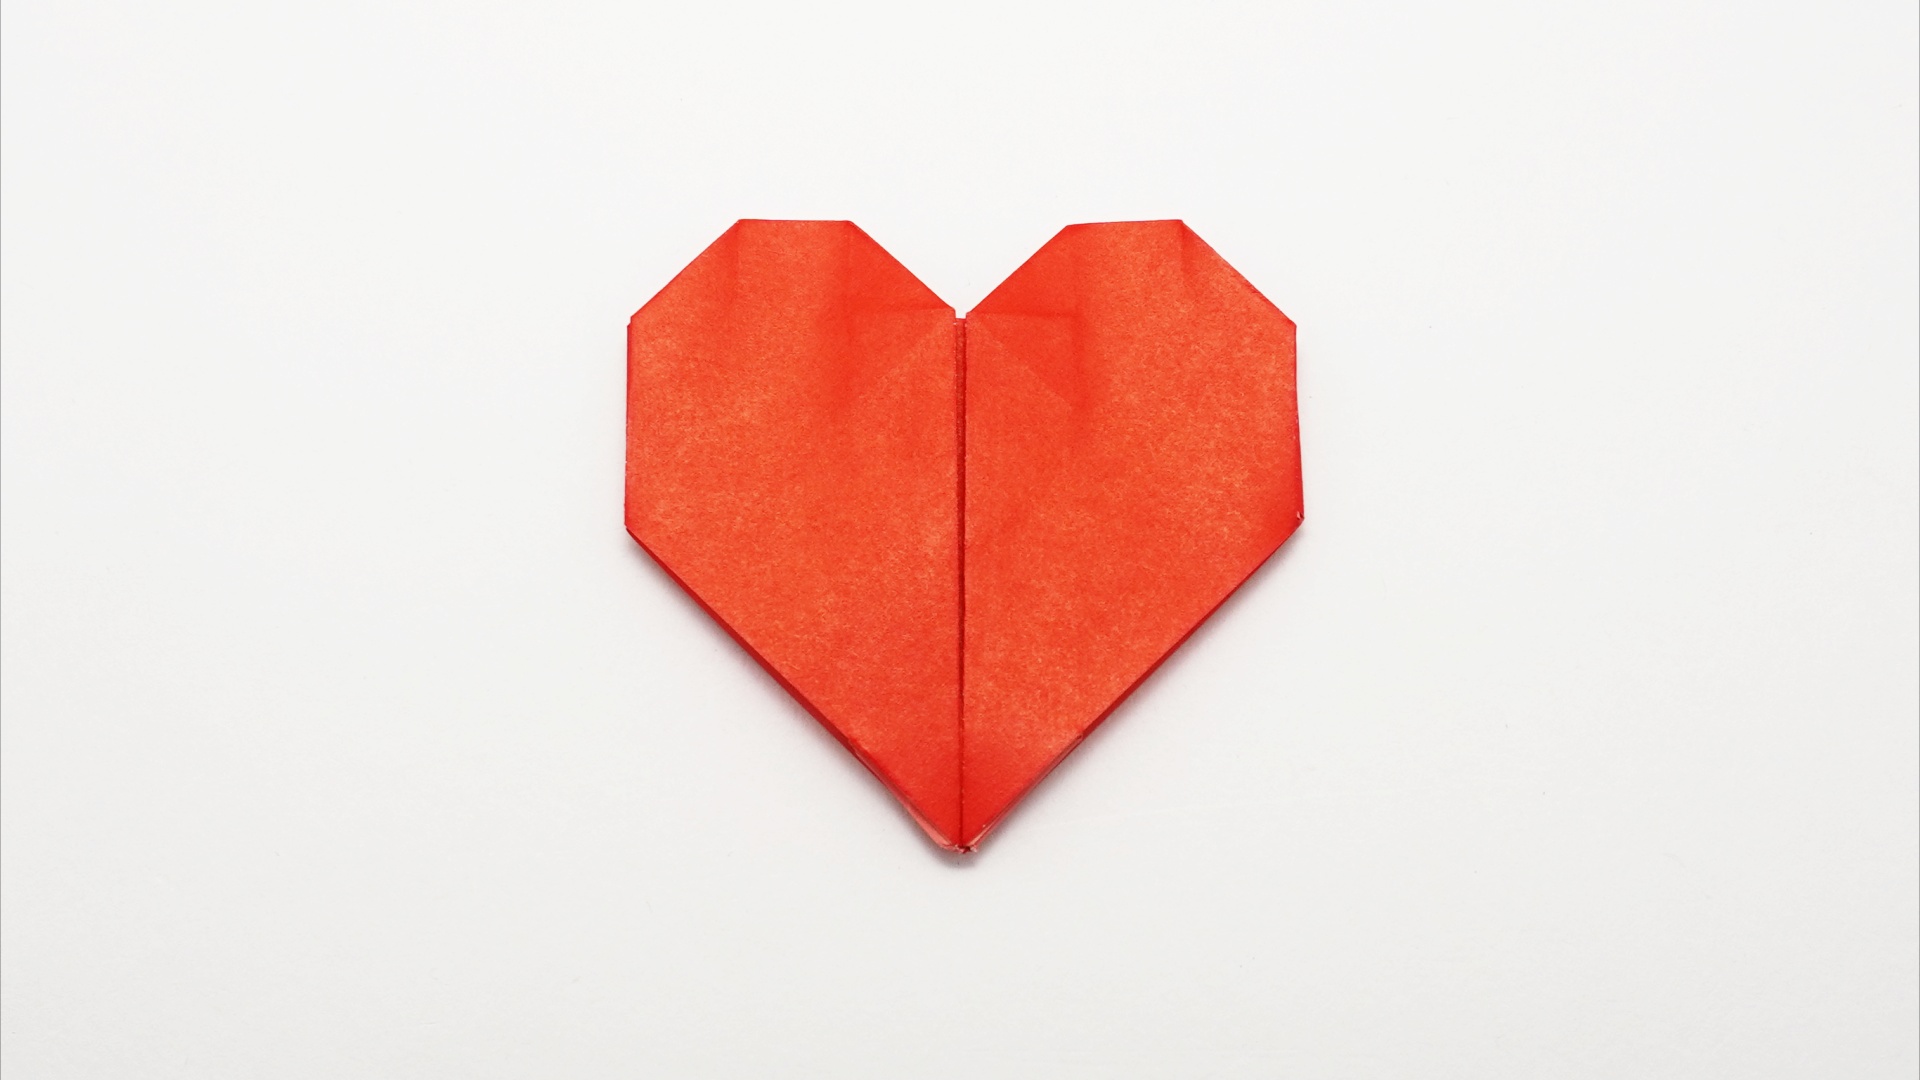
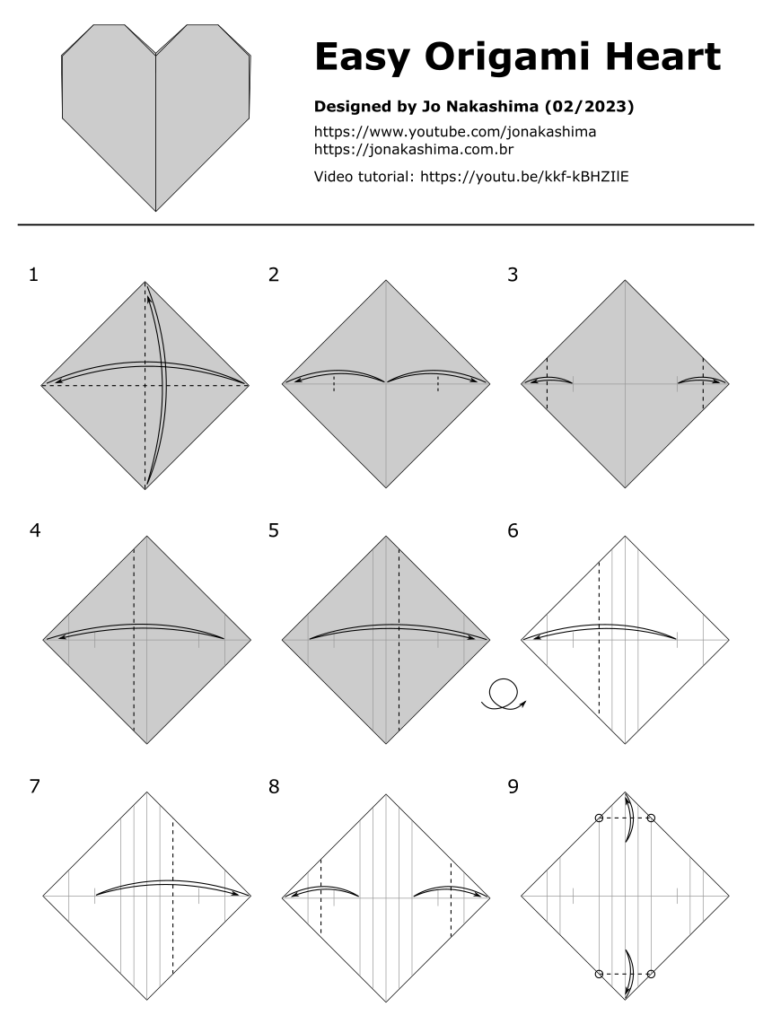
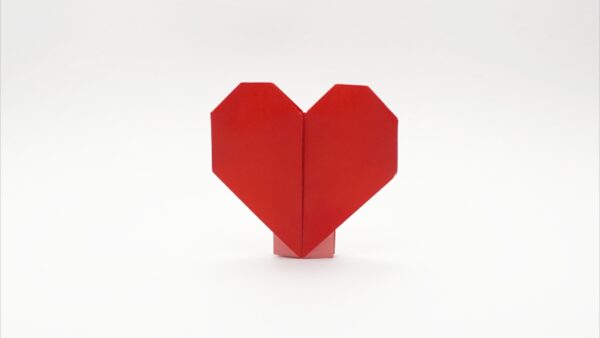
Easy Origami Heart
Designed by Jo Nakashima (02/2023)
Level: easy
I made this heart for Valentine’s day with the following goals:
- double sided
- no loose flaps
- no unwanted creases
- no unwanted layers
- easiest as possible
I made another heart in 2018 with these characteristics, but this new one is easier. You can see the comparison between them further in this article.
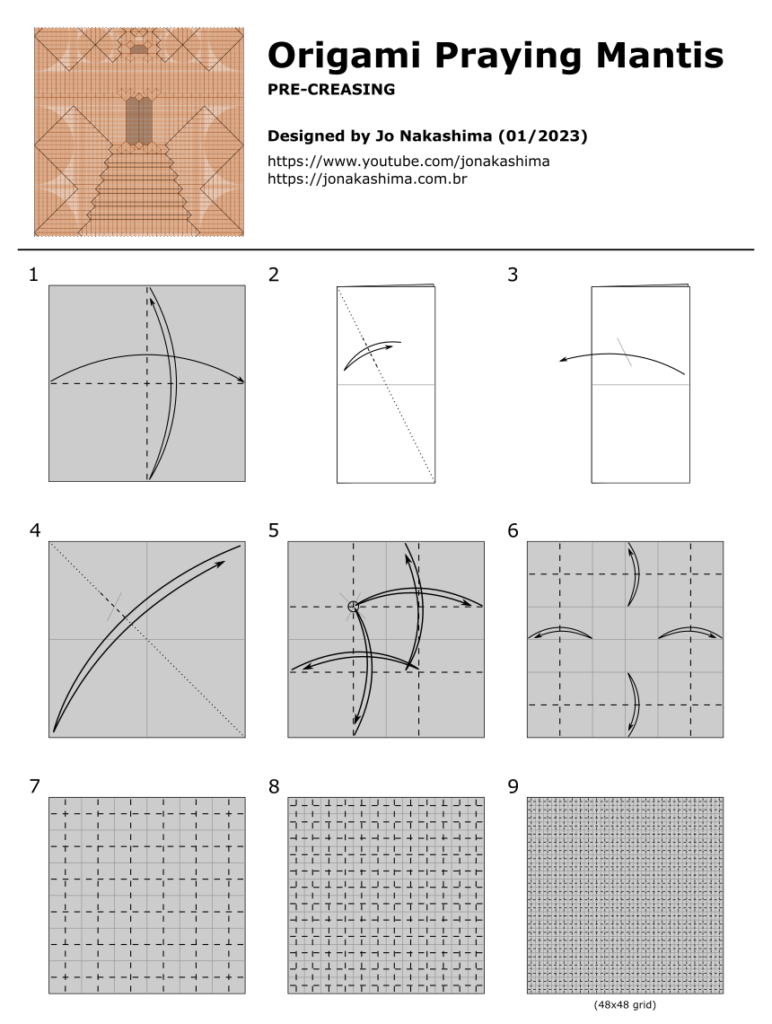
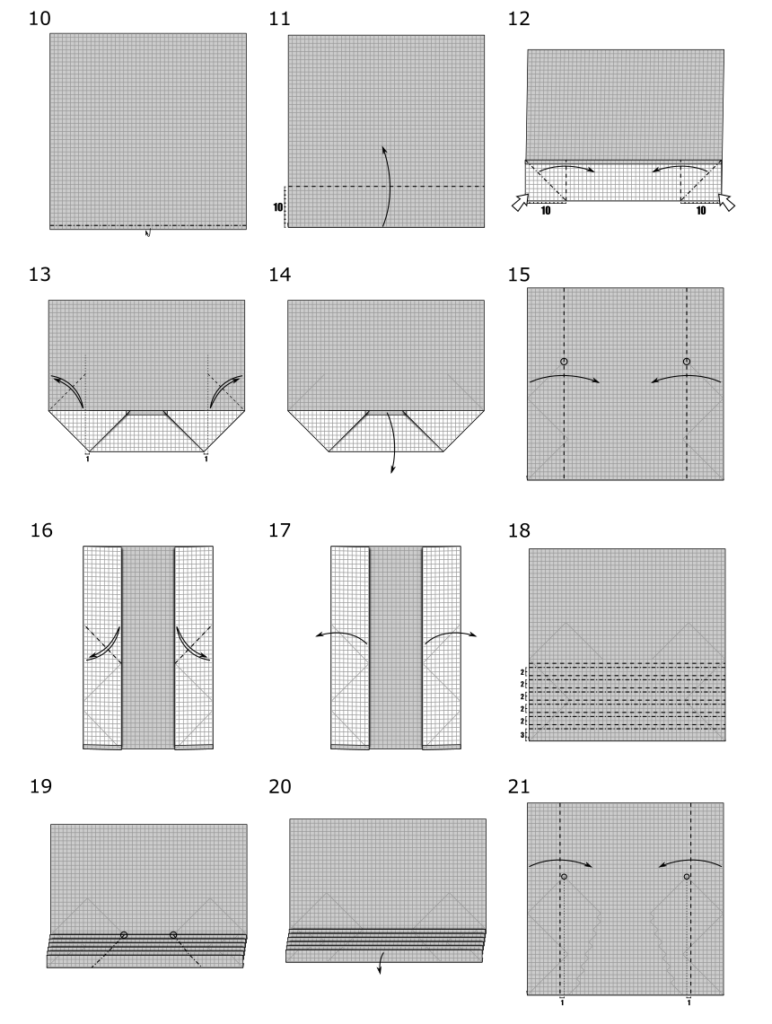
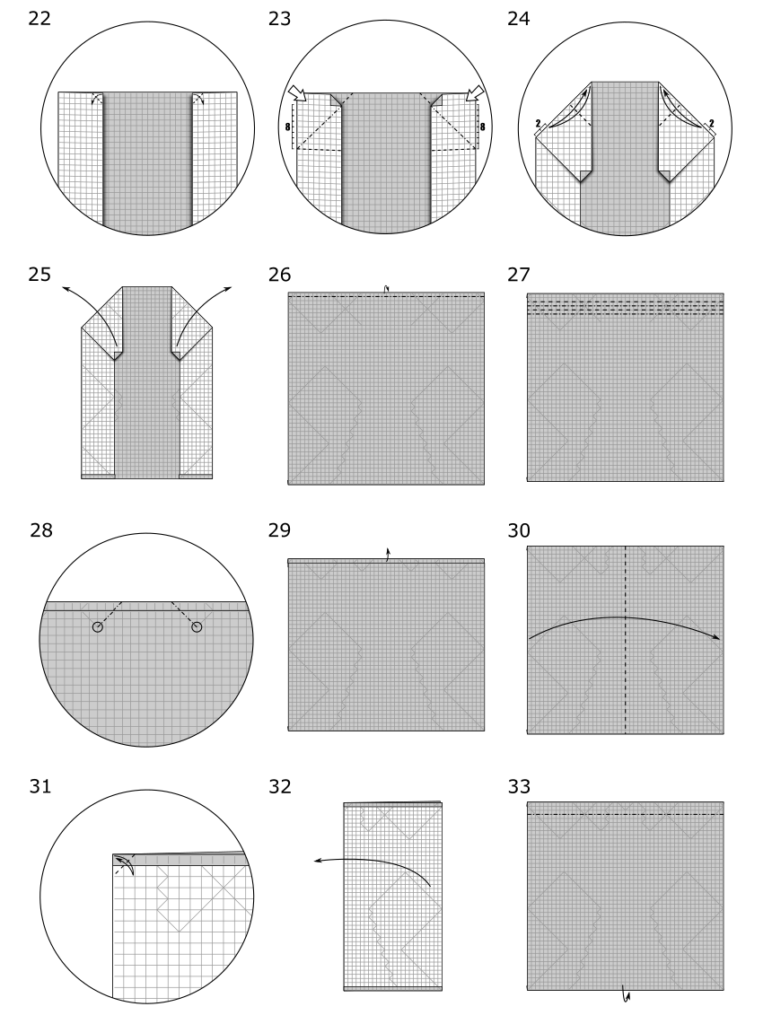
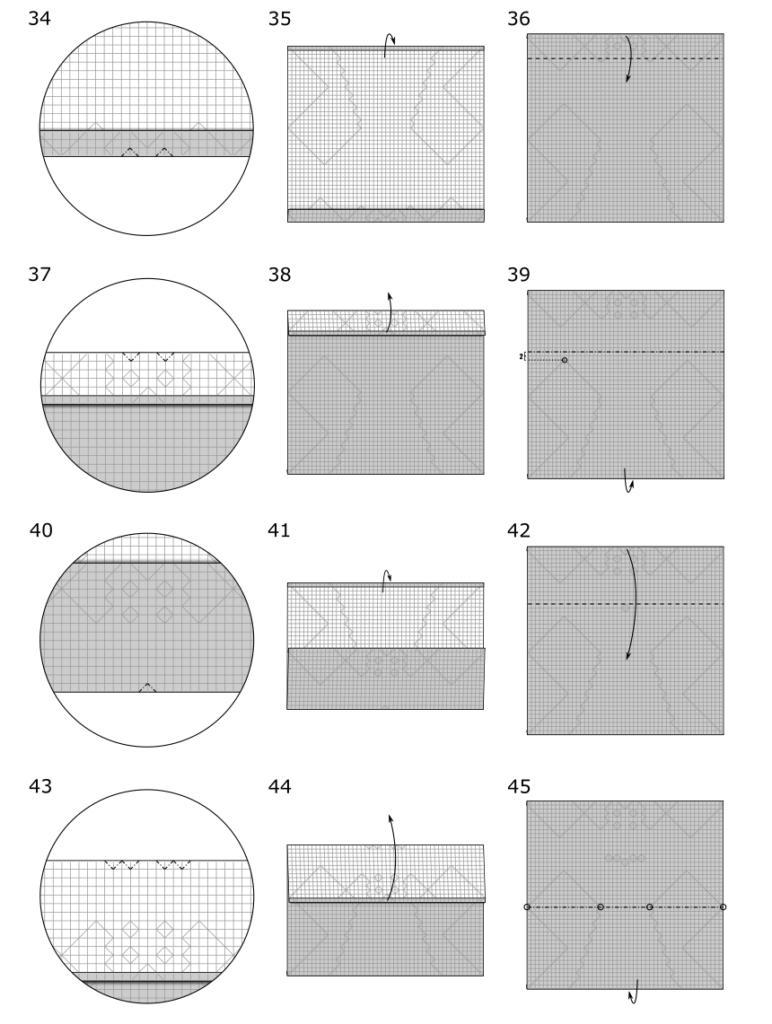
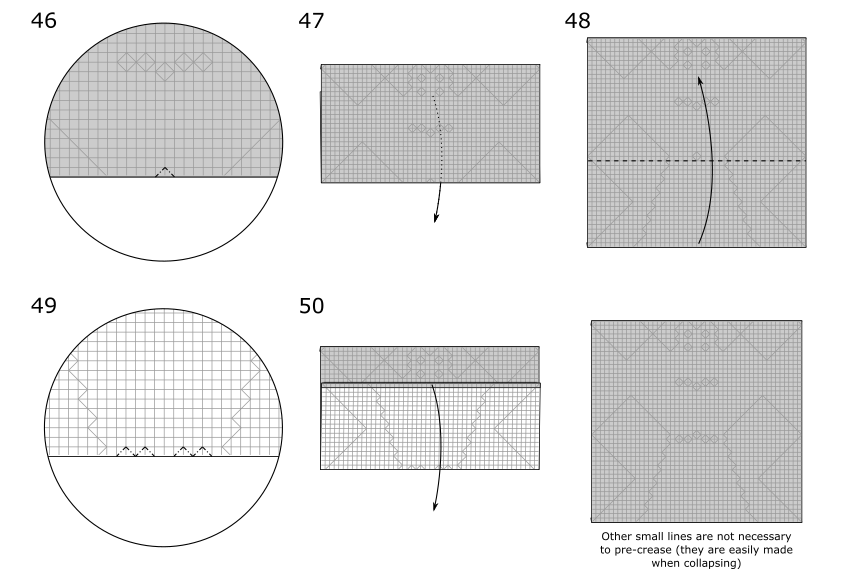
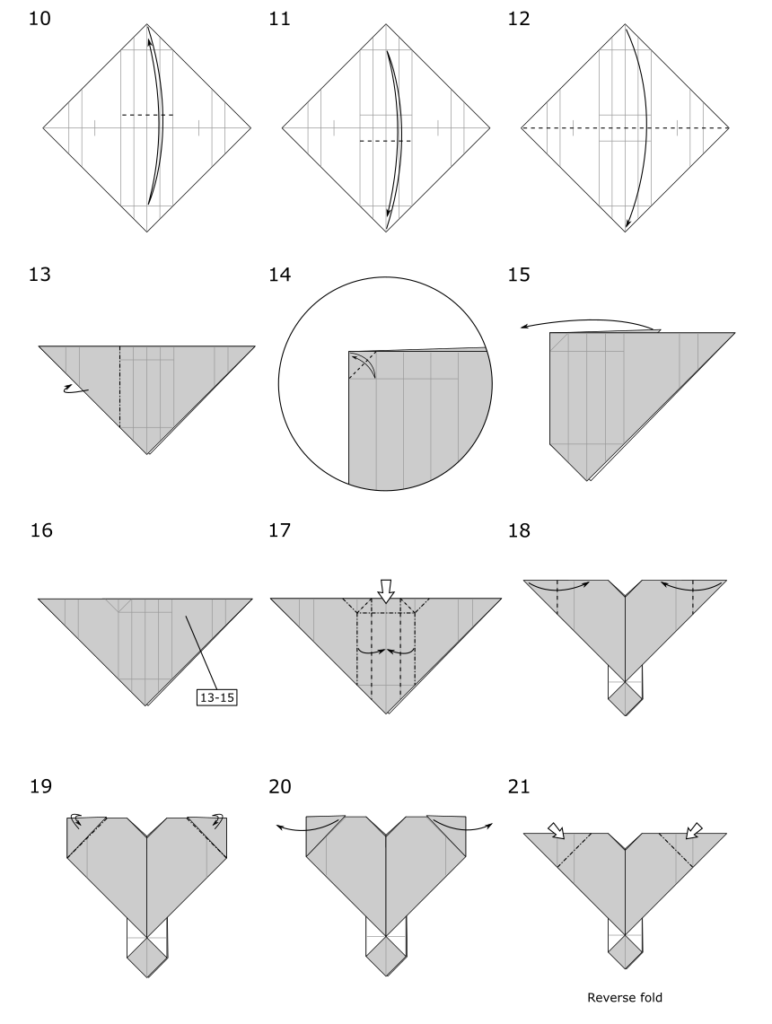
Diagrams
The only part I think might look tricky for beginners is the collapsing at step 17. You can always watch the video on YouTube, it is not that hard and all you need to do is use the creases you already made. All the other creases are simple valley/mountain and a couple of reverse folds.


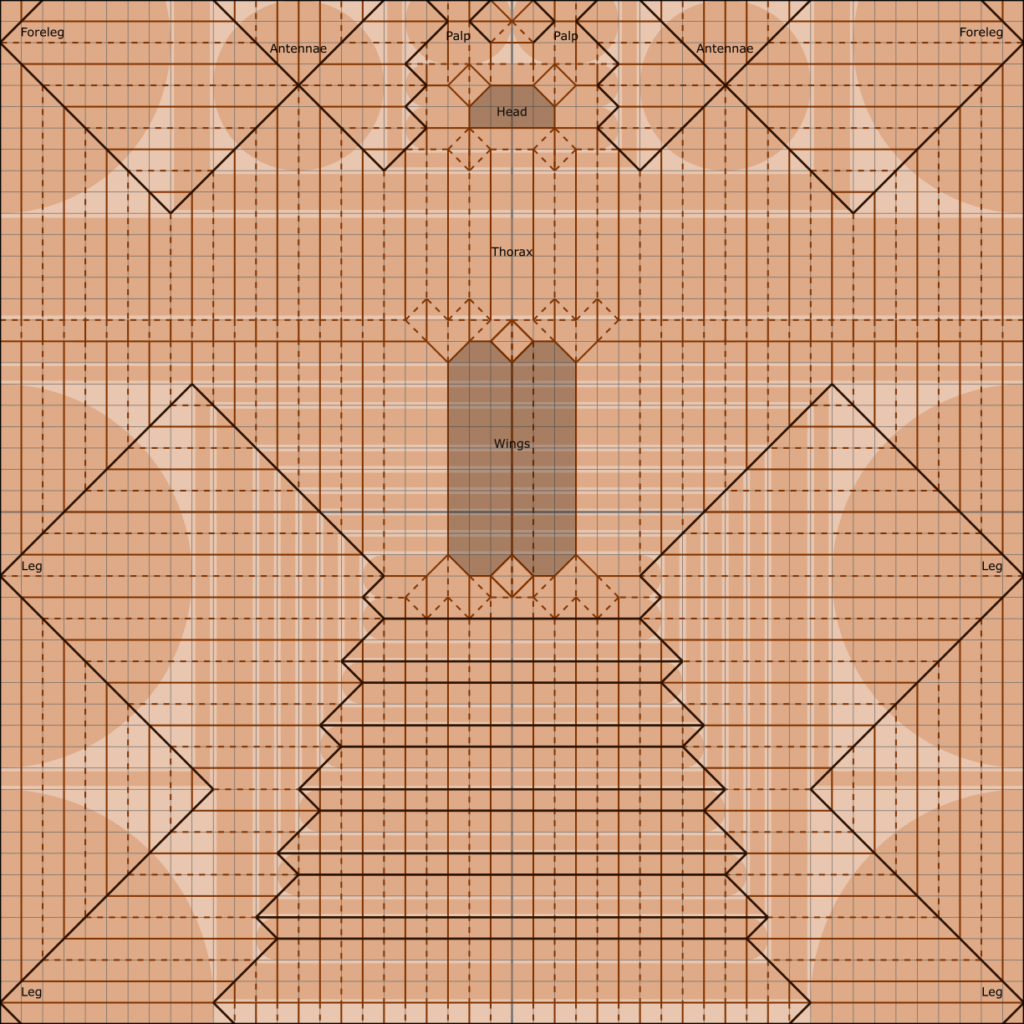
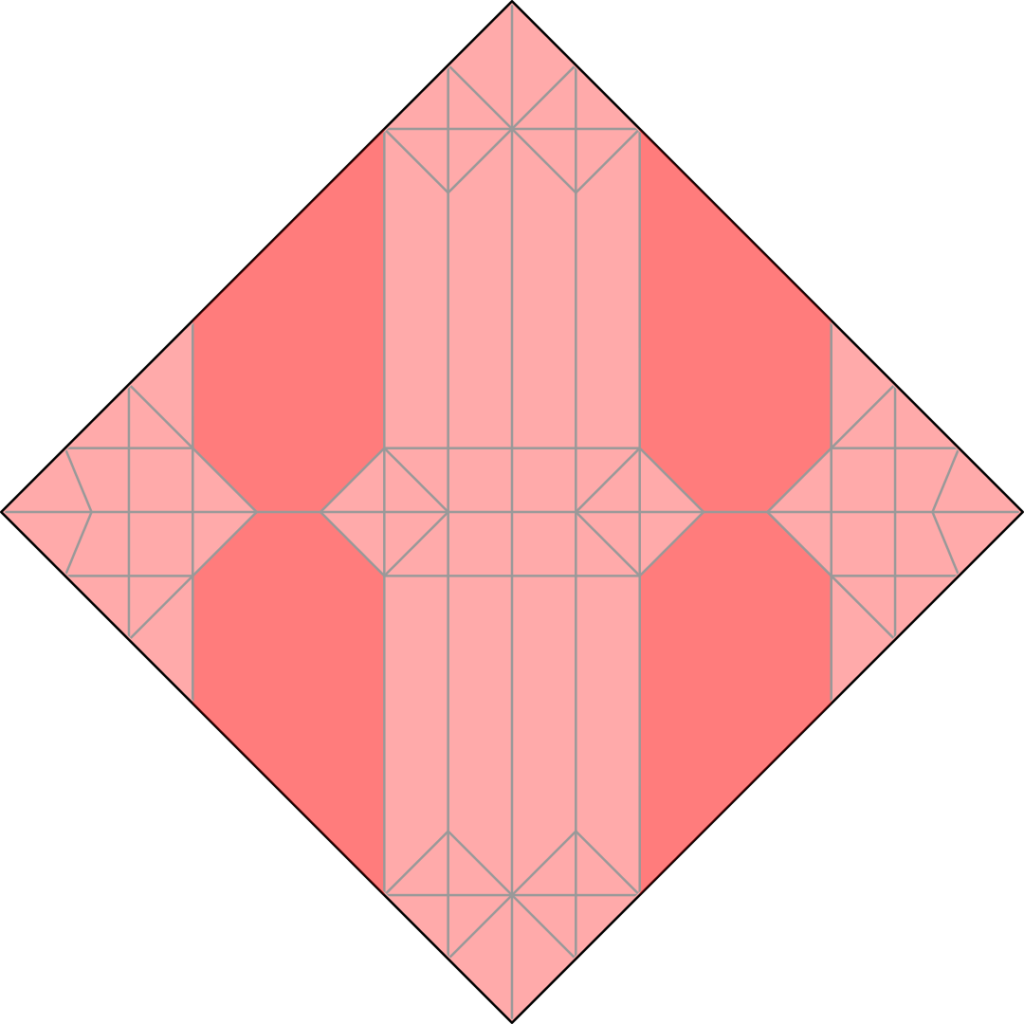
Crease Pattern

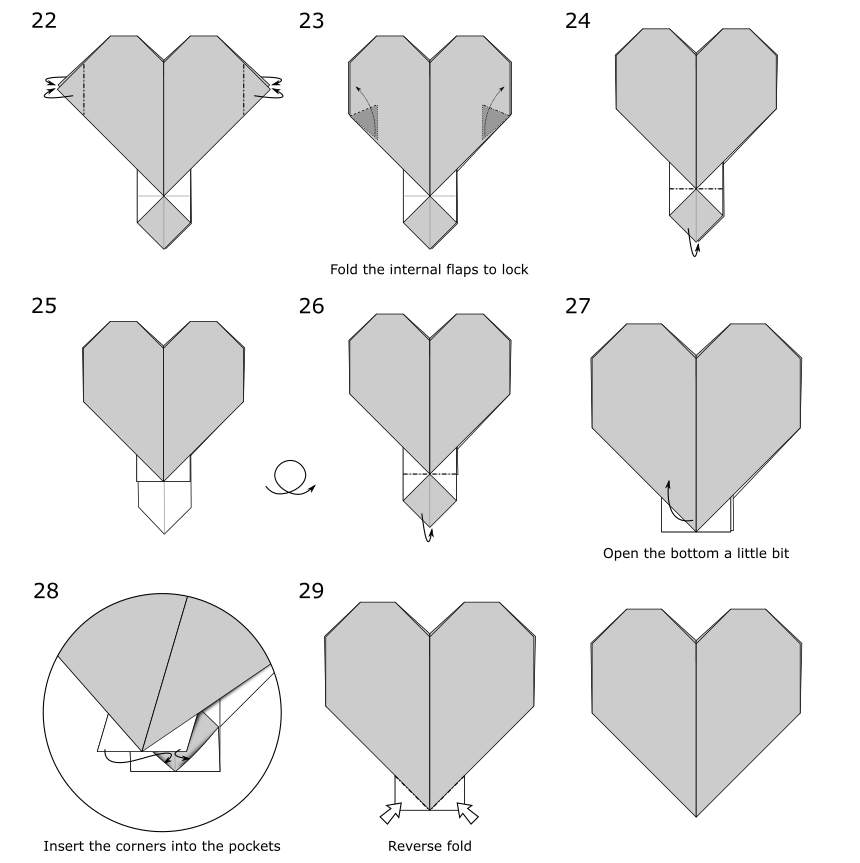
Heart Stand
Optionally you can stop at step 27 of the diagrams and use the bottom to make it stand

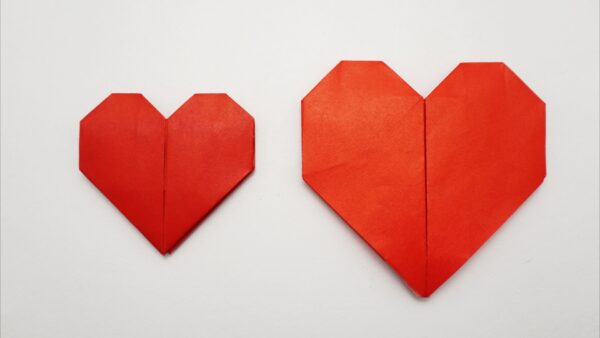
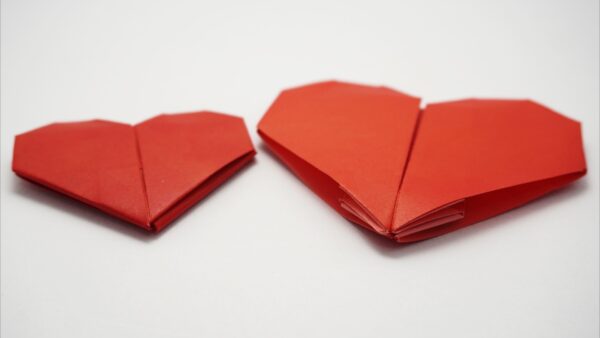
Hearts comparison – 2018 version vs 2023 version

It’s really difficult to show how good my origami hearts are with only the picture in the thumbnail of the video. They look the same! And they look like the traditional origami heart, a very simple heart but not double sided. For this reason I think these tutorials don’t get as much views as they deserve.
2018 version – which I named “Nakashima Heart” trying to differentiate from other origami hearts – is definitely my favorite. The locks are great, there are no unwanted creases/flaps/layers, the distribution of paper is good making it feel sturdy and the white side is 100% hidden.
I made the 2023 version as an easier alternative. It has fewer folds, so it is less time consuming and the paper usage is more efficient (meaning you can make larger hearts from the same size of paper, or use smaller sizes). There are only 3 locks at corners and the bottom edges are open (the model will stay locked but you can see the white side there). It also don’t feel sturdy like the previous version because some parts will have thinner layers.
Support my work!
If you like my work, please consider visiting and subscribing to my YouTube channel! You’ll find all my work, including models that are not in this website and also models from other origami artists. The easiest way to support my work is simply watching my videos, clicking the like button, leaving comments and subscribing to my channel!
You can also contribute with small donations on Patreon or YouTube Channel Membership. It’s basically like paying me a tip as a thanks for my work and get some rewards in return, like early access to my tutorials and your name in the video (the “thank you” list). They work with recurring payments, but you can cancel anytime so one-time donations are also possible.