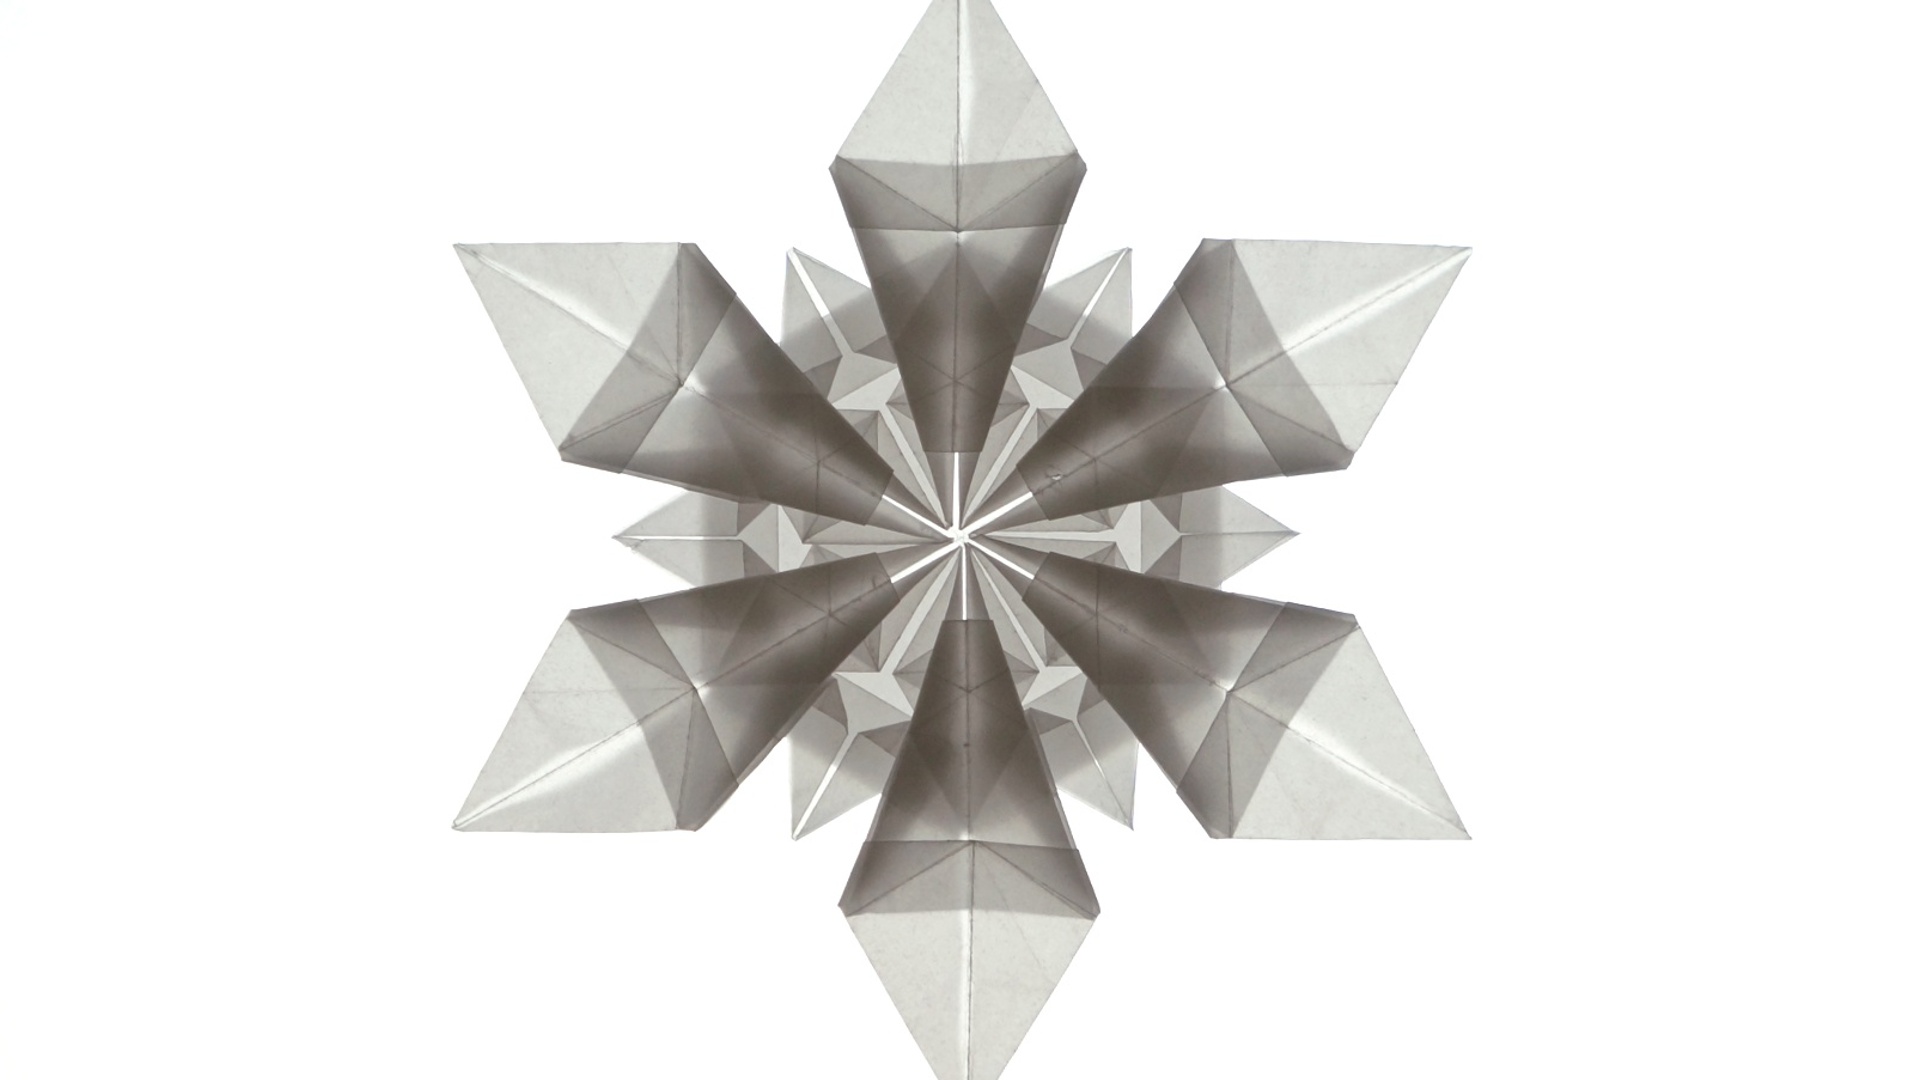
Origami Snowflake

Origami Snowflake by Jo Nakashima
YouTube Poster

Origami Snowflake
Designed by Jo Nakashima (Dec 13, 2017)
Difficulty level: intermediate
My paper: Copper Tissue-Foil 20cm x 20cm (cut into a Hexagon). For transparency I suggest Glassine paper.

Learn how to make a beautiful origami Snowflake from one uncut hexagon sheet of paper. It will look even better if you use translucid paper (eg: tracing paper or Glassine paper).

Origami Snowflake Diagrams

Notice: at first I’ve made these diagrams only for the video, not to be published separately. For this reason, some transitions or steps might not be so clear. If you find some step difficult, you can find more detailed instructions in the video tutorial.

Support my work!

If you like my work, please consider visiting and subscribing to my YouTube channel! You’ll find all my work, including models that are not in this website and also models from other origami artists. The easiest way to support my work is simply watching my videos, clicking the like button, leaving comments and subscribing to my channel!

You can also contribute with small donations on Patreon or YouTube Channel Membership. It’s basically like paying me a tip as a thanks for my work and get some rewards in return, like early access to my tutorials and your name in the video (the “thank you” list). They work with recurring payments, but you can cancel anytime so one-time donations are also possible.
Origami Snowman

Did you know? In America the snowmen are made from 3 snowballs, but in Japan you make it with only 2. I made the Japanese version first because it was easier.Then, I just added another module to make the third snowball and changed the arms position a little bit. The hat and scarf gives a special touch to the model.

Origami Snowman
Designed by Jo Nakashima (03/12/2017)
Difficulty level: low intermediate
My paper: Kraft
Recommended paper sizes:

  • Snowman: 15cm x 15cm
  • Third snowball for the snowman: 15cm x 15cm
  • Scarf: 15cm x 1.5cm
  • Santa’s Hat: 7.5cm x 7.5cm
  • Top Hat: 7.5cm x 7.5cm

Diagrams

If you find some step difficult, you can find more detailed instructions in the video tutorials at the end of this page.

Video tutorials

Origami Emoji

I’m working on a new series of origami Emoji! I’m adding the tutorials to the playlist down below.

Pictures and video tutorials

Click the picture to open the tutorial on YouTube (new tab)!

Origami Smiling Face Diagrams

Origami Feathered Crane

How to make an origami Feathered Crane designed by Jo Nakashima. This model is like the traditional Tsuru, but with nice details on the wings and a color change on the beak. Special paper is NOT required! You can use even standard 15cm x 15cm origami paper. But for best results I recommend DELUXE WASHI 24cm x 24cm.

Origami Feathered Crane
Designed by Jo Nakashima (09/2017)
Difficulty level: intermediate
My paper:
Red tsuru: Deluxe Washi 24cm x 24cm (buy it here)
Tutorial: Copper Tissue-foil 20cm x 20cm (buy it here)

Diagrams

Notice: at first I’ve made these diagrams only for the video, not to be published separately. For this reason, some transitions or steps might not be so clear. If you find some step difficult, you can find more detailed instructions in the video tutorial.

Origami Seal

How to make an origami Seal designed by Jo Nakashima. You can also fold an origami Whale and a Dolphin using the same base

Origami Seal
Designed by Jo Nakashima (08/2017)
Difficulty level: low intermediate
My paper: SATOGAMI 15cm x 15cm (buy it here)

Diagrams

Notice: at first I’ve made these diagrams only for the video, not to be published separately. For this reason, some transitions or steps might not be so clear. If you find some step difficult, you can find more detailed instructions in the video tutorial.

Origami Dolphin

Learn how to fold an origami Dolphin. I’ve created it using the same base as my origami Whale.

Origami Dolphin
Designed by Jo Nakashima (06/2017)
Difficulty level: low intermediate
My paper:
20cm x 20cm Tant (first dolphin) – you can buy it HERE
15cm x 15cm kami (tutorial)

Diagram

Notice: at first I’ve made these diagrams only for the video, not to be published separately. For this reason, some transitions or steps might not be so clear. If you find some step difficult, you can find more detailed instructions in the video tutorial.

Origami Whale

Origami Whale
Designed by Jo Nakashima (22/Jun/2017)
Difficulty level: low intermediate
My paper: 15cm x 15cm kami

Diagrams

Notice: at first I’ve made these diagrams only for the video, not to be published separately. For this reason, some transitions or steps might not be so clear. If you find some step difficult, you can find more detailed instructions in the video tutorial.

Origami Bottle v2, Cork stopper and Cup

How to make an origami Bottle (v2)
Designed by Jo Nakashima (05/2017)
Difficulty level: low intermediate

In 2011 I’ve made the first version of my origami bottle. This improved version is easier to fold and there is a better lock at the bottom and a better shape.

The paper used in the tutorial is Copper Tissue-foil (18cm x 18cm). The blue one in the beginning was made from PVC plastic.

Cork Stopper

To make it complete, close it with a cork stopper! To make this model, use a square with half of the width of the paper used for the bottle (in this case, 9cm x 9cm).

Cup

The origami cup is similar to the bottom part of the bottle. Since it’s much shorter, the paper is a rectangle with ratio 2:1 (half of a square). In this tutorial I’m using 15cm x 7.5cm. The water inside is a simple modular variation of the origami snowball.

Boat inside the bottle

Additionally you can put a boat inside if you use a translucid material to make the bottle. The blue bottle in my tutorial was made from a PVC plastic sheet from Daiso Japan. It’s difficult to fold, but the result is pretty cool. I chose the classic traditional origami boat to put inside.

Diagrams

Diagrams for this models are not available yet. Watch the tutorial to learn how to make it!

Origami Money Bunny v2

This is a new version of my origami Money Bunny. The head is the same as the previous version, but I changed the body trying to turn it into a bookmark (you can use it that way too). Click here for the first version.

Money Bunny v2/ Bunny Bookmark
Designed by Jo Nakashima (16/Apr/2017)
Diagrams: Not available
Difficulty level: intermediate
My paper: Biotope (first rabbit) and Copper Tissue-foil (tutorial)
Rectangle with ratio of a dollar bill cut from a 20cm x 20cm square

You can buy these papers from origami-shop:
– Biotope: http://www.origami-shop.com/fiche_article.php?ref=8&products_id=9470&affiliate_banner_id=1
– Copper Tissue-foil: https://www.origami-shop.com/fiche_article.php?ref=8&products_id=2914&affiliate_banner_id=1

More dollar bill models

There is a playlist on my channel dedicated to money origami. You can find it here.

Origami Penguin Bookmark


Learn how to fold a cute Origami Penguin bookmark! In this tutorial I’m using a 15cm x 15cm sheet of paper, but I recommend using a smaller sheet (like 7.5cm x 7.5cm or 10cm x 10cm) otherwise it’s gonna be too big to use as a bookmark. It’s very simple, so the small size of the paper shouldn’t be a problem.

Origami Penguin Bookmark designed by Jo Nakashima (15/Mar/2017)
Difficulty level: simple
Suggested paper size: 7.5cm x 7.5cm

Diagrams

More origami bookmarks

If you like this one, see also my Neko (cat) Bookmark and Elephant Bookmark!

Origami Sunflower

I created this origami Sunflower based on the Daisy flower (2016). It is similar, but the base comes from a hexagon (works with pentagon, heptagon and octagon too, but hexagon is the best in my opinion).
If you don’t have a paper with the proper colors on each side, you can use two sheets: a yellow sheet colored on both sides and a brown sheet (for a 20cmx20cm yellow sheet, use a 10cmx10cm brown sheet of paper). Make all pre-creases and cut them into hexagons. Cover the middle hexagon of the yellow paper with the brown paper before collapsing (11:15). No need to glue!

Origami Sunflower designed by Jo Nakashima (02/2017)
Difficulty level: high intermediate
Diagrams: not available
Suggested paper sizes:
– Sunflower: 20cm x 20cm
– Flowerpot: 15cm x 15cm (tutorial here)

Origami YouTube Play Button

Learn how to make an easy origami YouTube Play Button. In the diagram there is also a standing version of this model (the first seven steps are the same on both versions).

Origami YouTube Play Button
Designed by Jo Nakashima (08/Feb/2017)
Difficulty level: simple
Diagrams: PDF or down bellow!

Diagrams

Origami Wolf

How to make an origami Wolf
Designed by Jo Nakashima & Camila Zeymer (01/2017)
Difficulty level: intermediate (easy to fold, but requires shaping)
My paper: Grainy 20cm x 20cm

The origami wolf is the first model I created in 2017, based on my origami Fox.

Paper

In the video tutorial I’m using a 20cm x 20cm sheet of paper. It requires some shaping to make it look really nice, so I strongly recommend wet-folding for best results. Here are some suggestions:

  • Grainy: this is the paper that I used in my tutorial. As the name suggests, it has a grainy texture. It’s very good for wet-folding and will keep the shape very well. Click here to buy it.
  • Elephant Hide: also perfect for wet-folding. One of my favorite types of paper. Click here to buy it.

Diagrams

Notice: at first I’ve made these diagrams only for the video, not to be published separately. For this reason, some transitions or steps might not be so clear. If you find some step difficult, you can find more detailed instructions in the video tutorial.

Help

Wallpapers

Download awesome wallpapers created by Camila Zeymer. Click to open the image in full size and save it!
Available for both desktop and mobile devices.

Origami Wolf wallpaper (desktop version)
Origami Wolf wallpaper (mobile version)
Exit mobile version