Learn how to make an origami Moving Cubes
Designed by Jo Nakashima (16/06/2019)
Difficulty level: easy
This is a modular origami and each cube is made from a single square sheet of paper, everything connected without glue nor tape.
I’ve made a new update to this model using the seamless cube. Check out the post here.
I’m really satisfied with the locking mechanism that I made to connect the units and I’ve never seen it before in other models. Inserting a flap into a pocket is a normal thing in origami, but in this case after inserting the two flaps into the oposite pockets they will block each other from separating. It’s actually difficult to disconnect them even if you want, because the blocking layers are inaccessible by your fingers (of course you can force them apart, but one of the units may even get damaged). I think the best way to understand how it works is folding a couple of cubes and testing it by yourself.
Paper and number of units
In the video tutorial I’m using 12cm x 12cm origami paper for each cube. Any square size can be used.
I’ve made a moving cubes with 9 units (3×3), but you can make a bigger one if you want. In order to make a N x N model you’ll need:
- Top/bottom units: 2
- Left/right units: 2
- Middle units: (N-2)^2
- Edge units: (N-2)*4
For example, to make a 5×5 moving cubes:
- Top/bottom units: 2
- Left/right units: 2
- Middle units: (5-2)^2 = 9
- Edge units: (5-2)*4 = 12
Total of 25 units
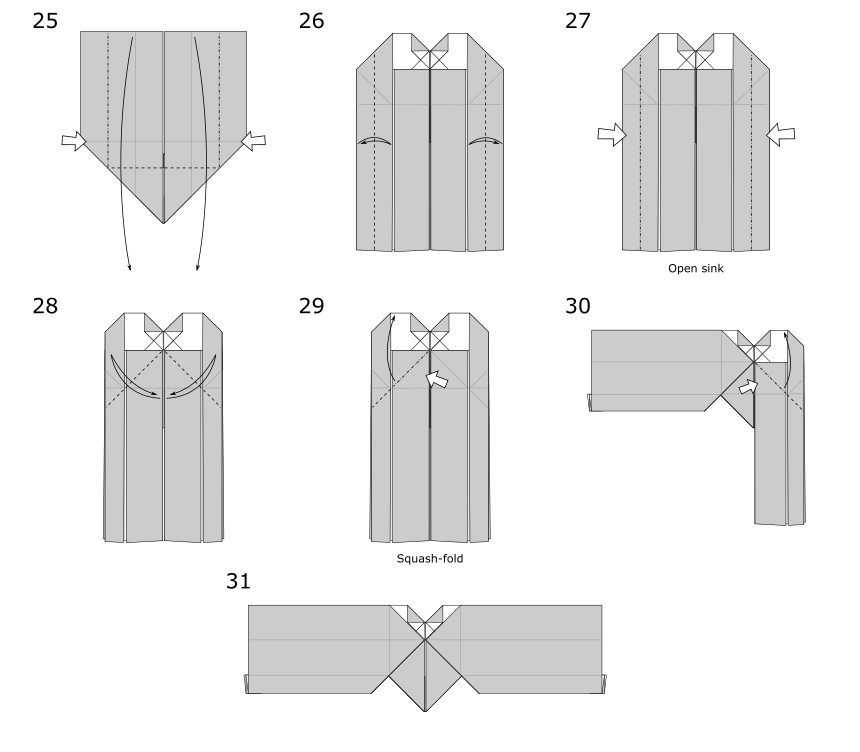
Diagrams
Not available yet! Watch the video to learn how to make it!
Helpful videos
To make the origami moving cubes you’ll need to fold a 5×5 grid on every sheet of paper that you’ll use. In the tutorial I show the “origami way” to do that, without a ruler or any kind of tool. However, there are easier methods and the videos below can help you in this task:


More origami models with cubes
On my YouTube Channel you can find a playlist with all my models based on the origami cube. Check it out for more action models like the Infinity Cube and also puzzles like the Soma Cube and the Rubik’s Cube.