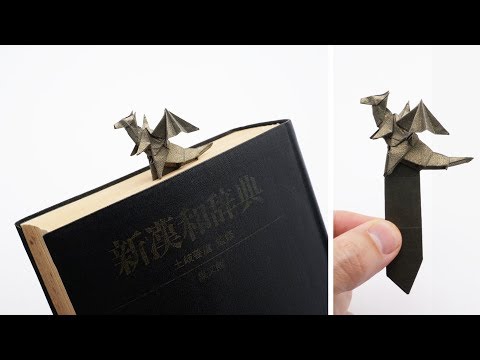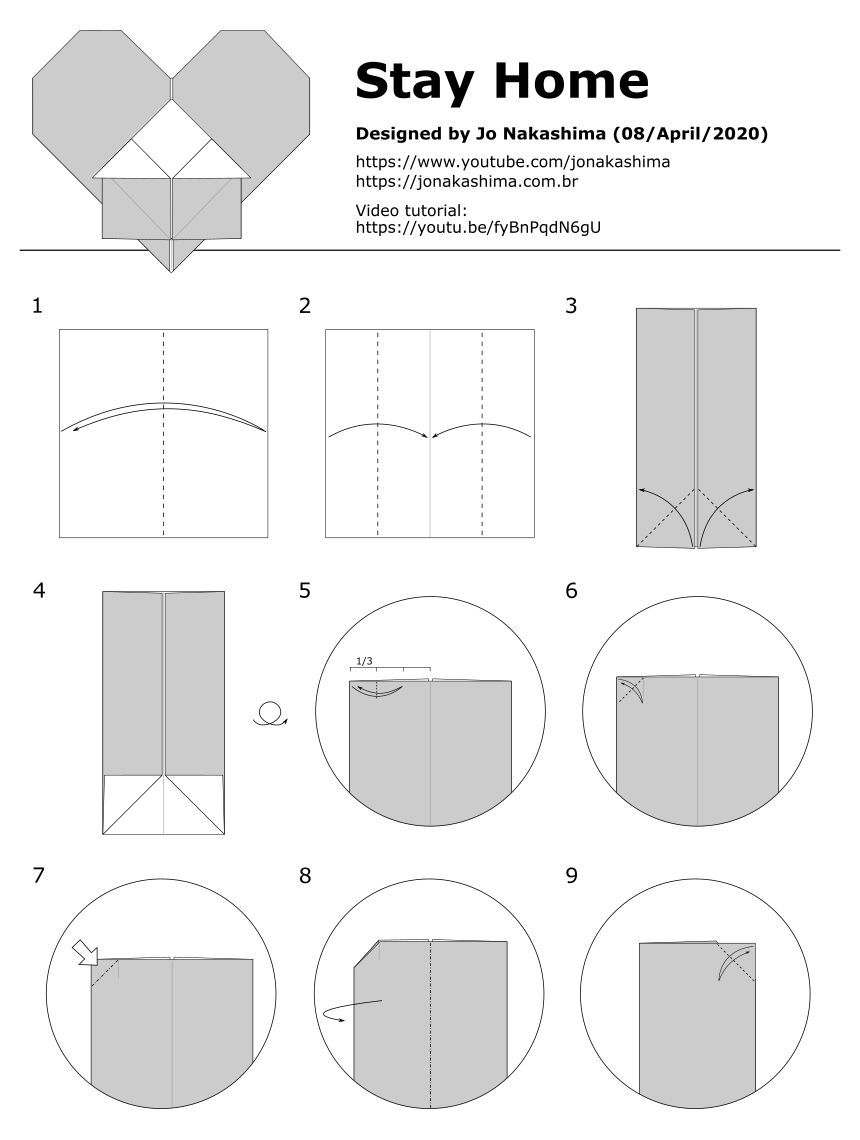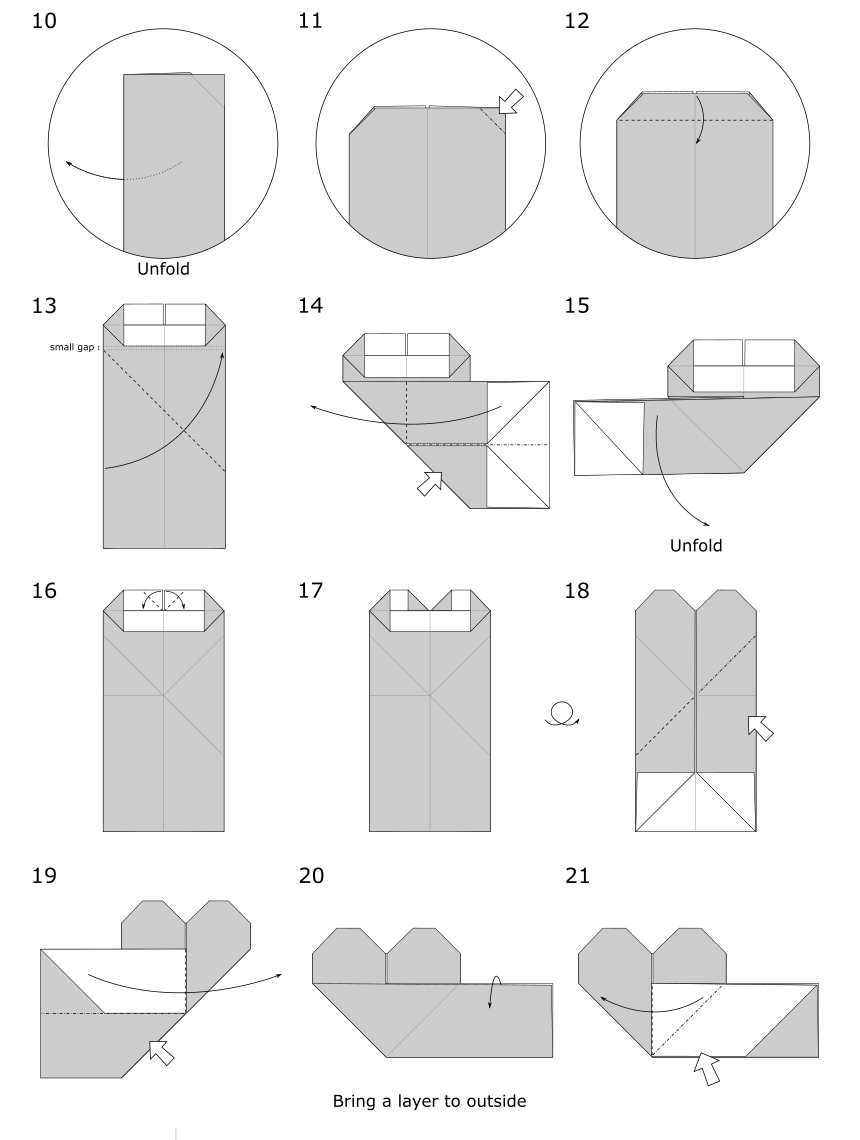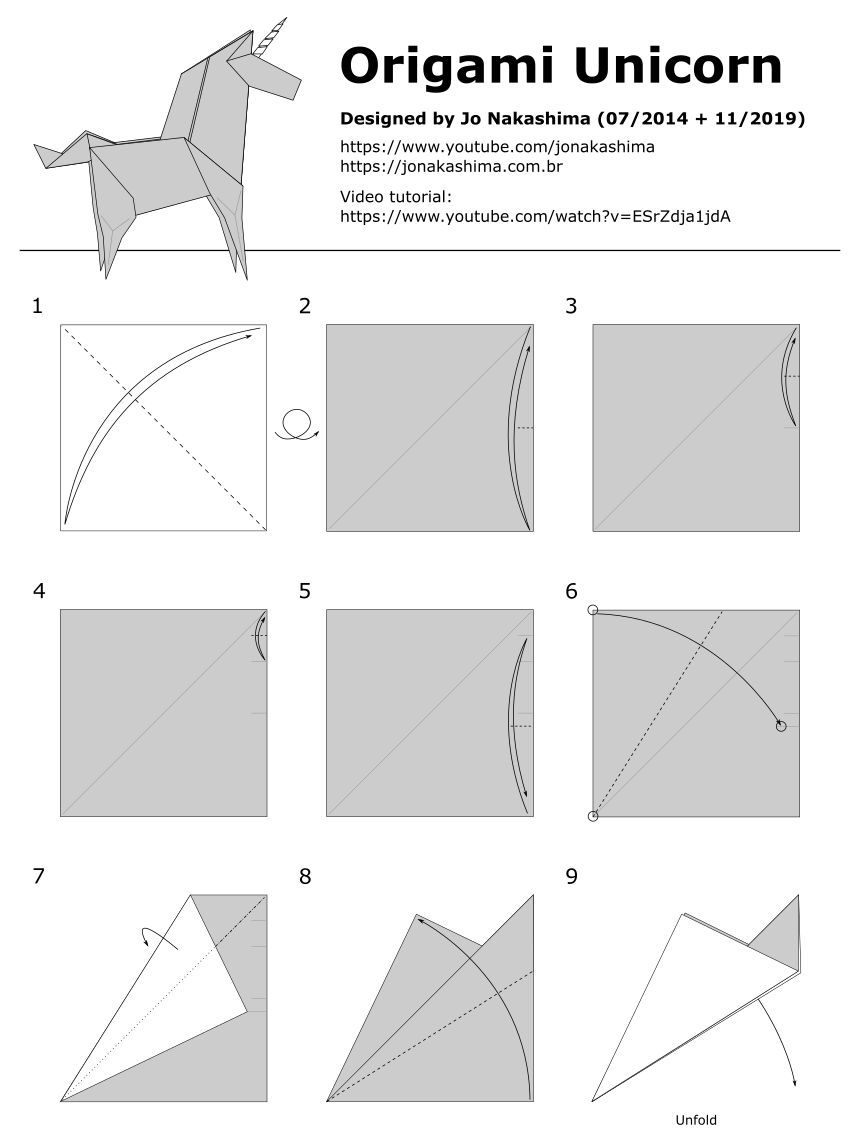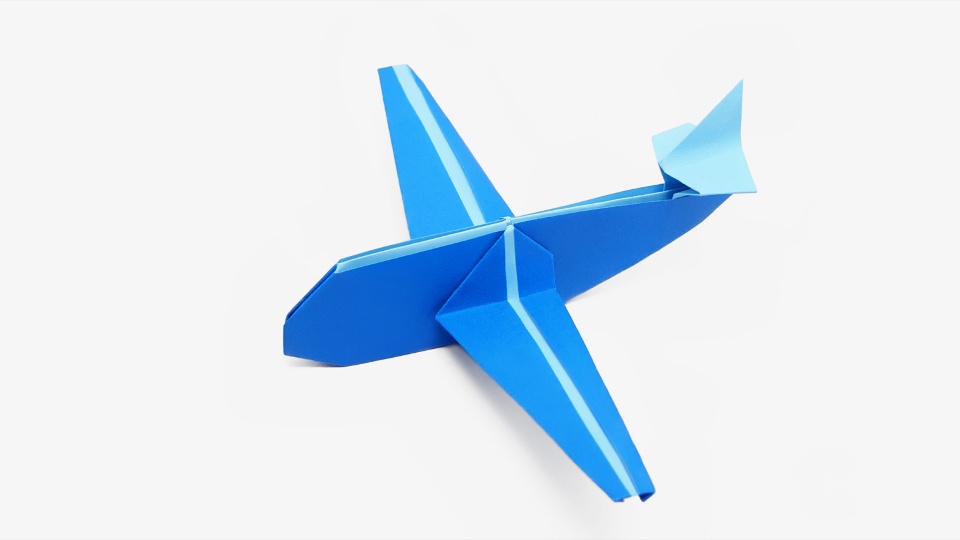
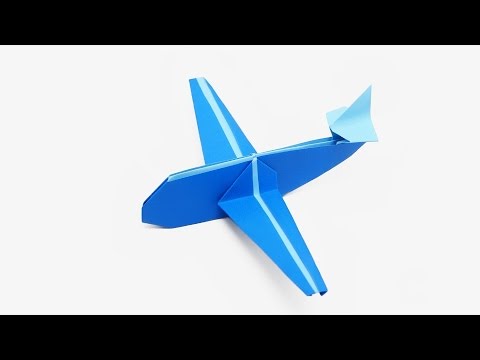
How to make an origami airplane
Designed by Jo Nakashima (17/05/2016)
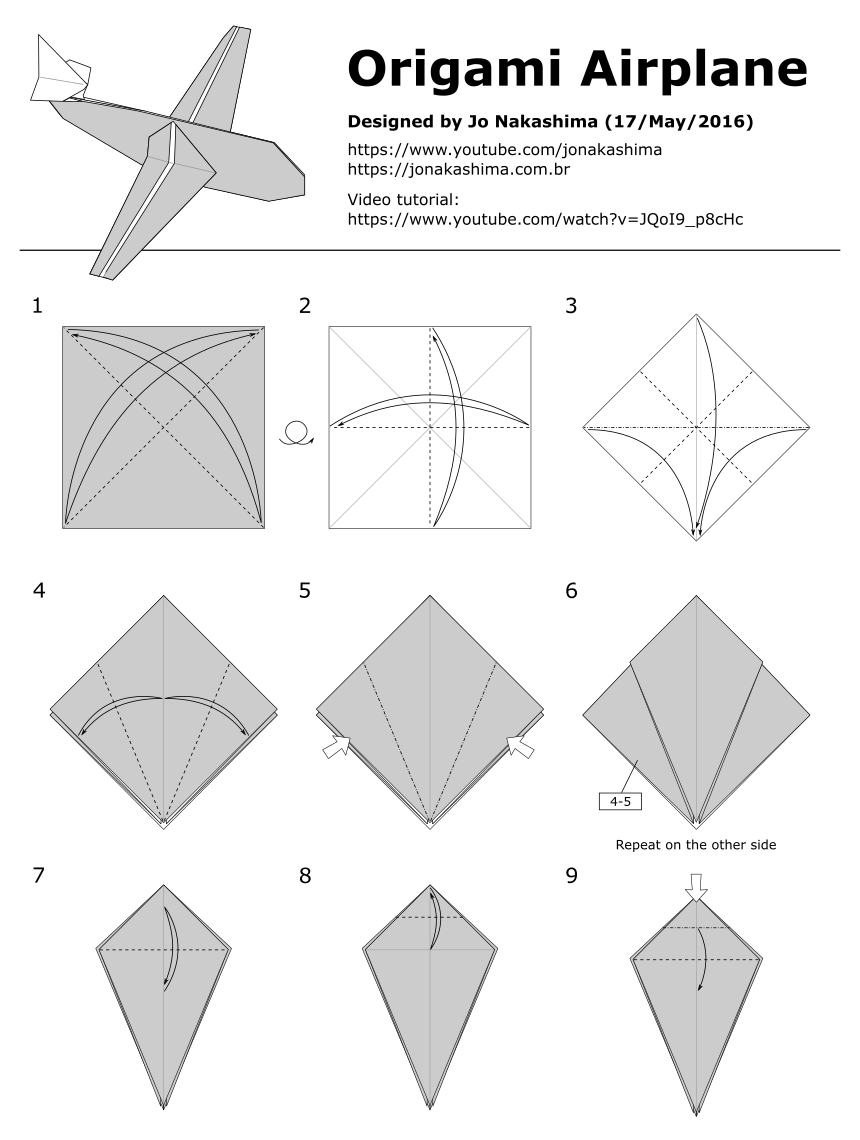
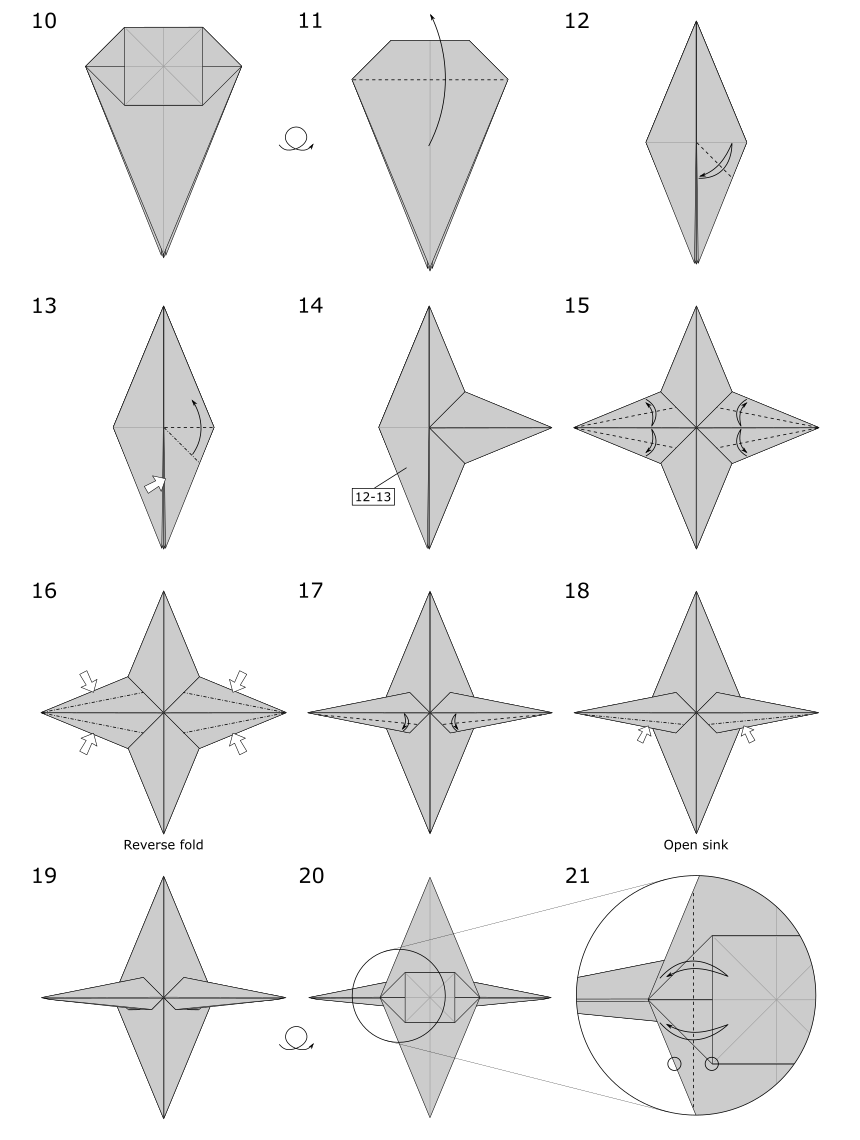
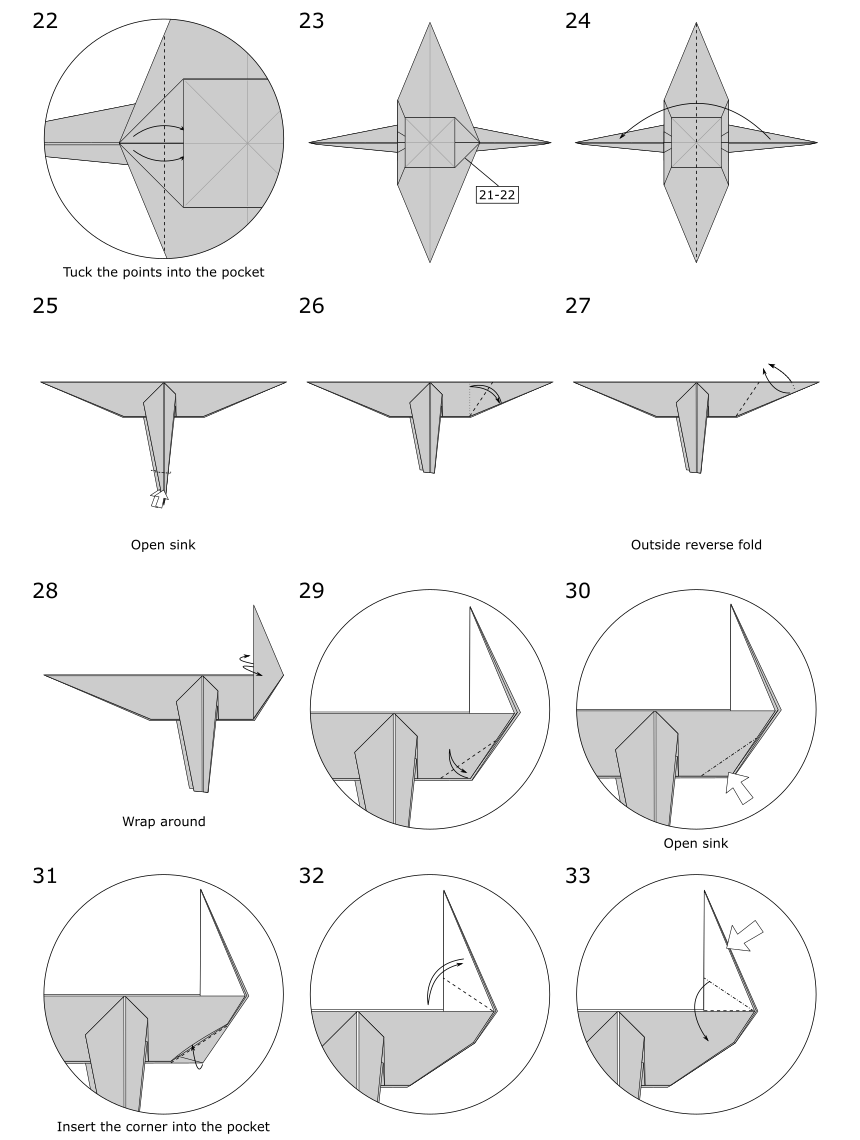
Difficulty level: low intermediate
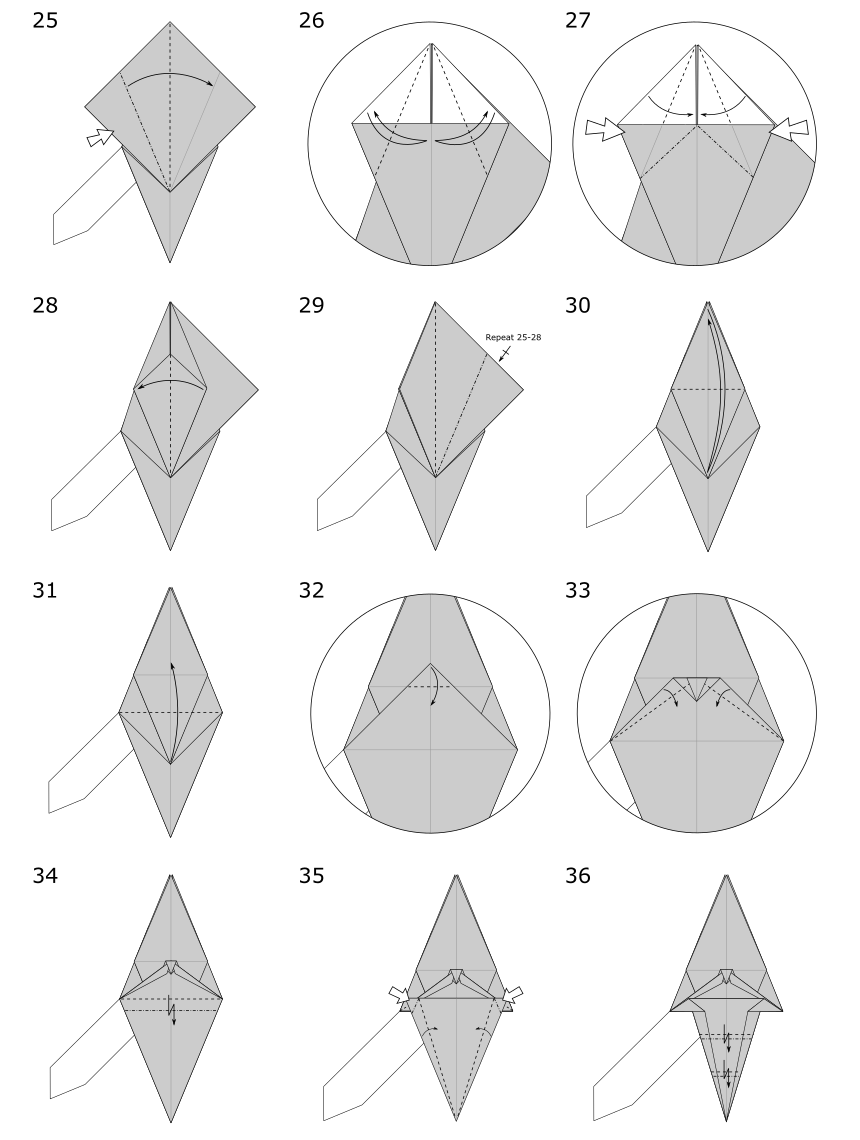
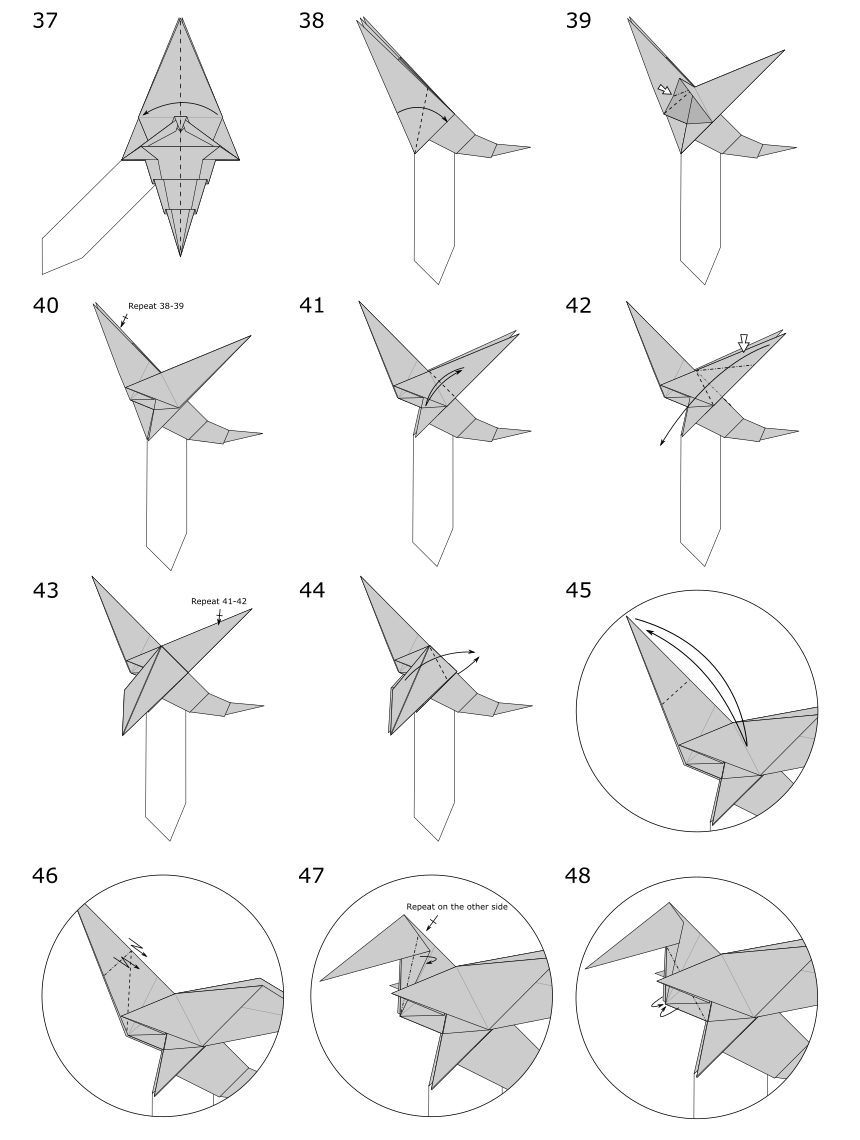
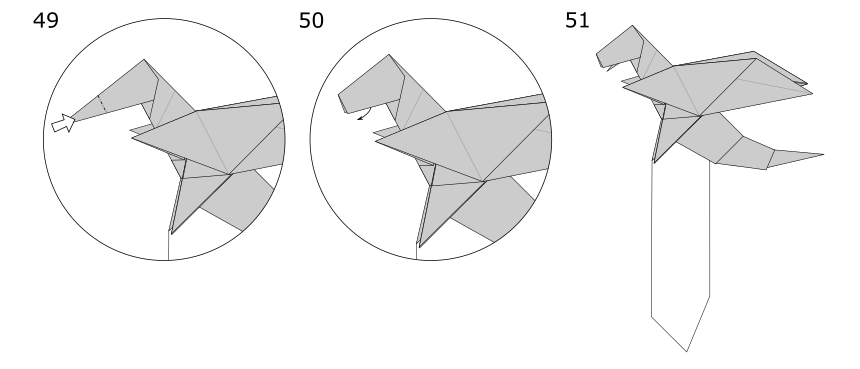
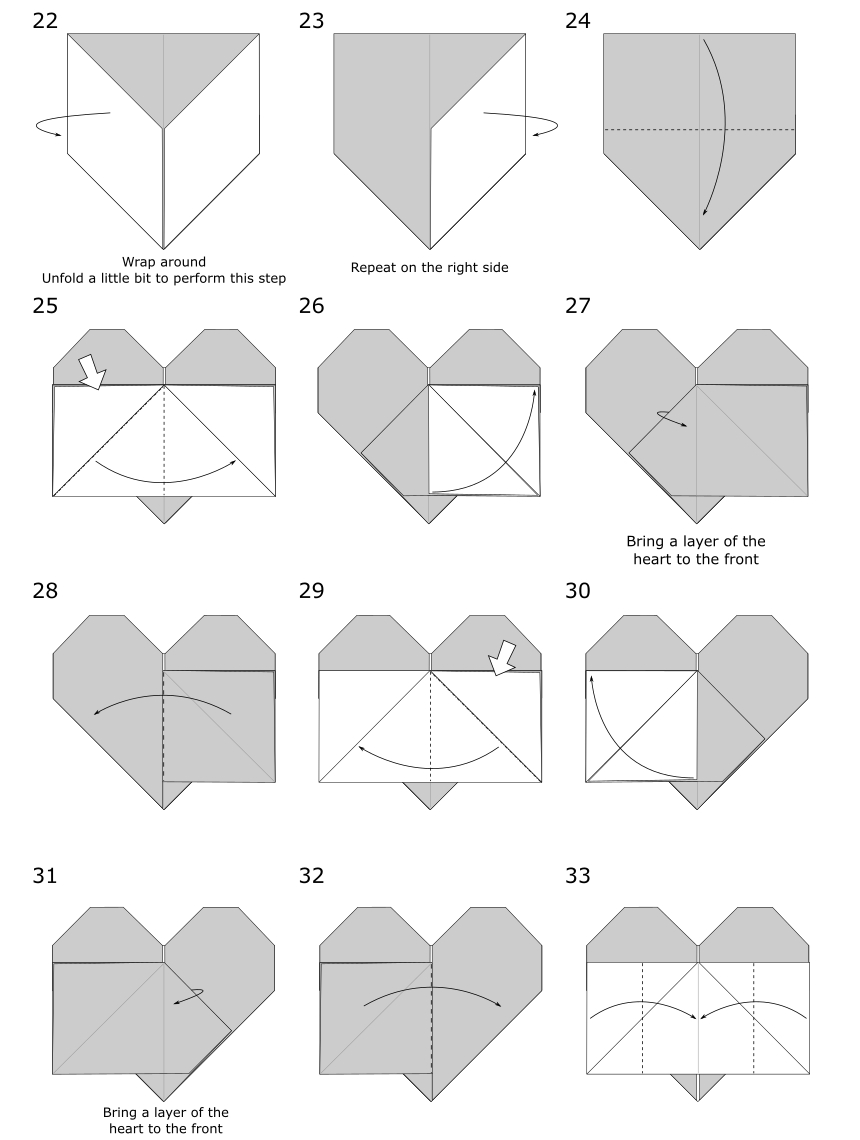
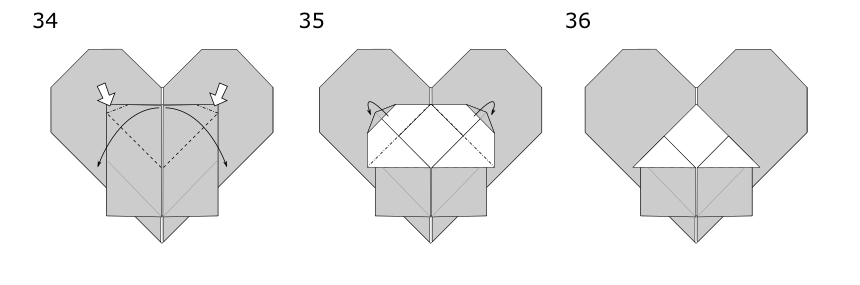
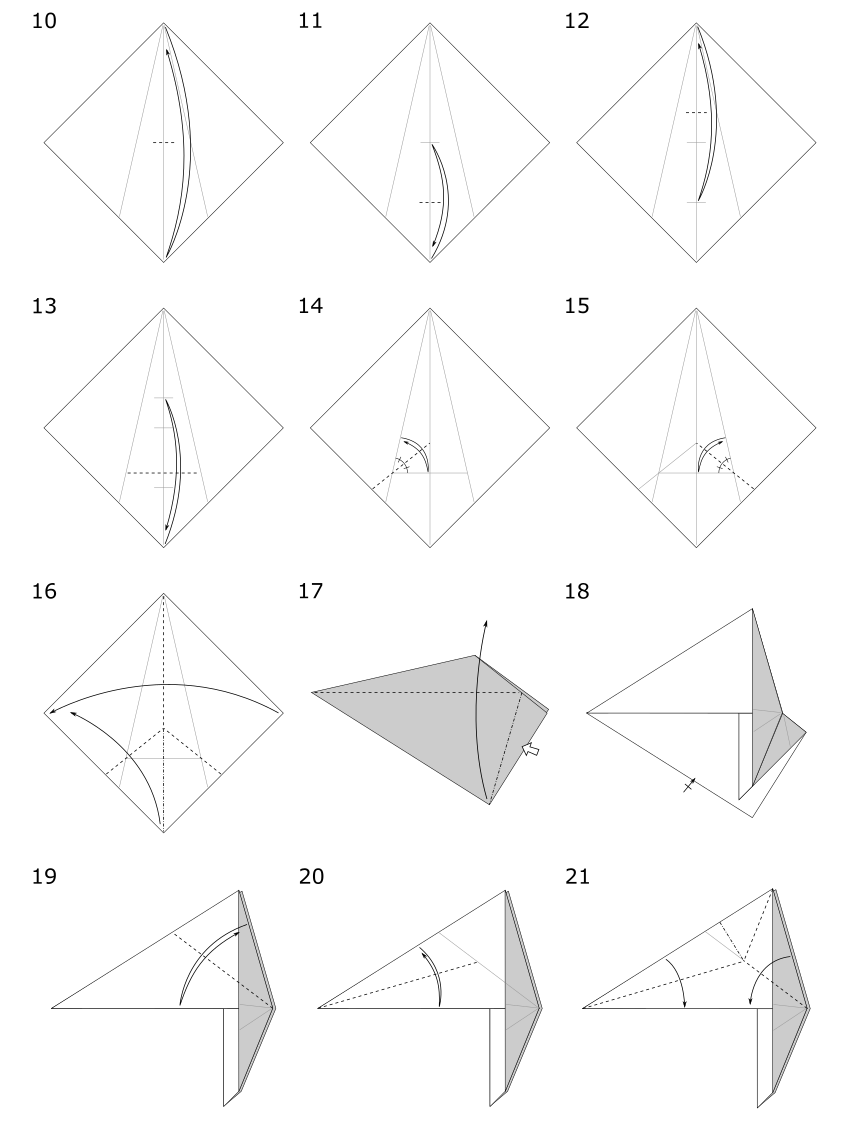
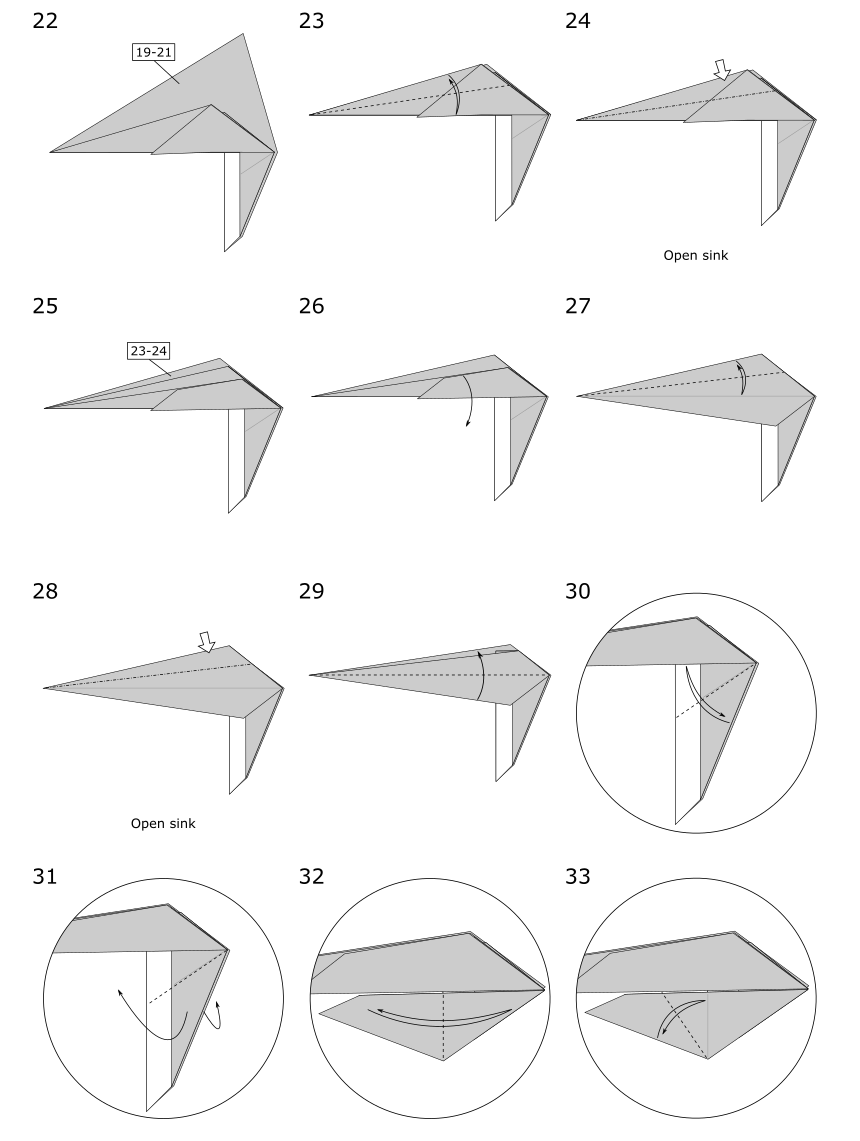
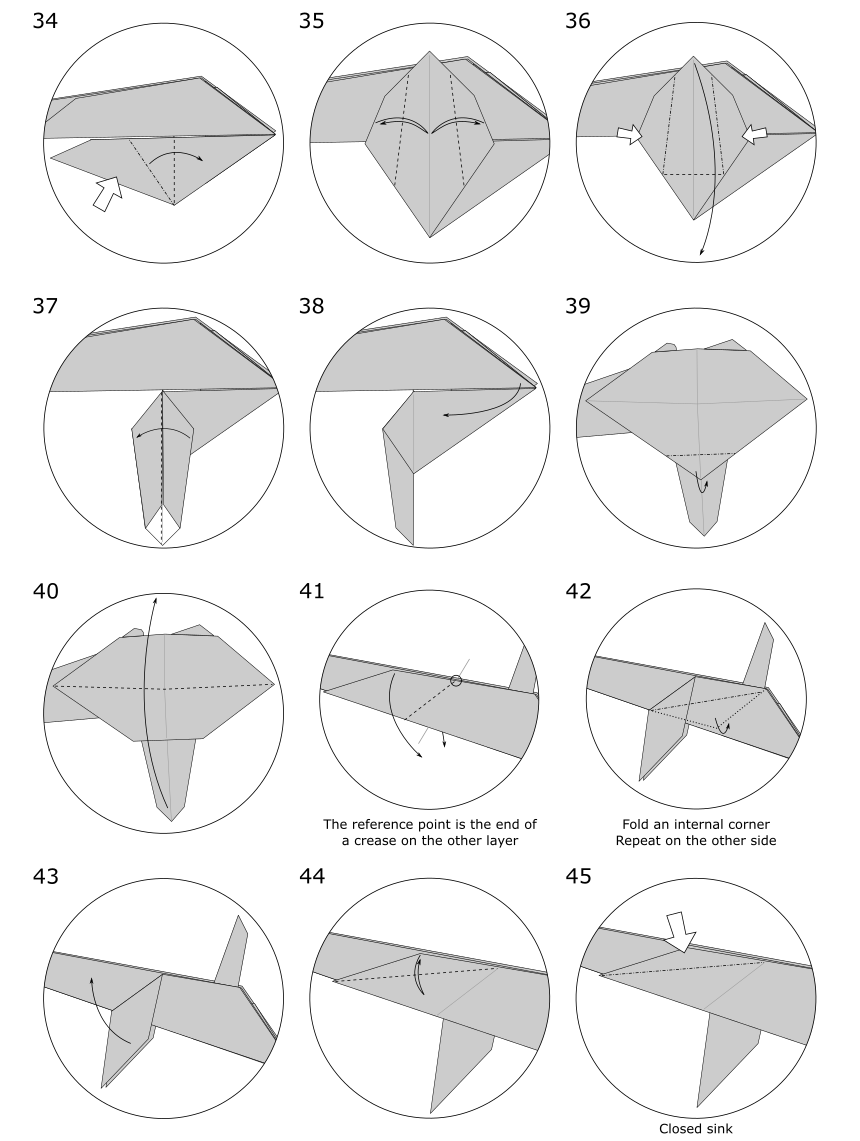
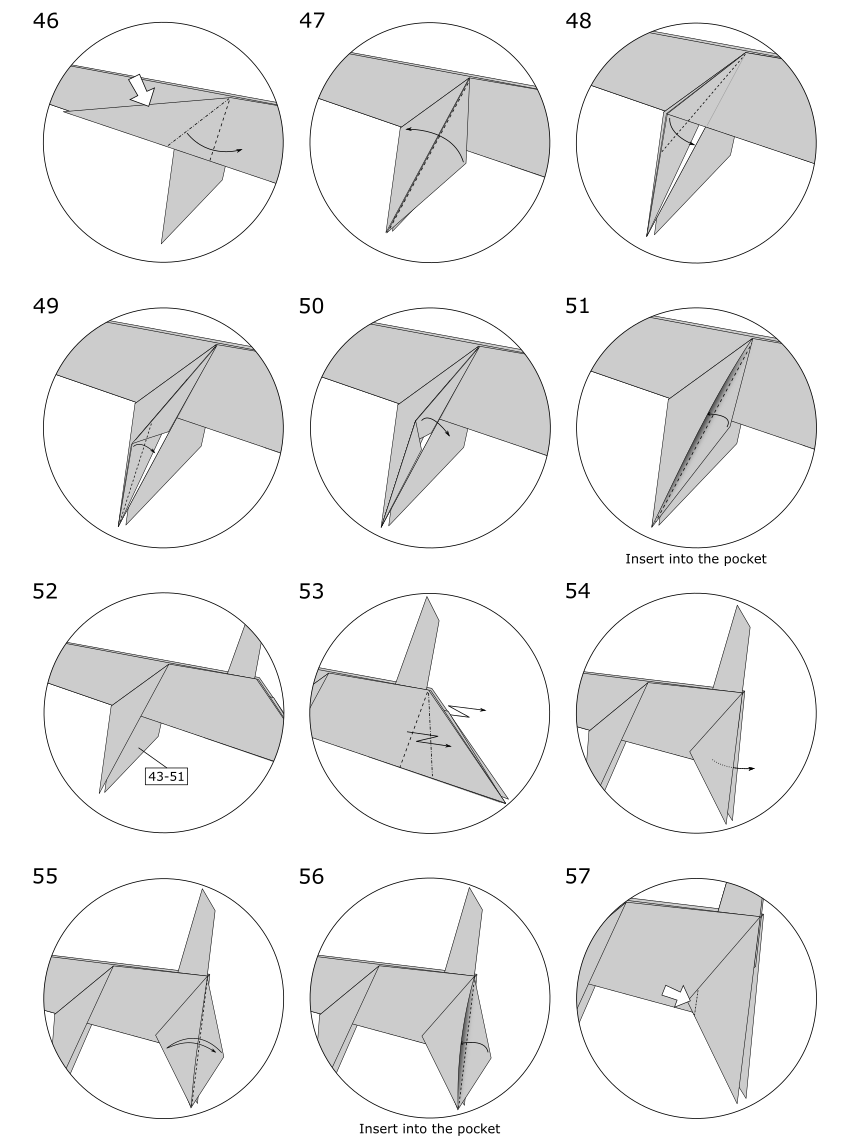
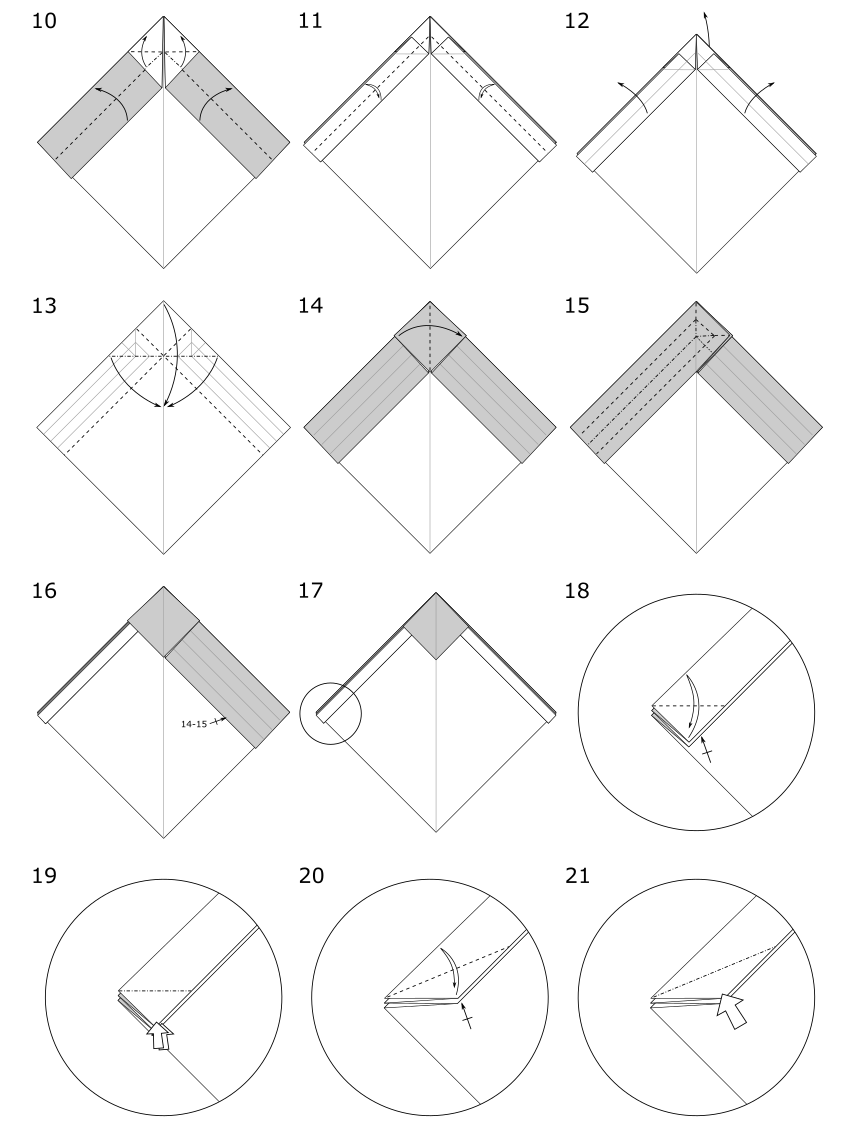
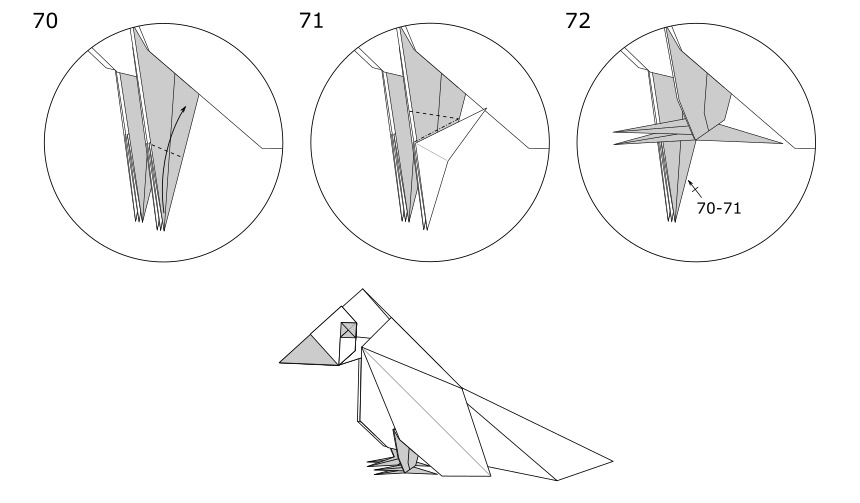
I’ve created this model to look like an airliner, but unfortunately it can’t fly (nor transport passengers). This plane isn’t hard to fold, but there is one step that can be tricky for beginners (narrowing the wings – 8:10 in the video or steps 17-18 in the diagrams). However, you can just skip this step if you think it’s too difficult.
Paper
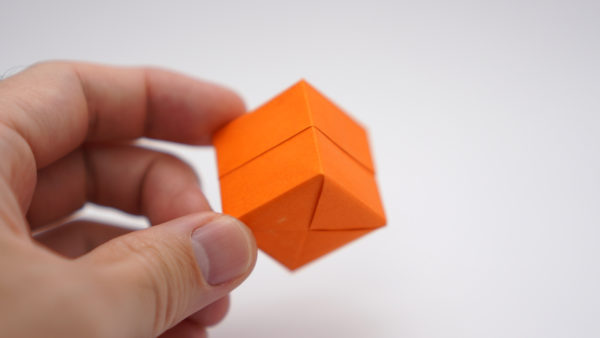
In this tutorial I’m using a 15cm x 15cm sheet of origami paper. You can use any square size to make this origami airplane.
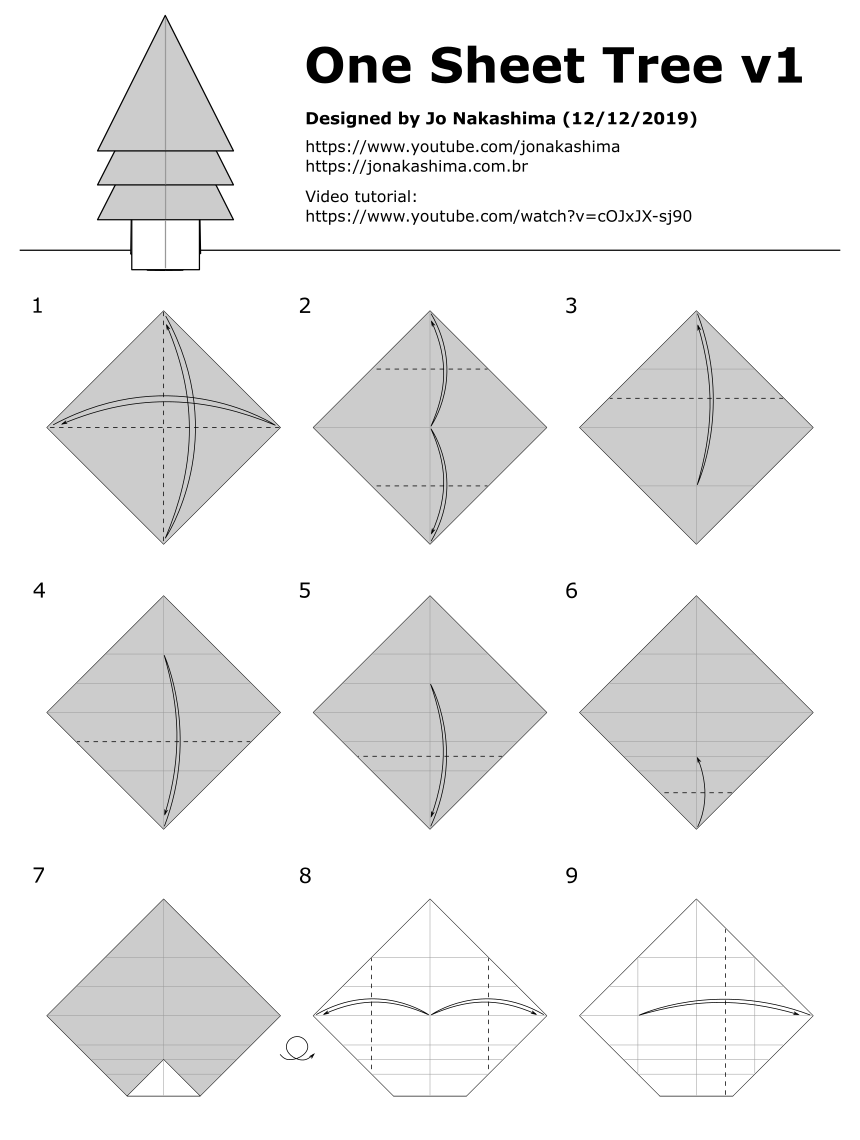
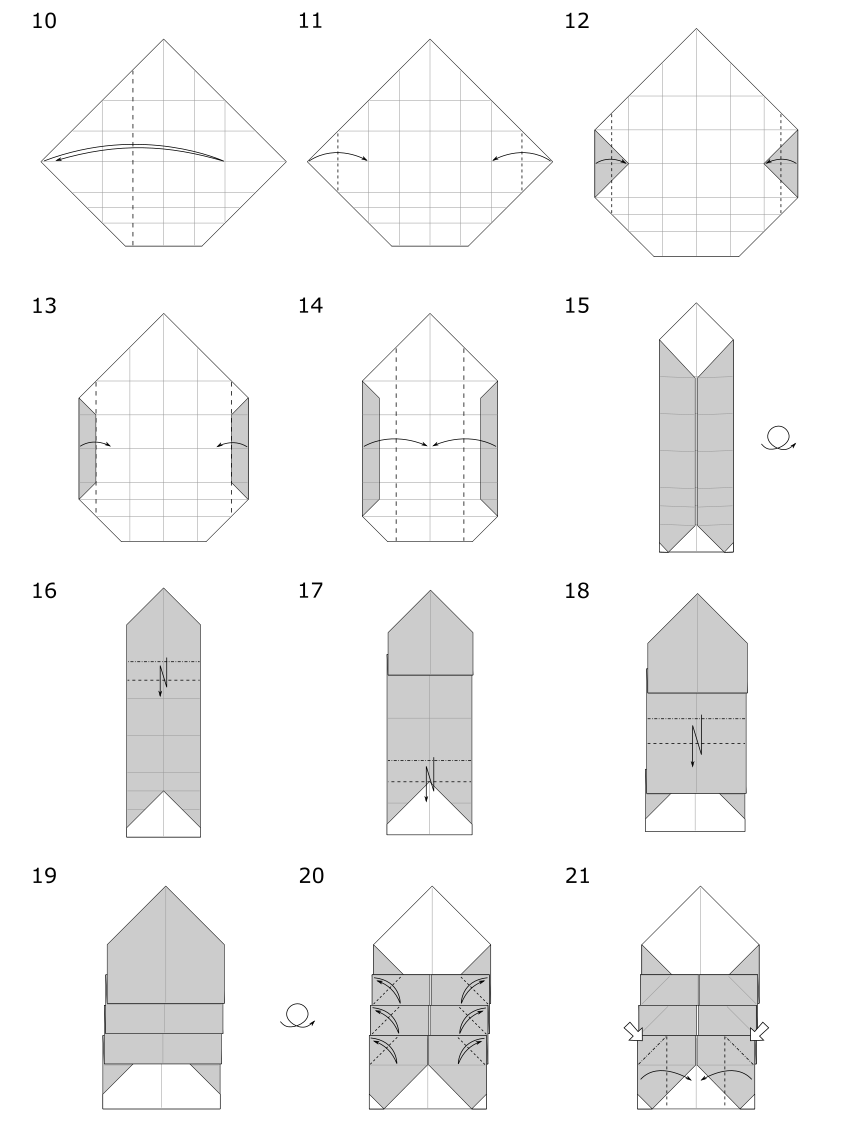
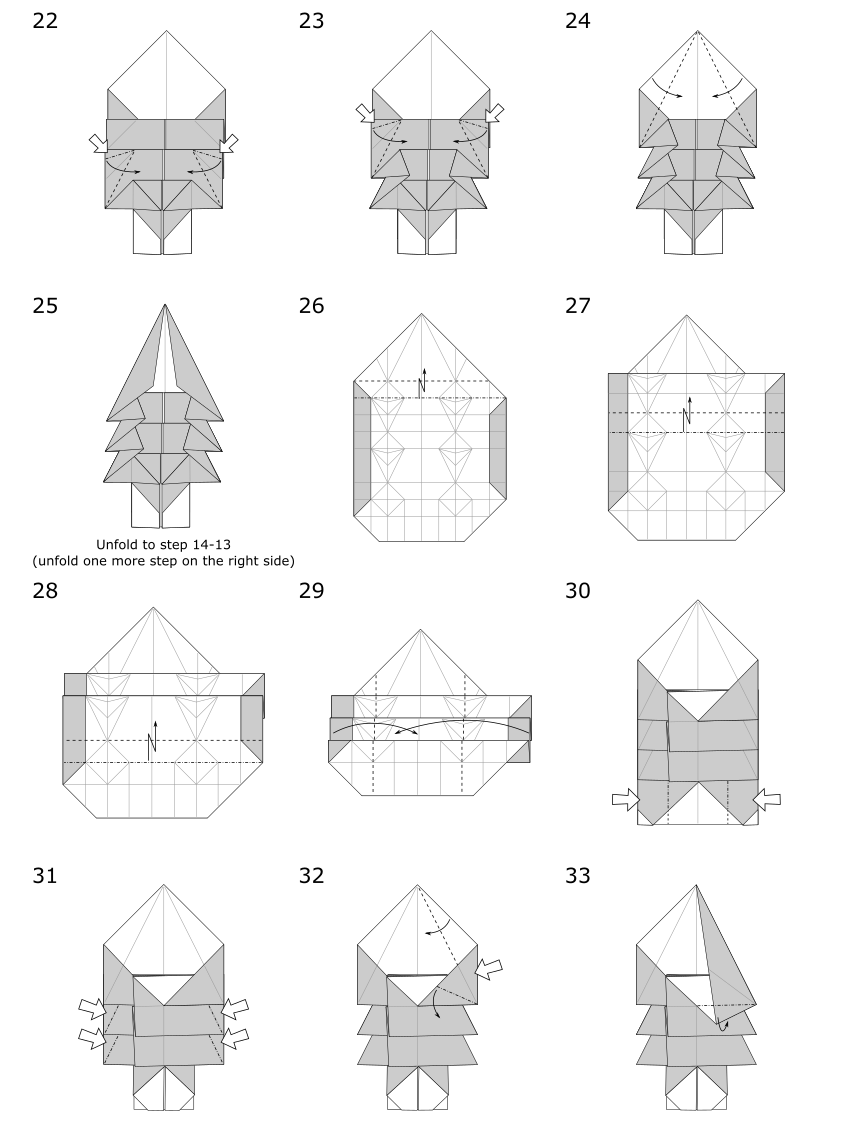
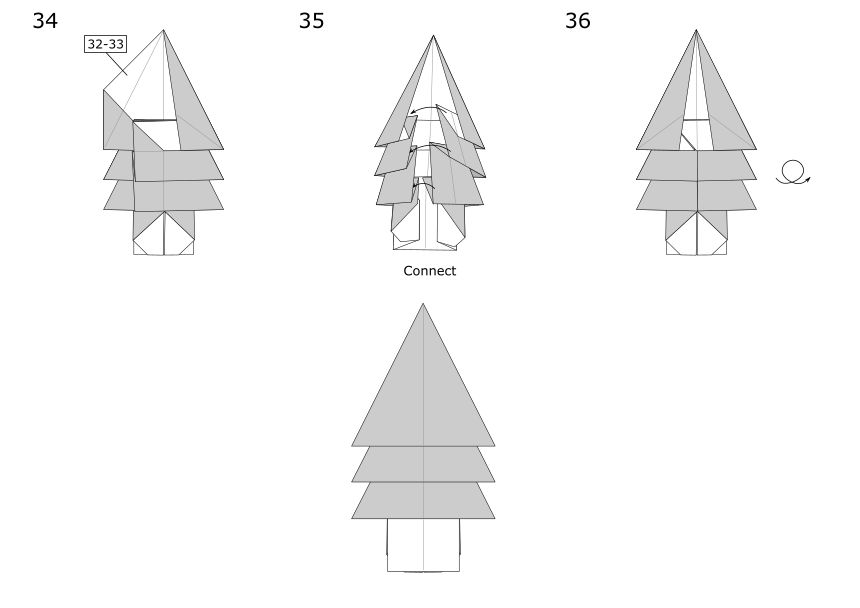
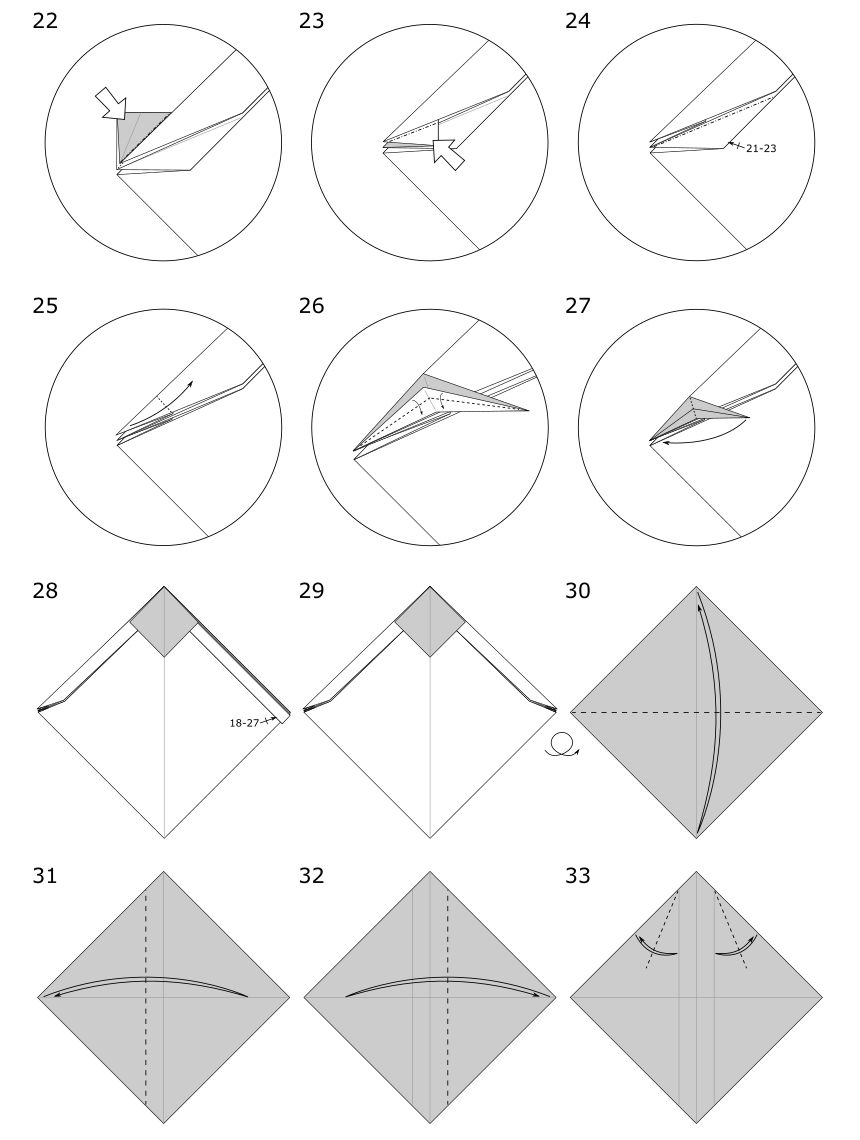
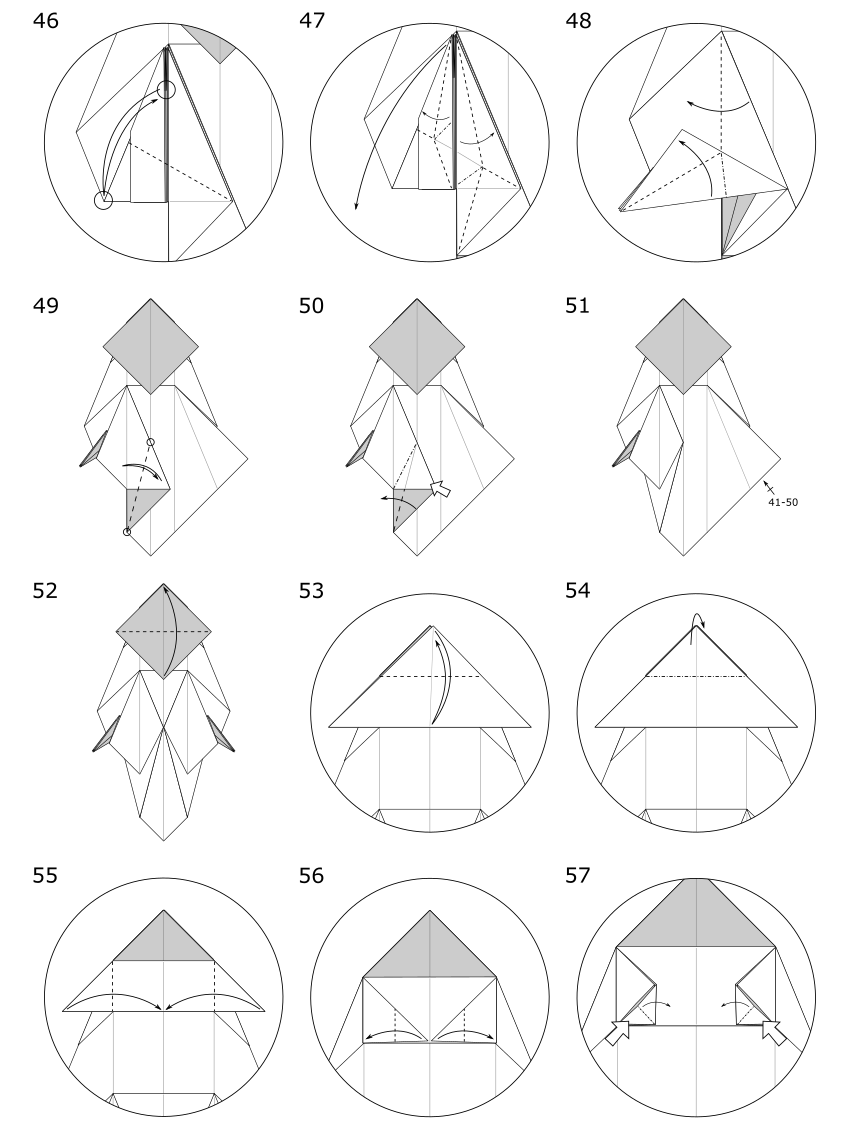
Diagrams

Support my work!
If you like my work, please consider visiting and subscribing to my YouTube channel! You’ll find all my work, including models that are not in this website and also models from other origami artists. The easiest way to support my work is simply watching my videos, clicking the like button, leaving comments and subscribing to my channel!
You can also contribute with small donations on Patreon or YouTube Channel Membership. It’s basically like paying me a tip as a thanks for my work and get some rewards in return, like early access to my tutorials and your name in the video (the “thank you” list). They work with Recurring payments, but you can cancel anytime so one-time donations are also possible.