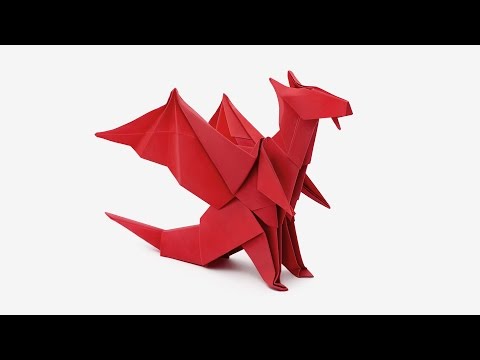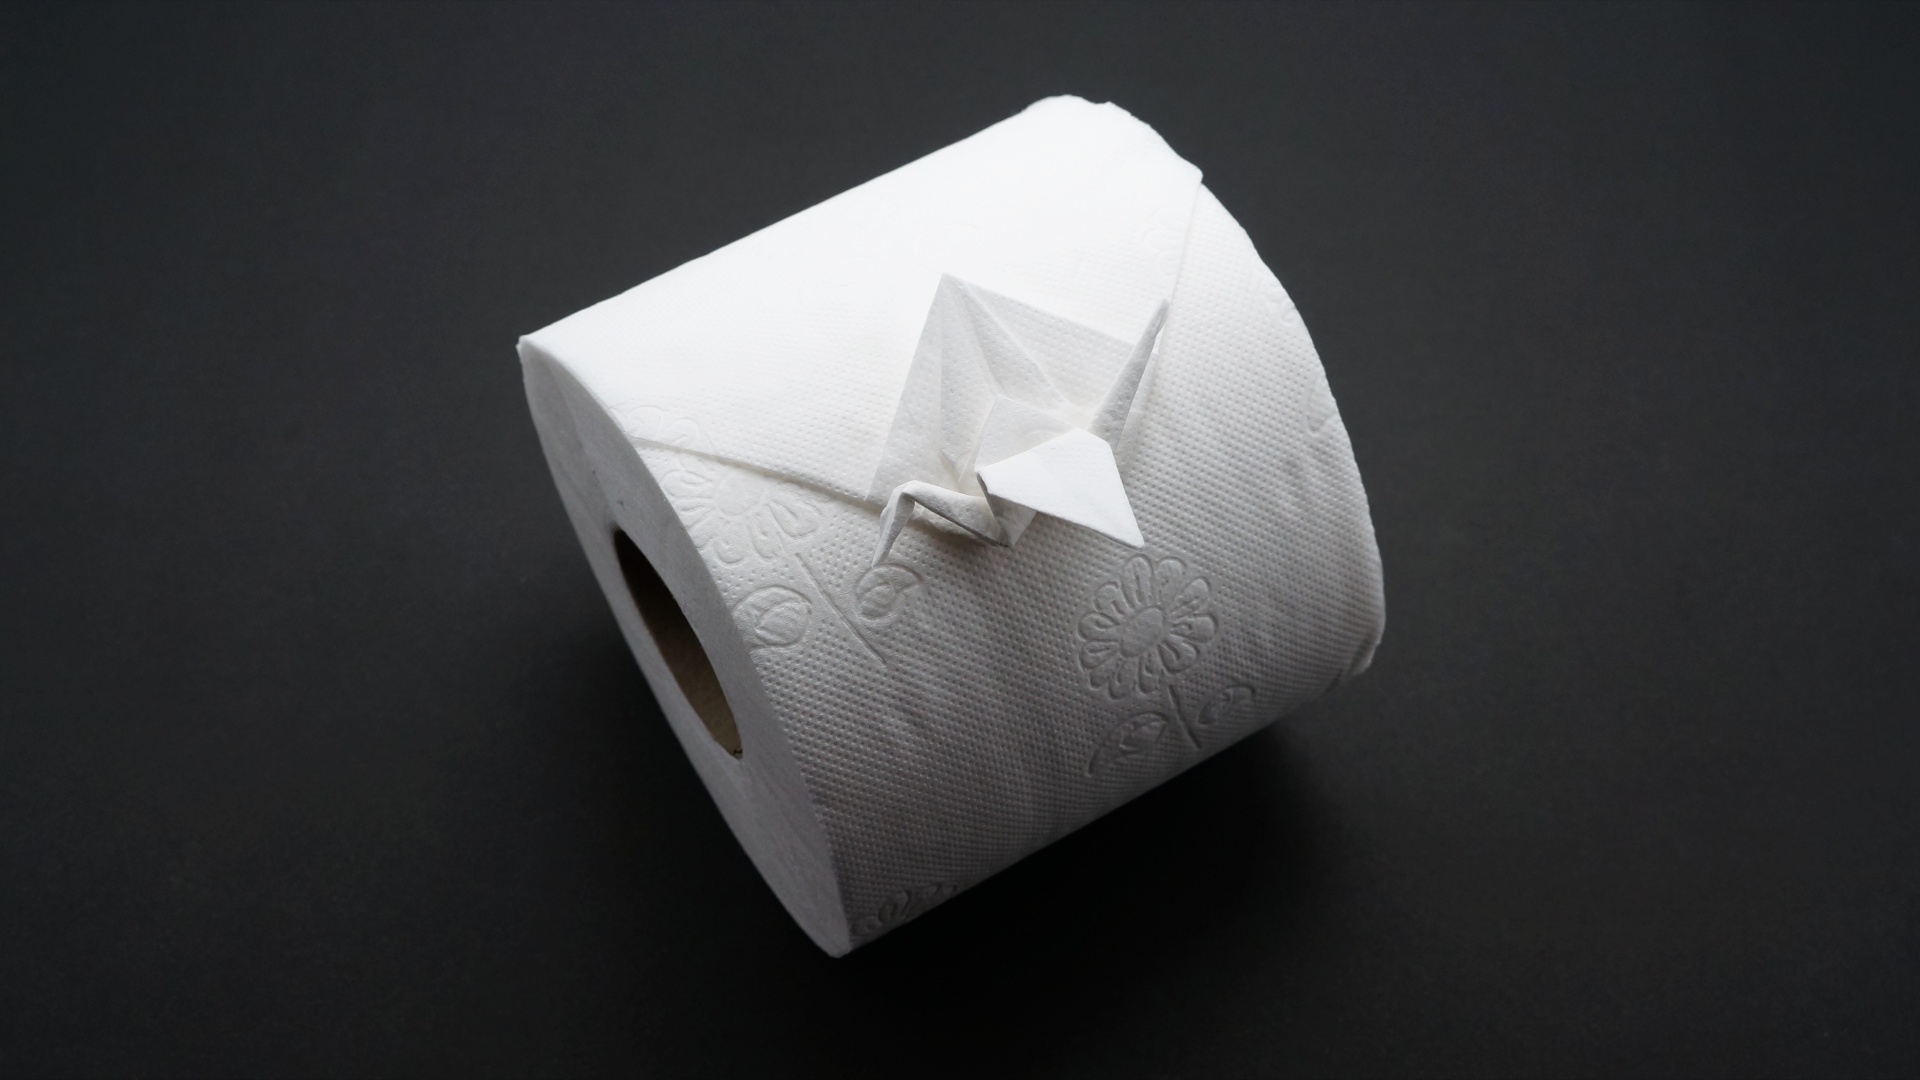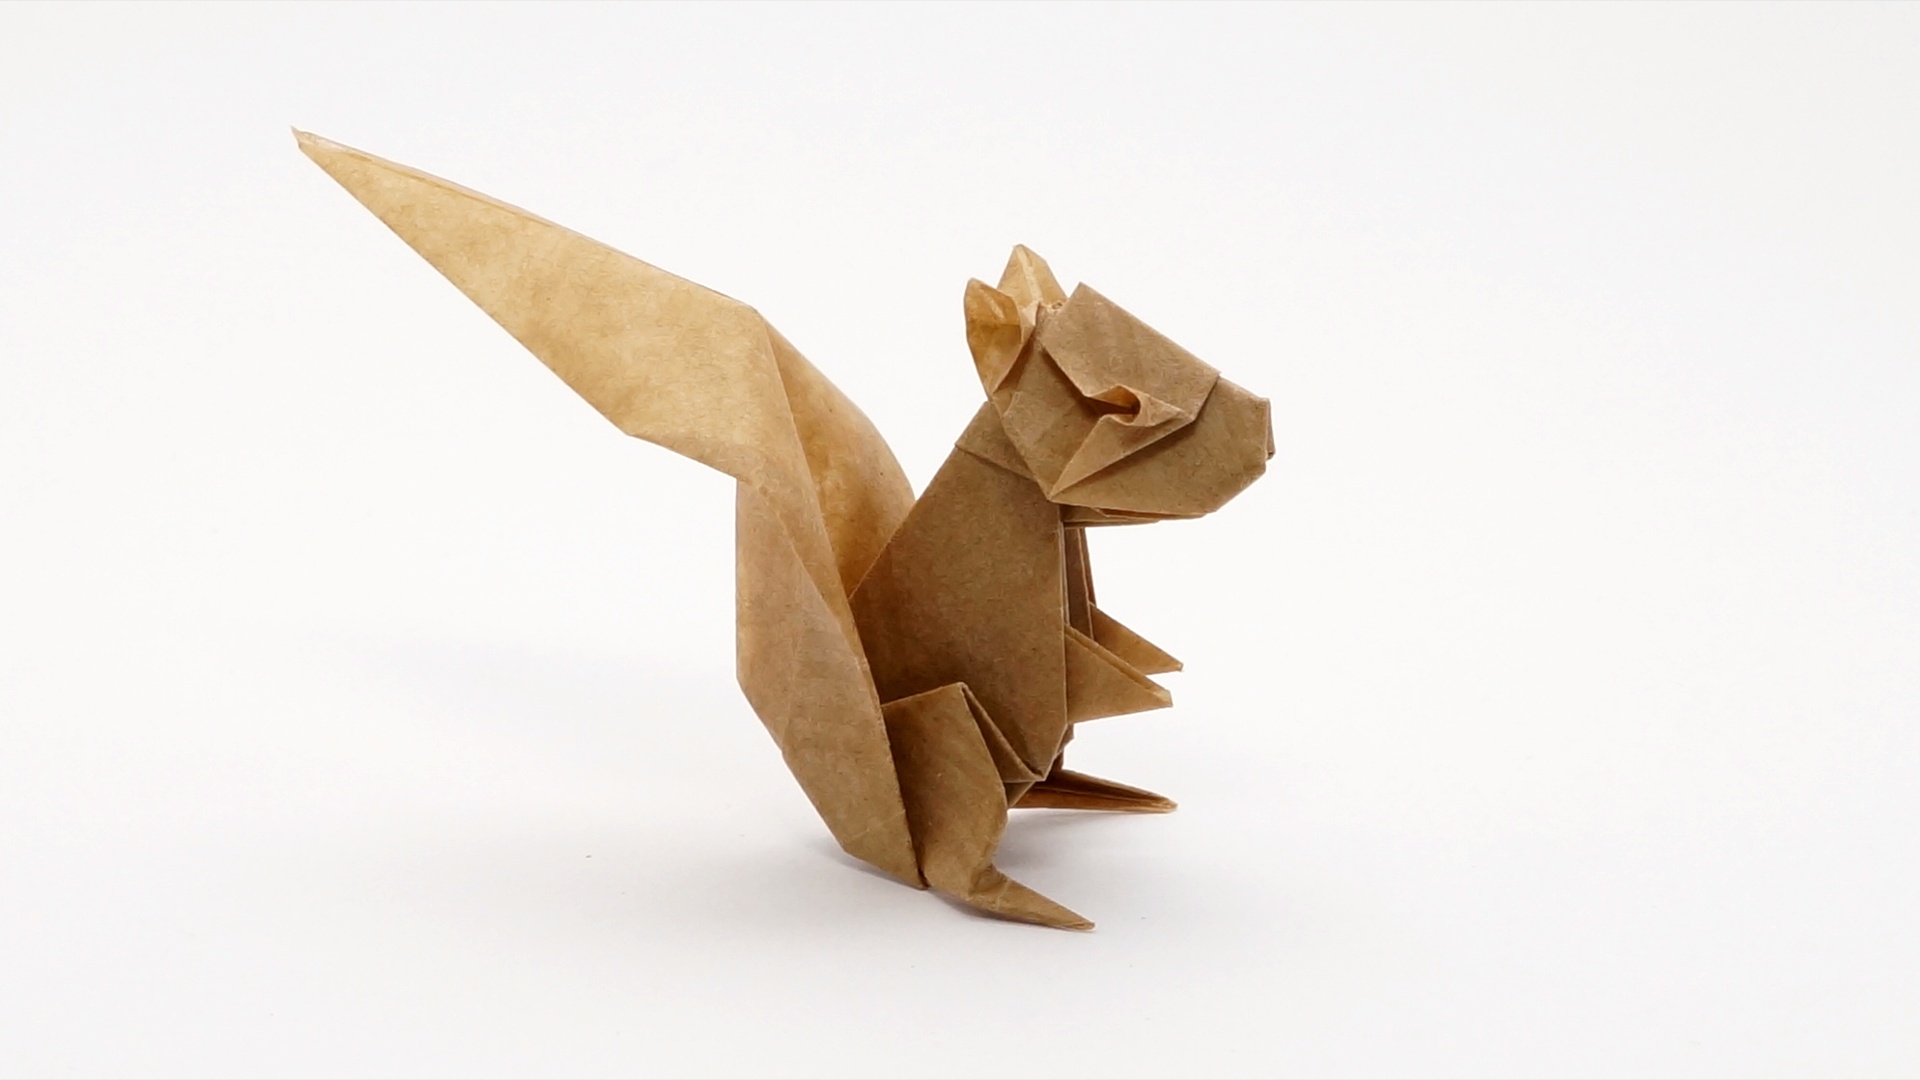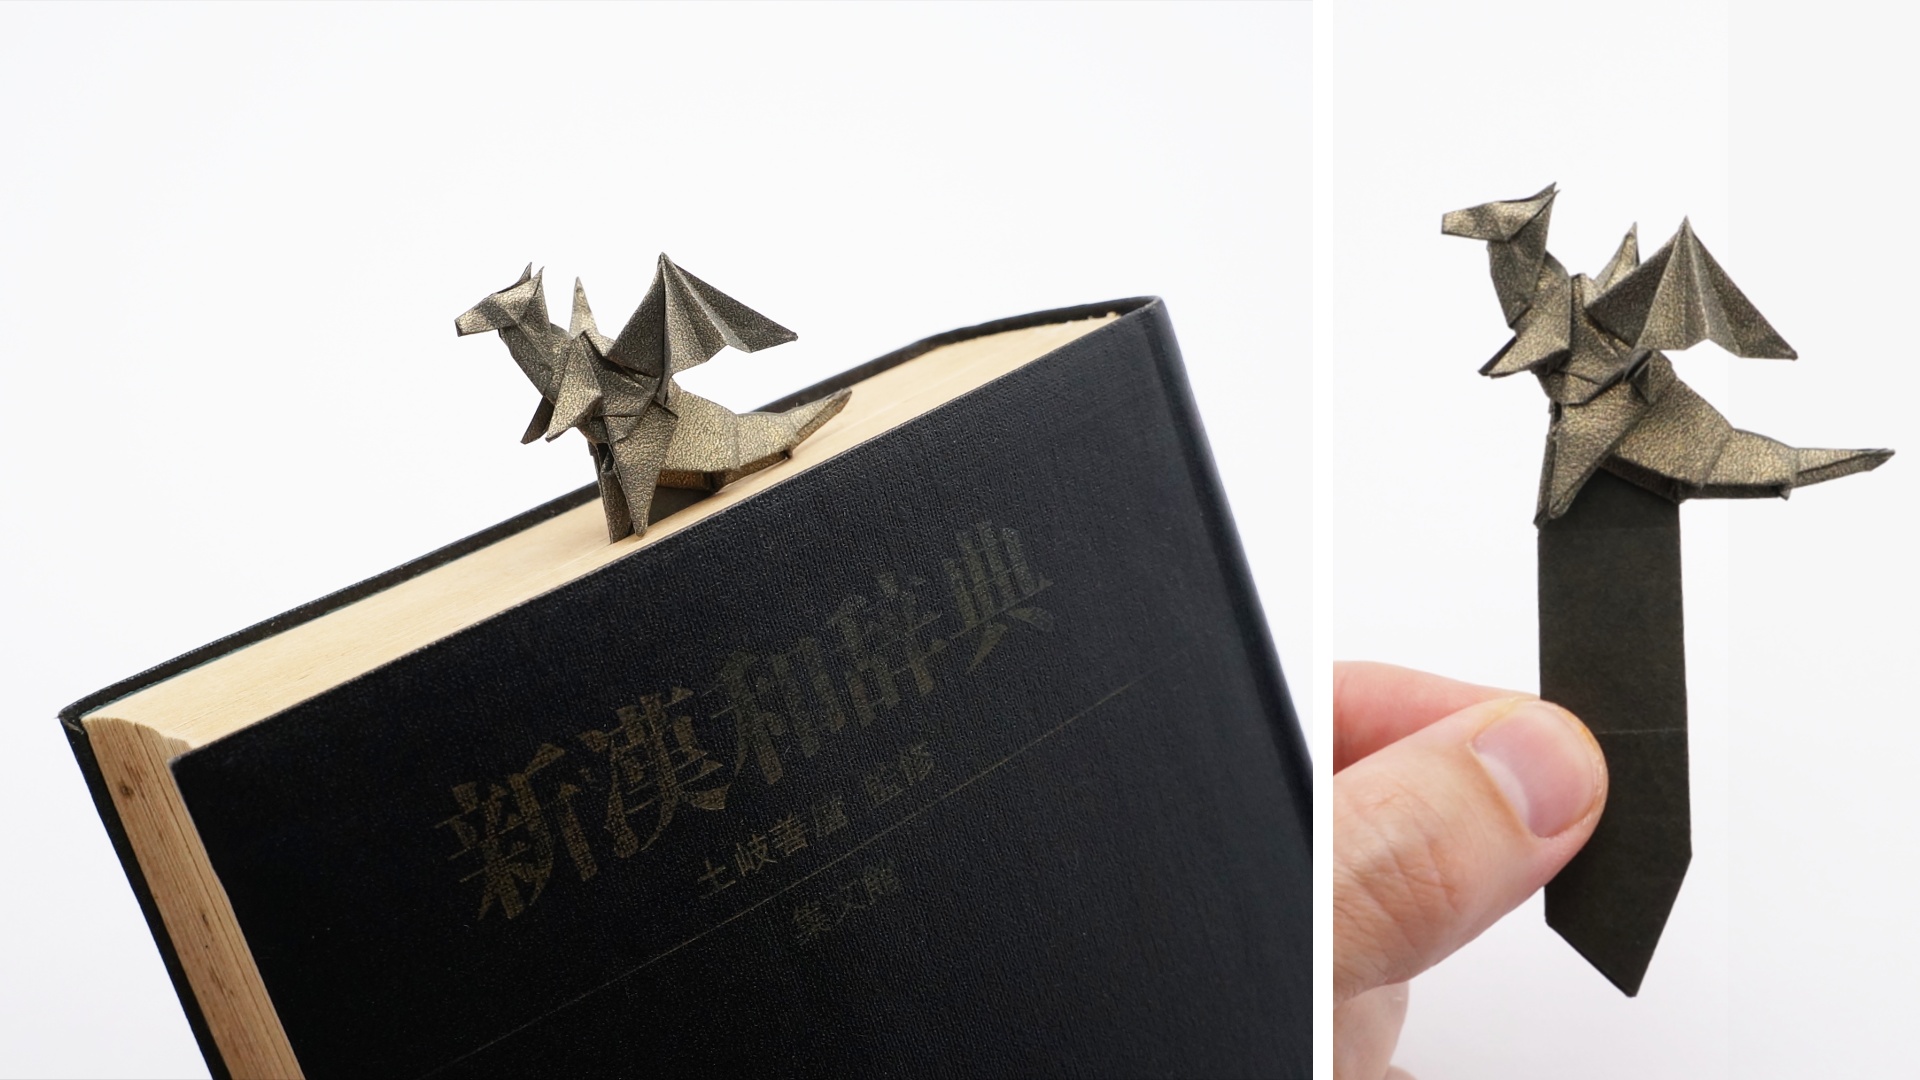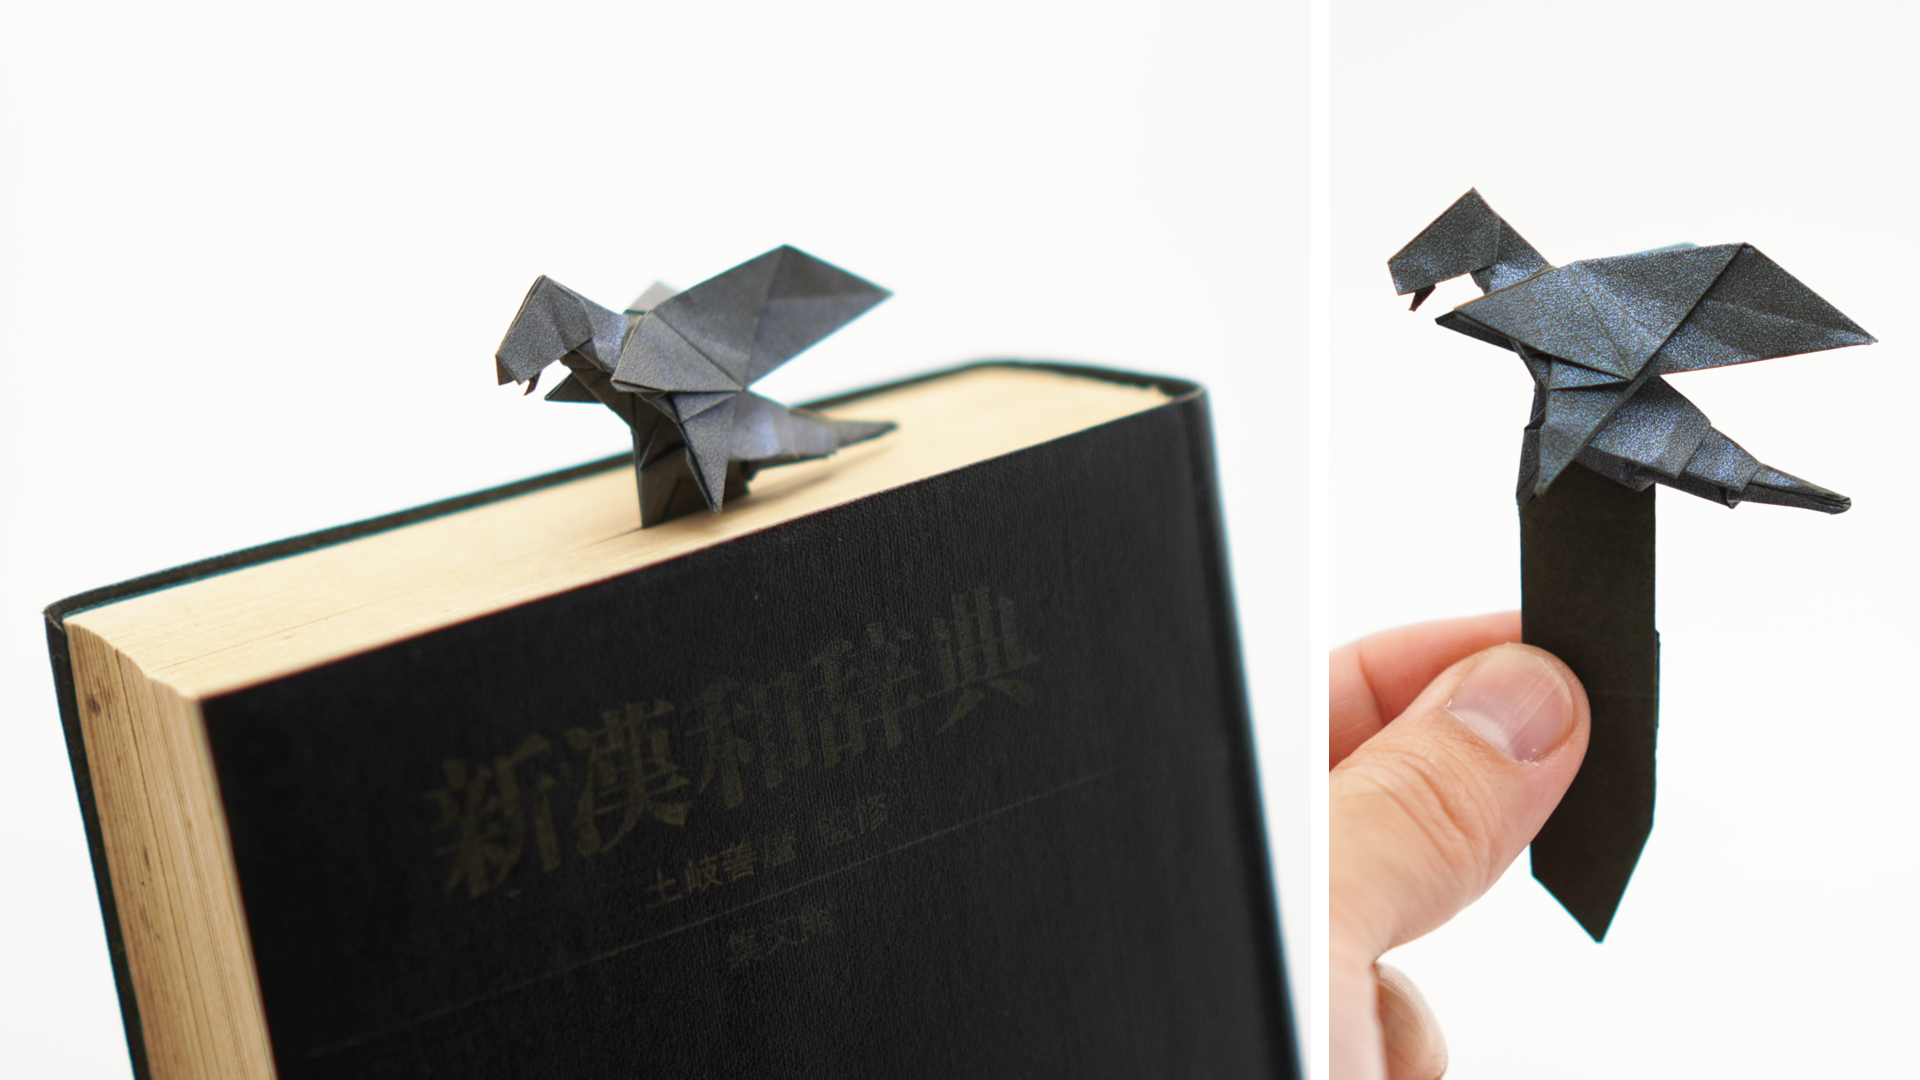
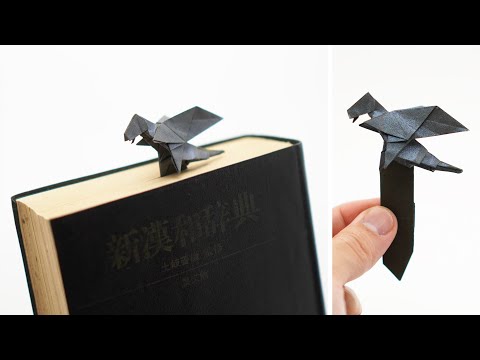
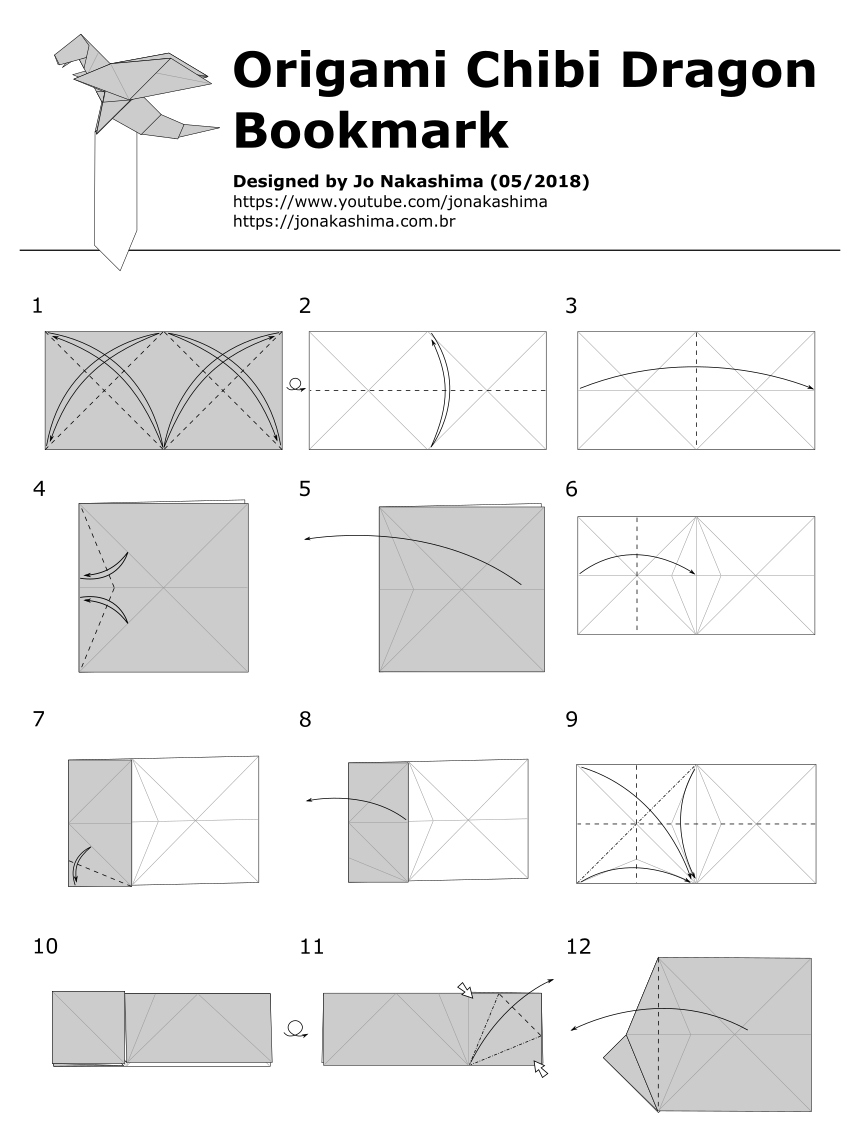
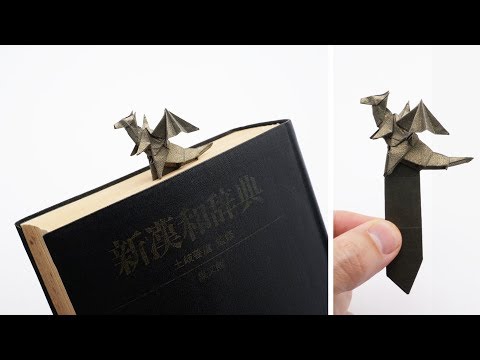
How to make the origami Chibi Dragon Bookmark.
Designed by Jo Nakashima (05/2018)
Difficulty level: intermediate
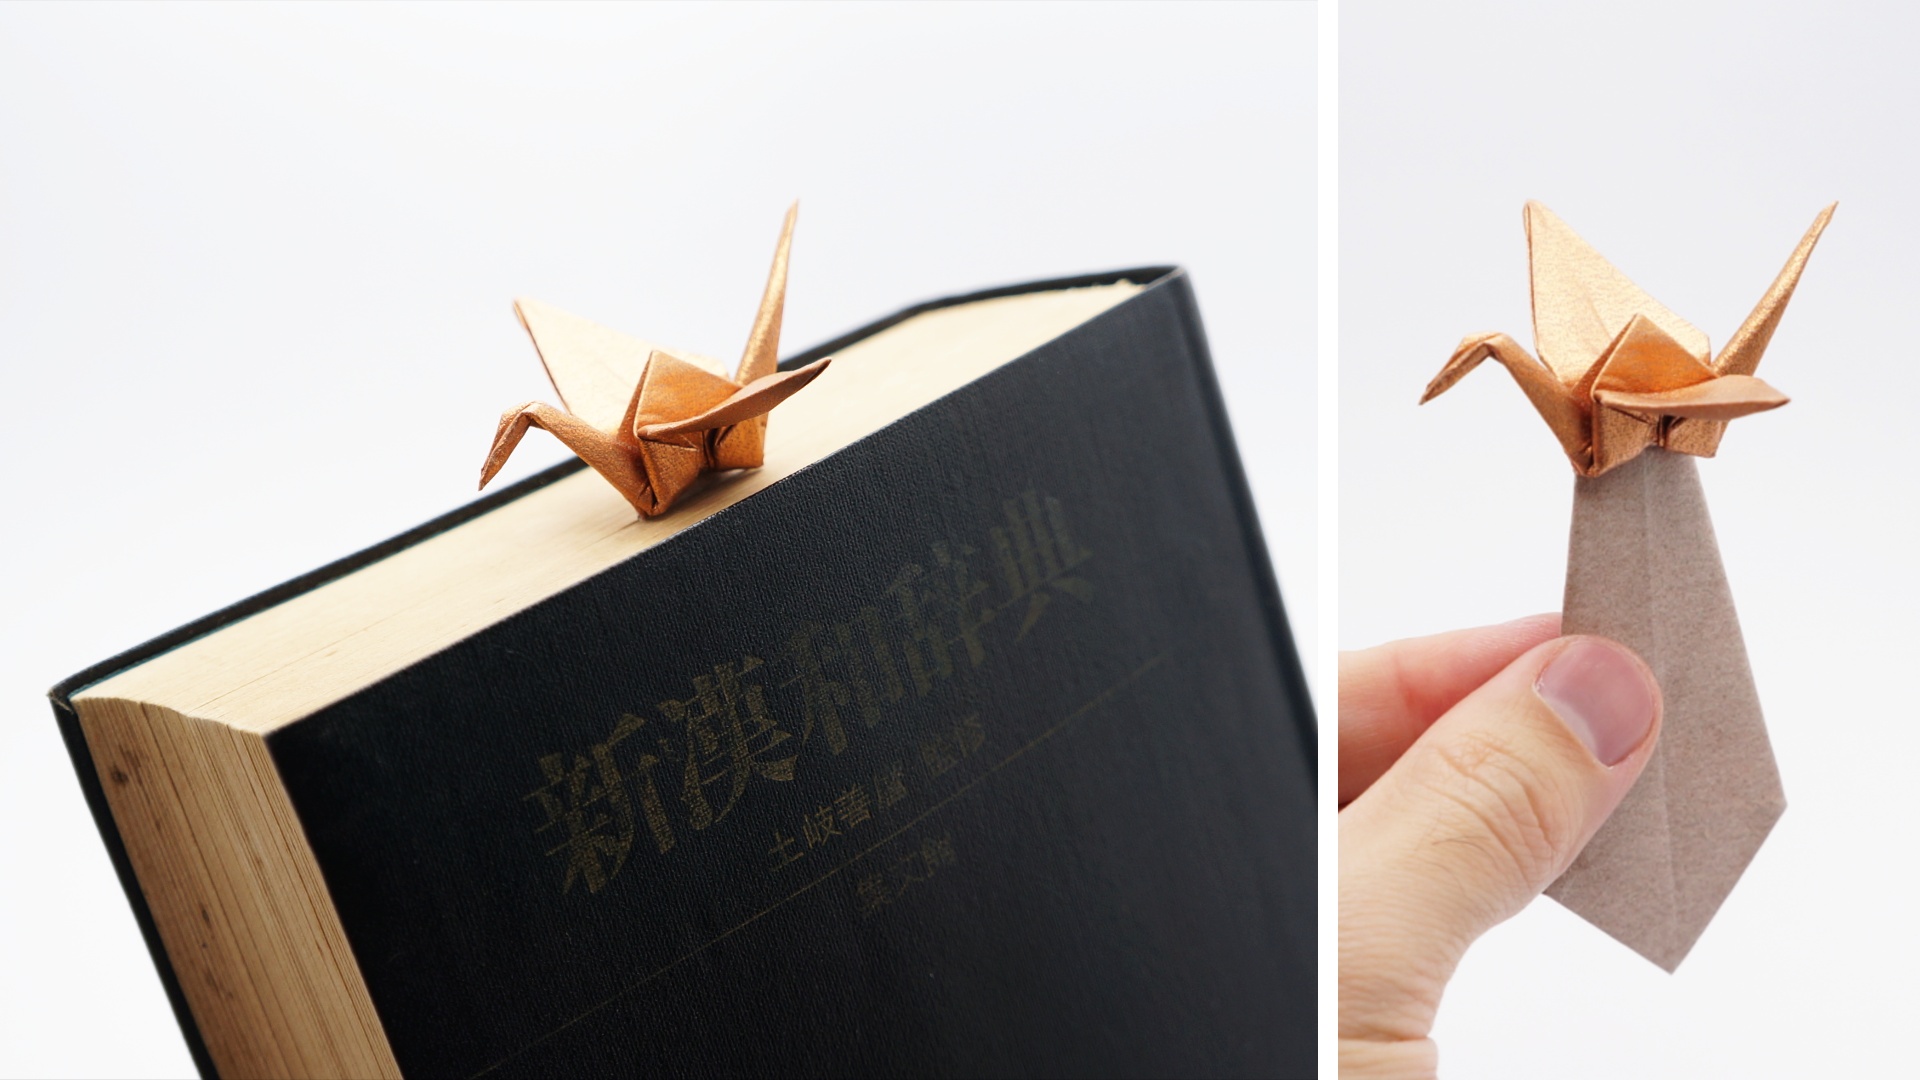
Now you can have a cute little dragon sitting and guarding the page of your favorite book! This is a simplified version of my Dragon Bookmark.
In 2015 I’ve created the original non-bookmark versions of the Chibi Dragon and the Dragon v1 from a combination of crane and frog bases. But only in 2018, after the creation of the Crane Boomark, many of my viewers requested to do the same with the dragon – and it worked pretty well!
Paper
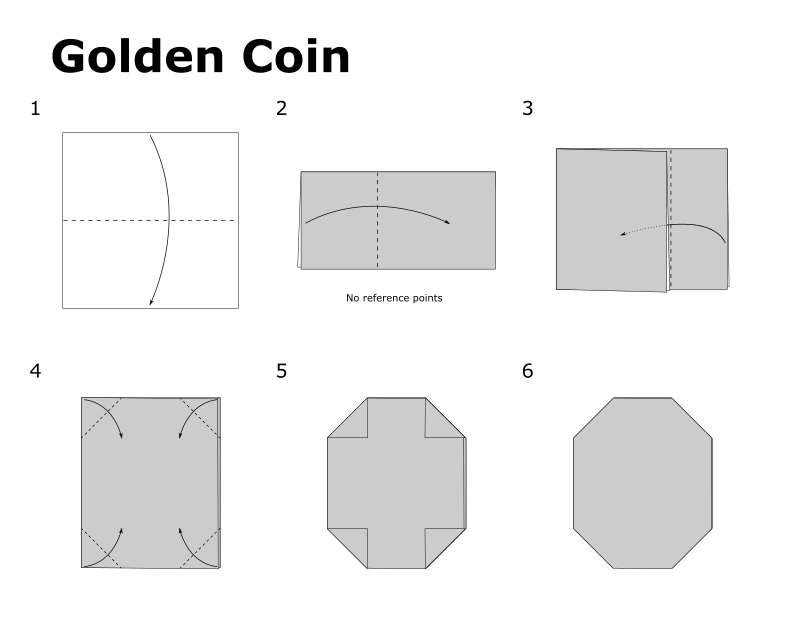
For this model you’ll need a rectangle with 2:1 ratio (half of a square). I recommend 20cm x 10cm.
It works best if you use a very thin paper, otherwise the layers on one of the sides of the dragon will get too thick and hard to fold or keep the shape. It does work with printer paper for test fold and learning, but don’t expect very good results from it.
This beatiful shiny paper used in the tutorial is 20cm x 10cm Shadow Fold paper from Origami-shop (buy it here).
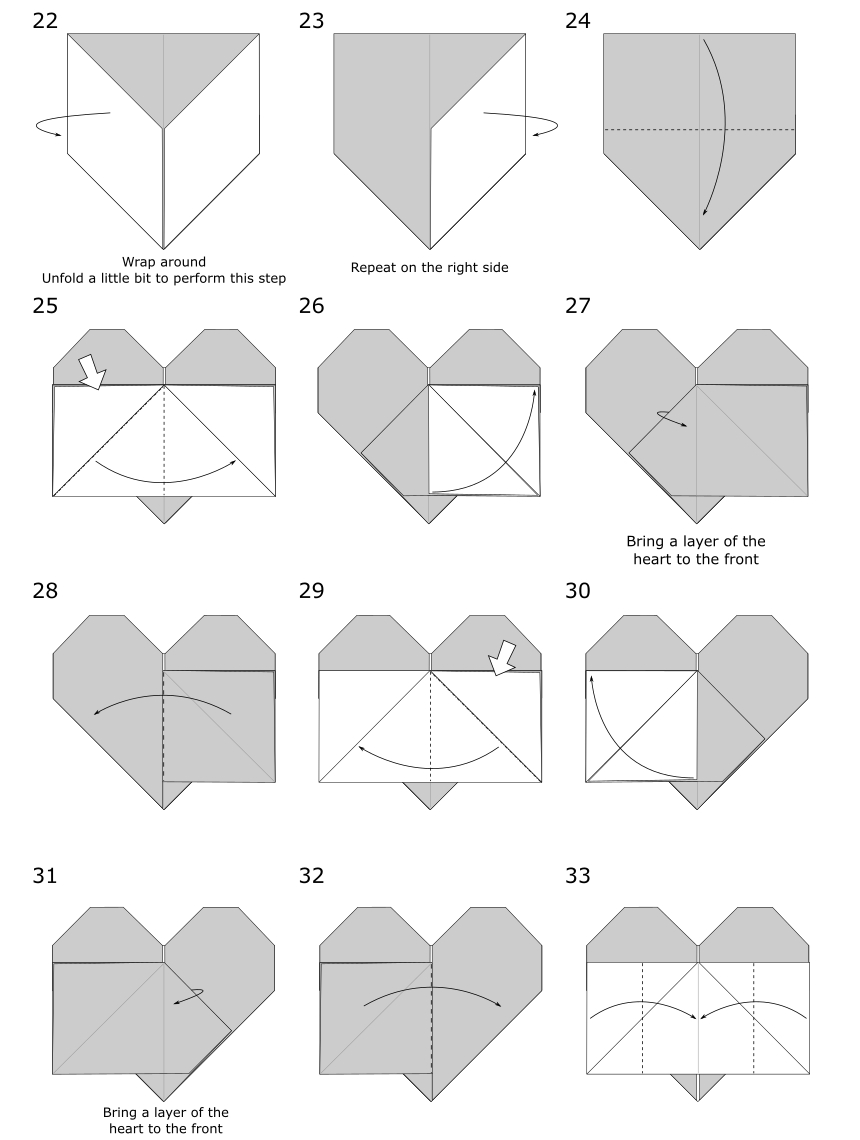
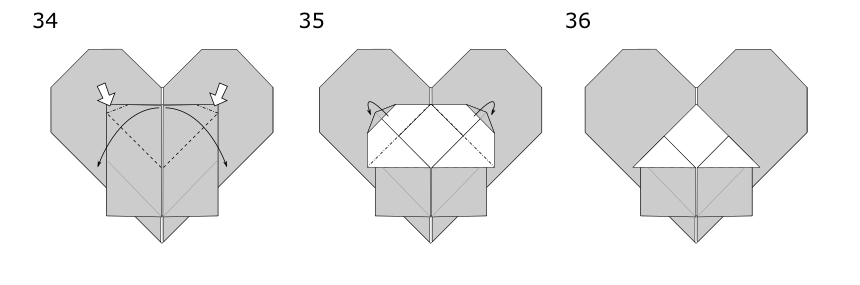
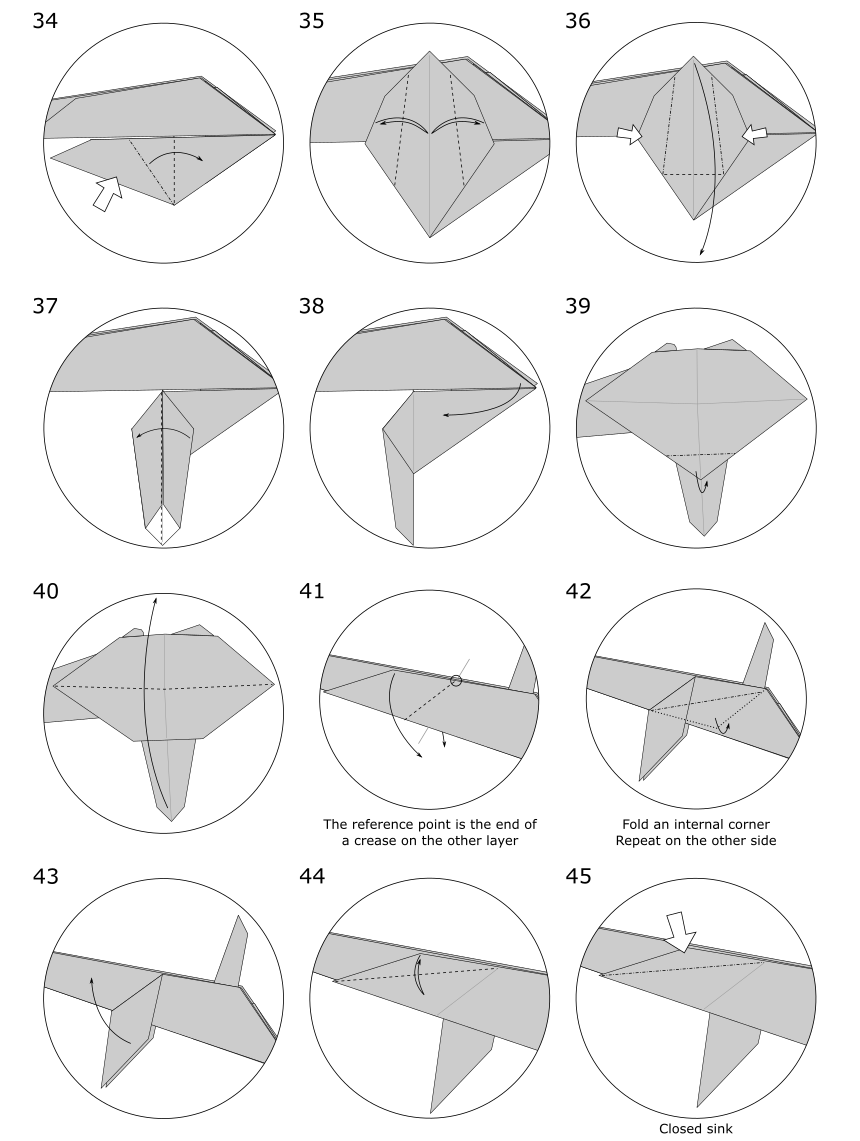
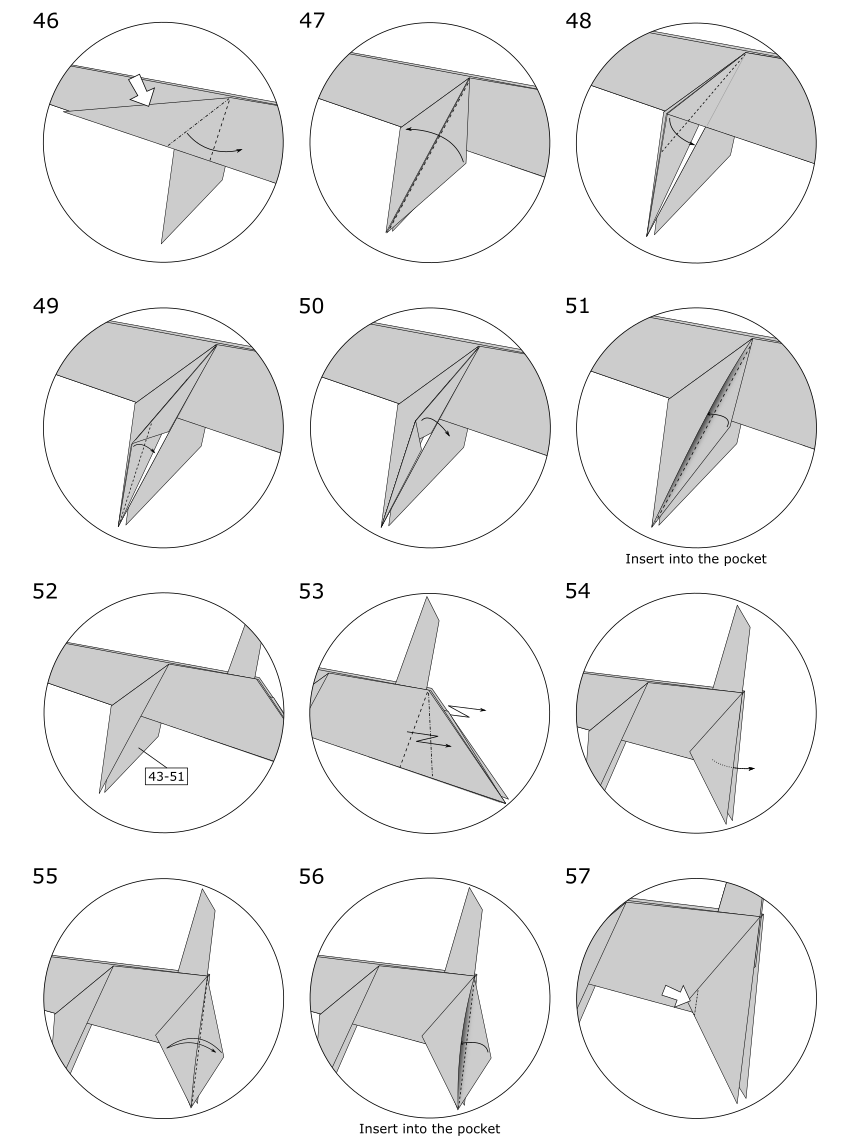
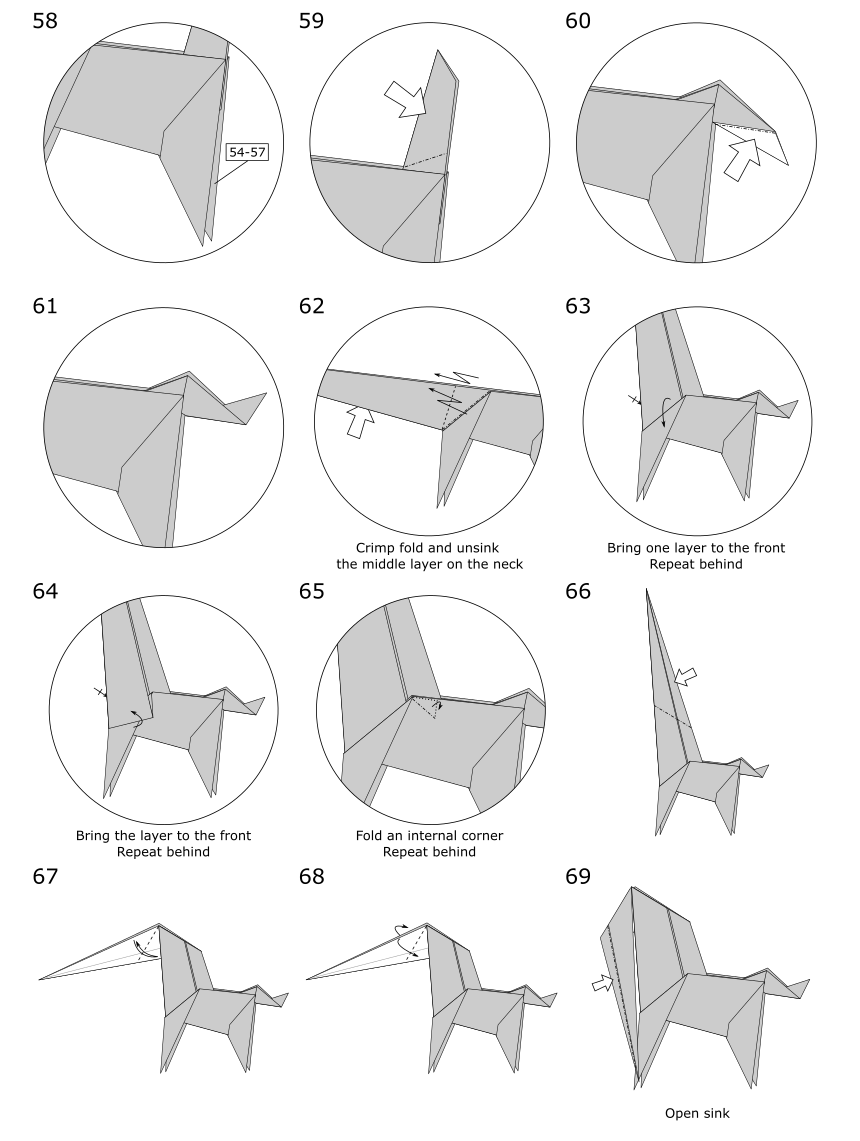
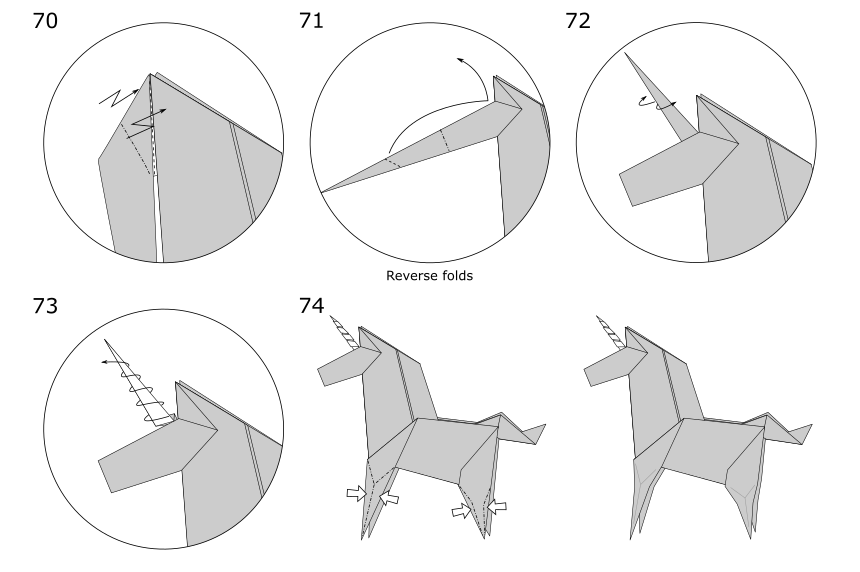
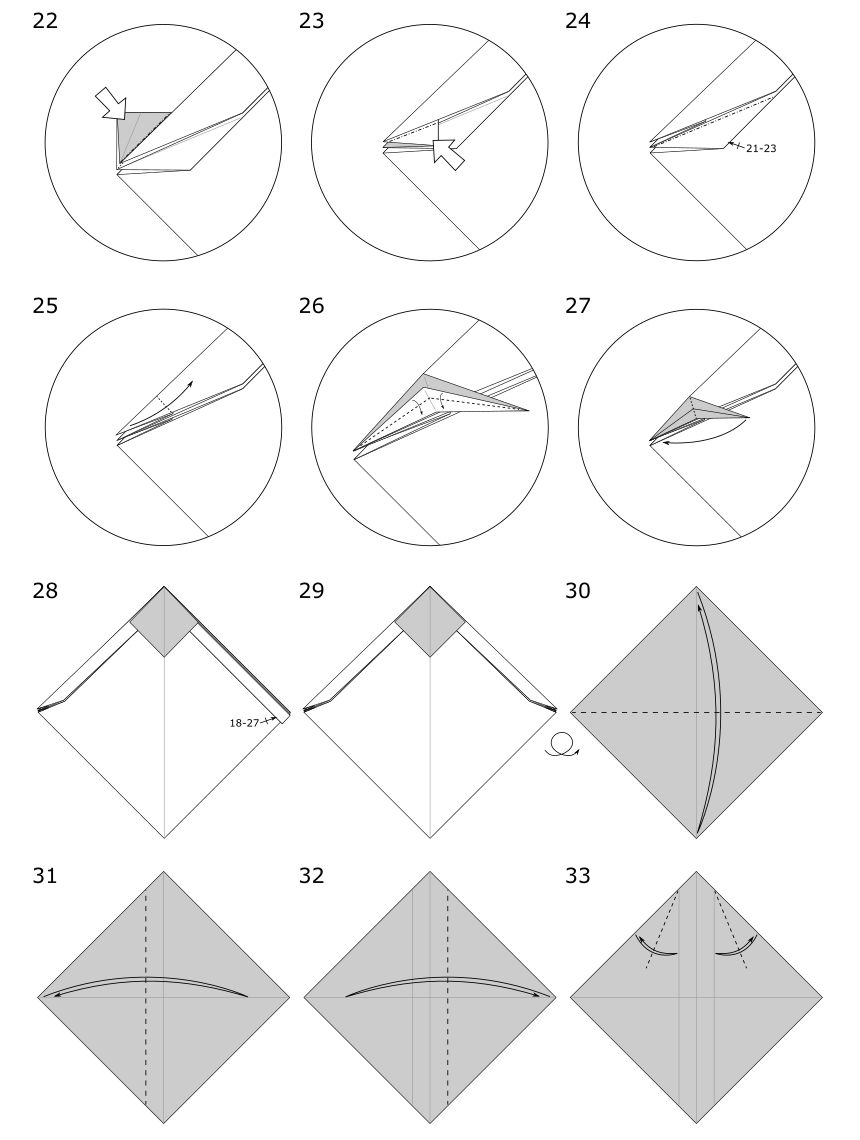
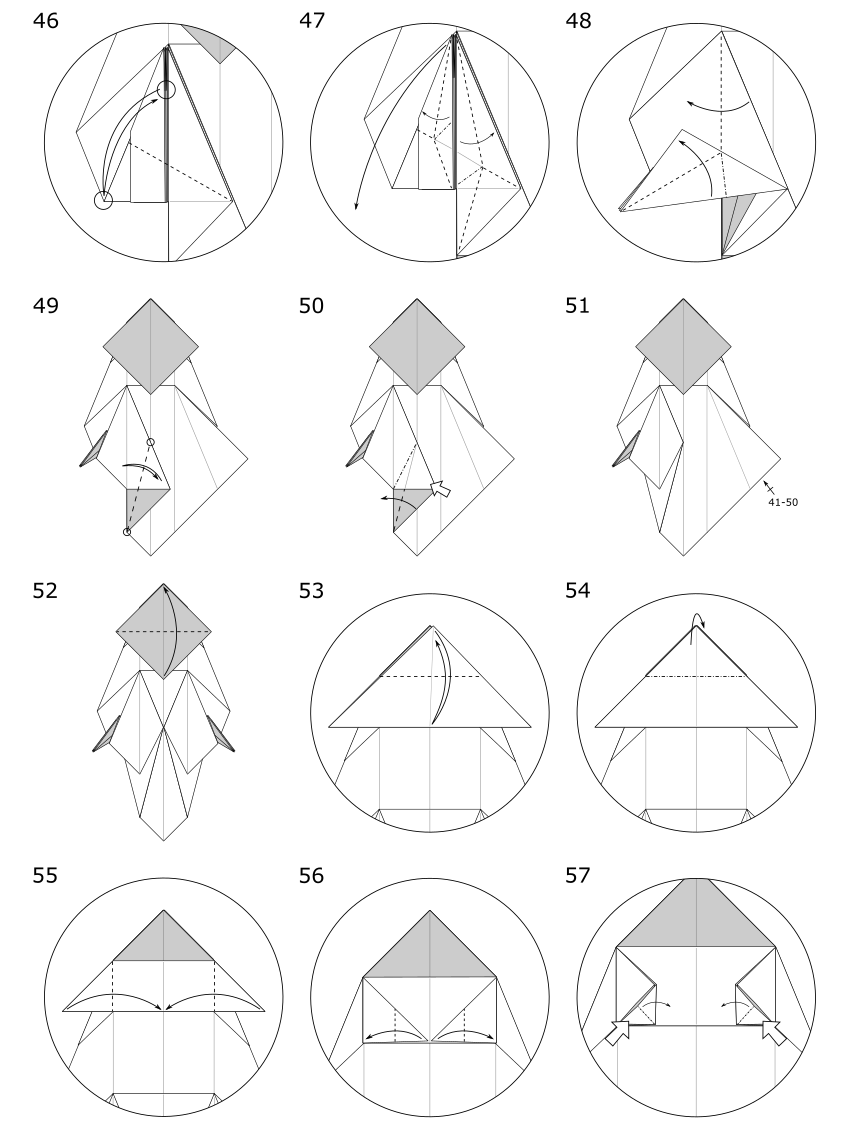
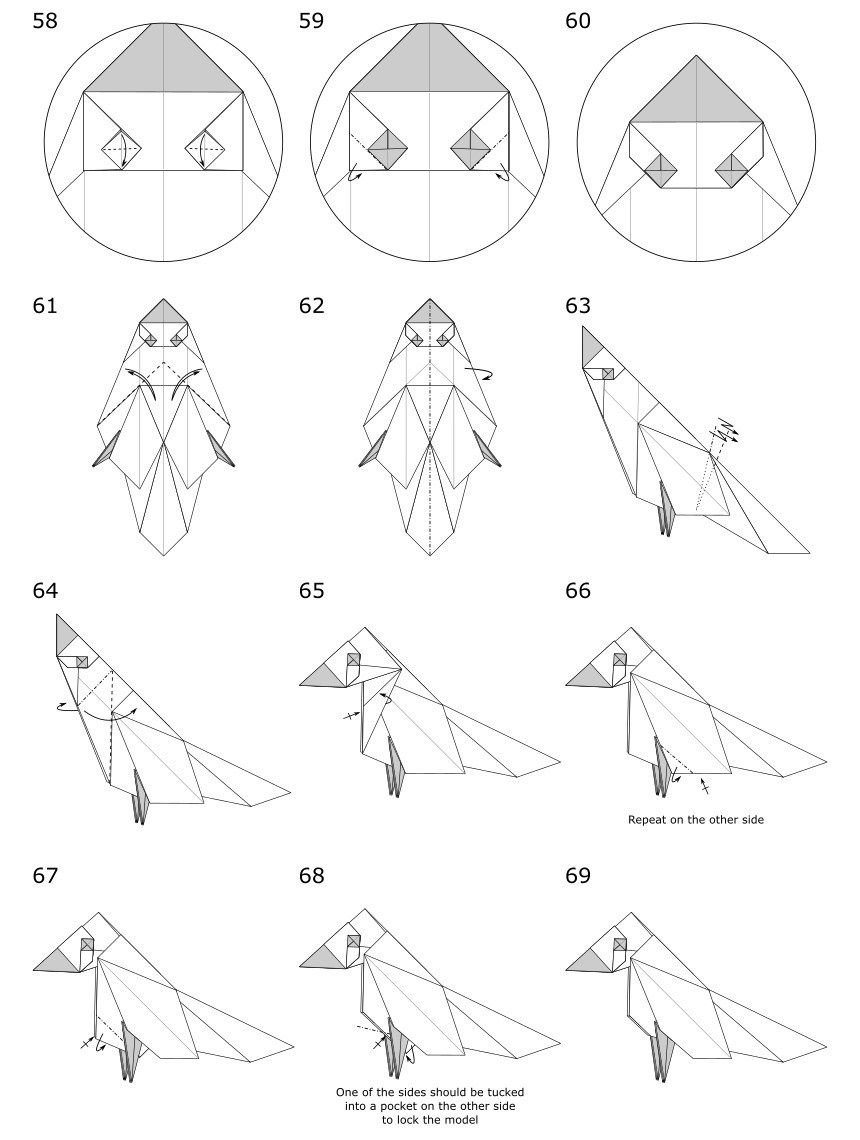
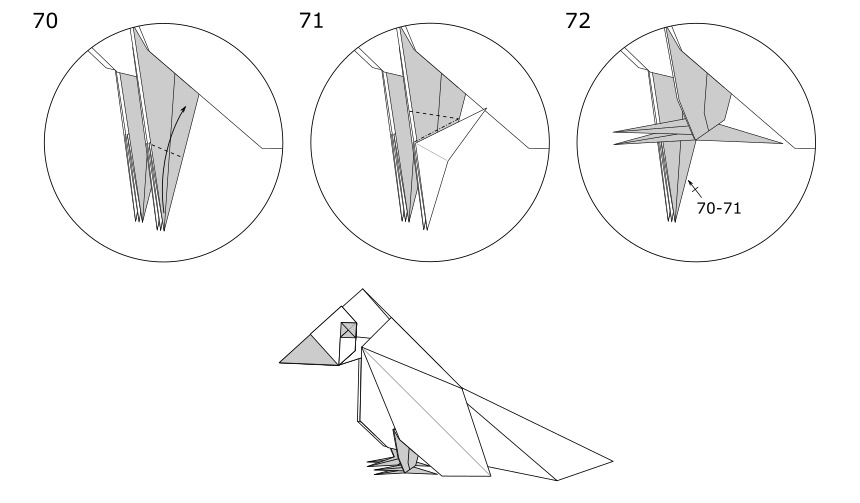
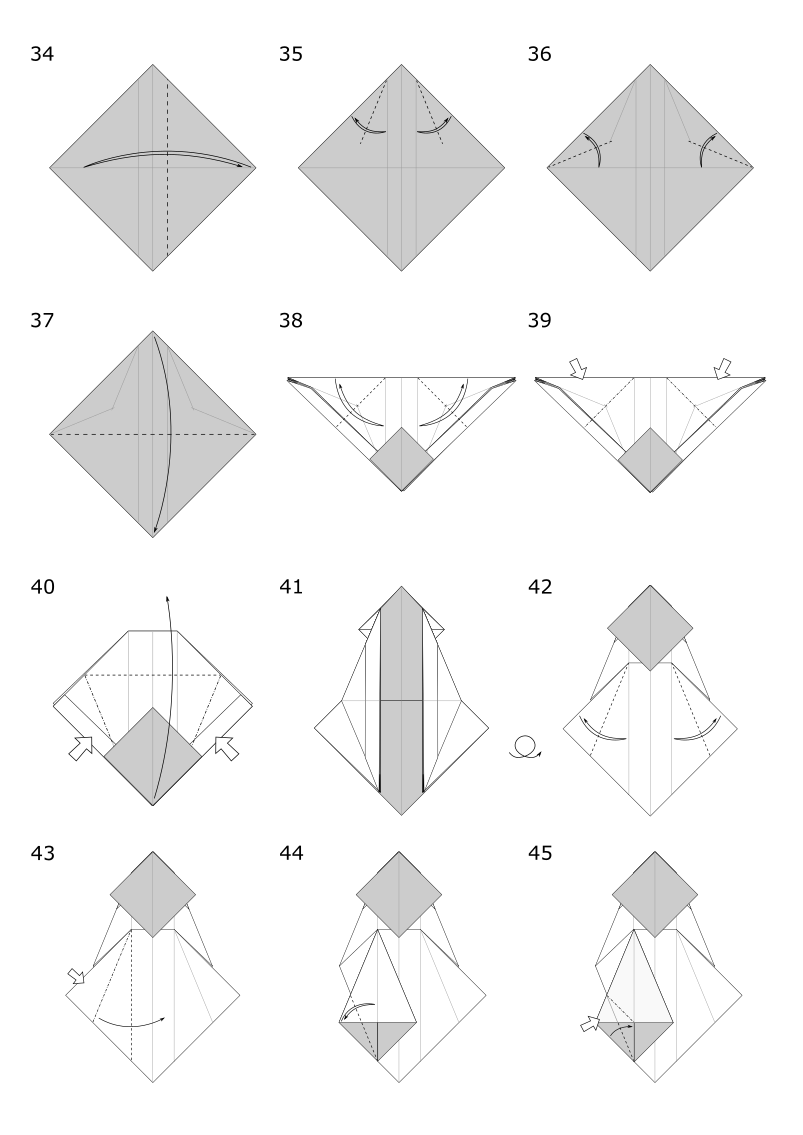
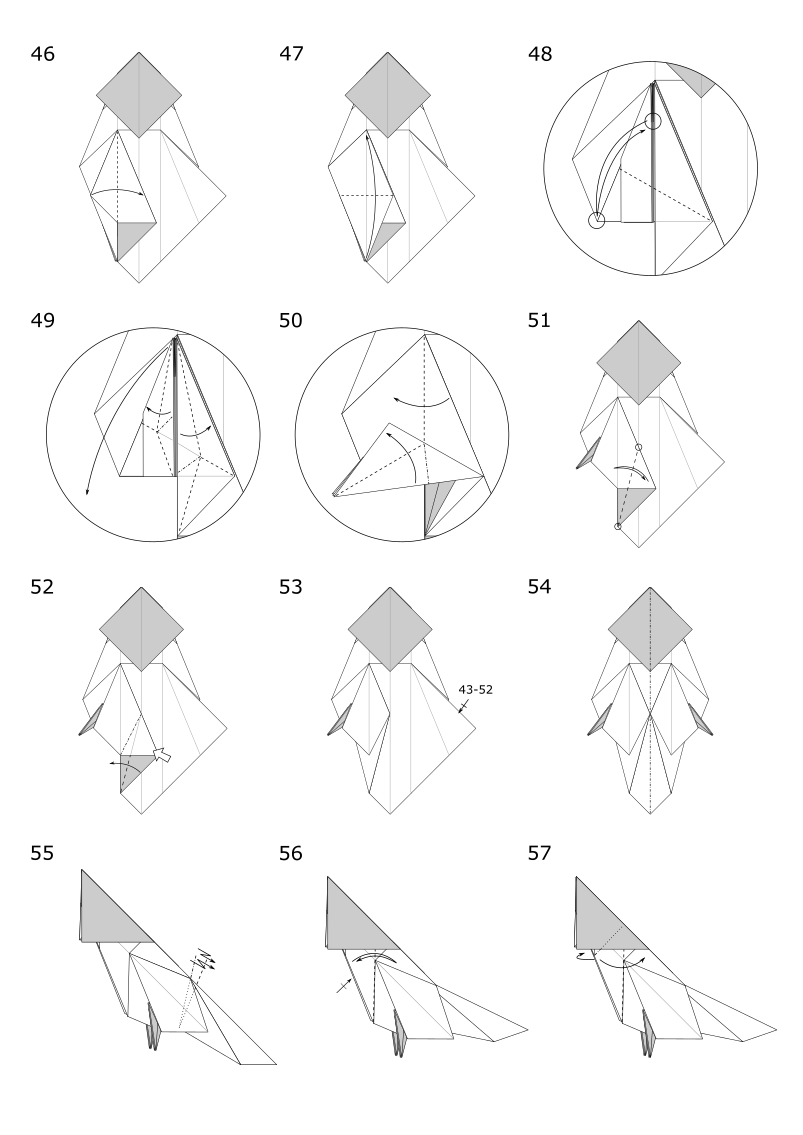
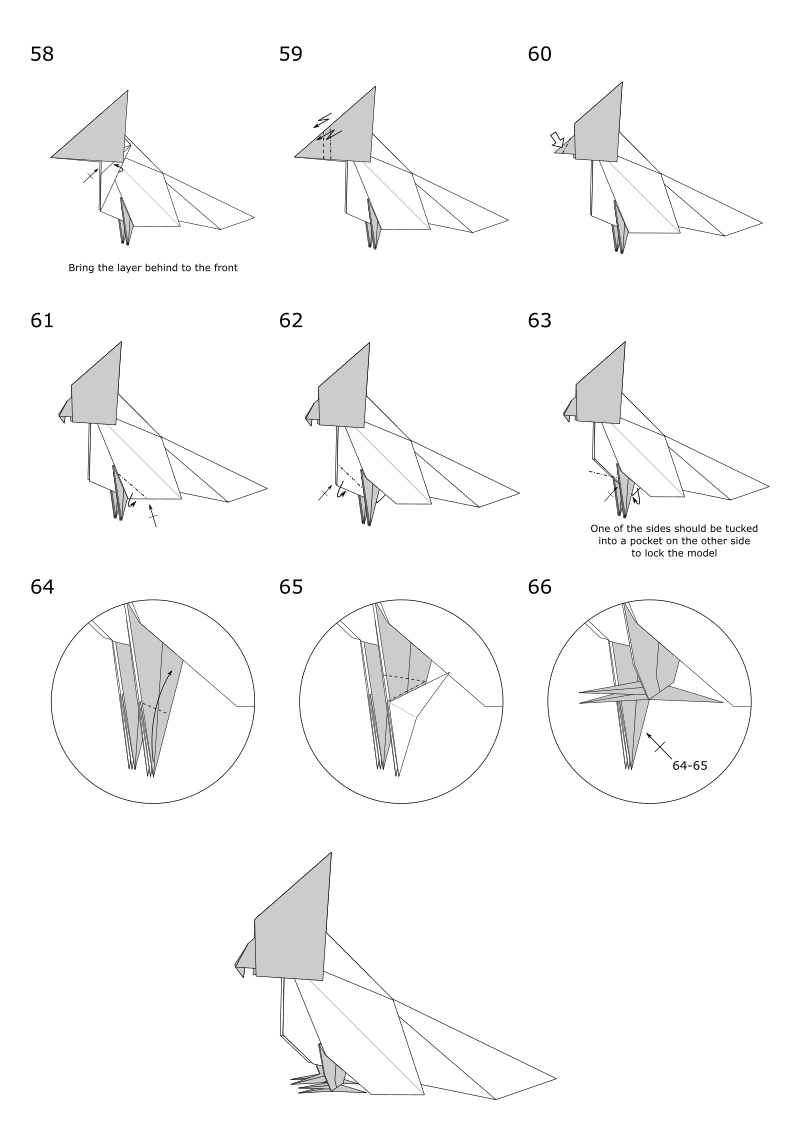
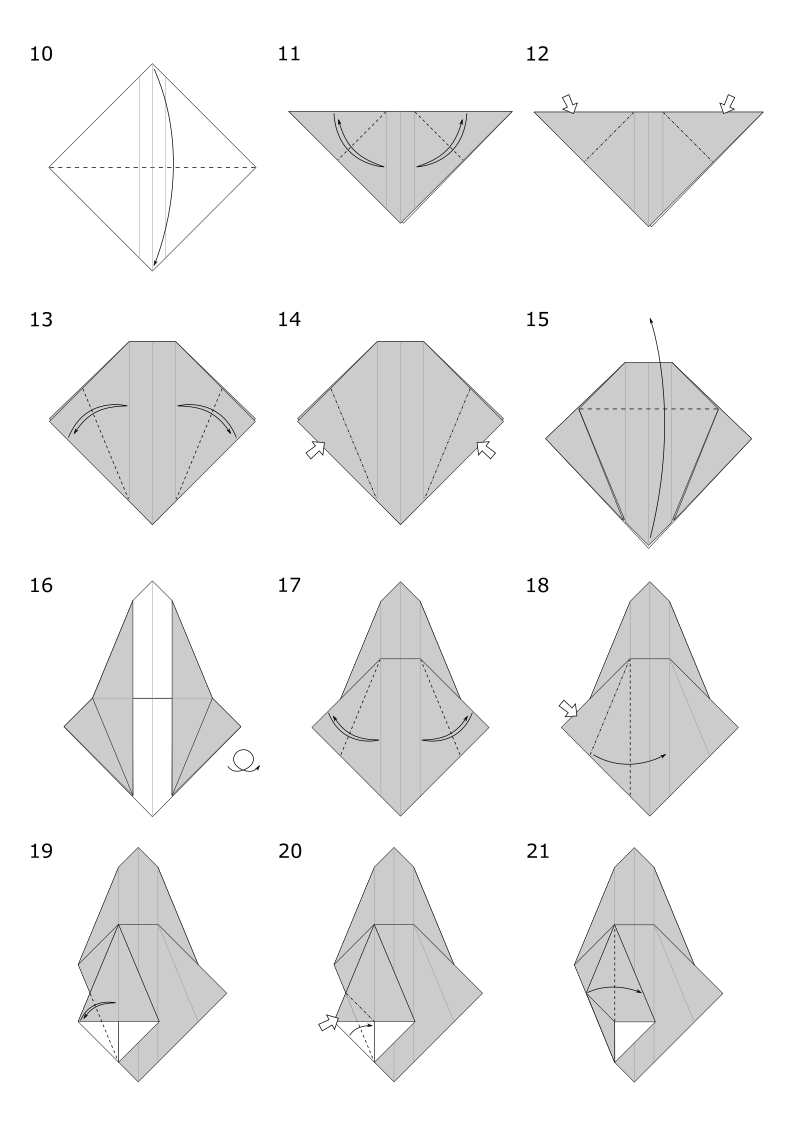
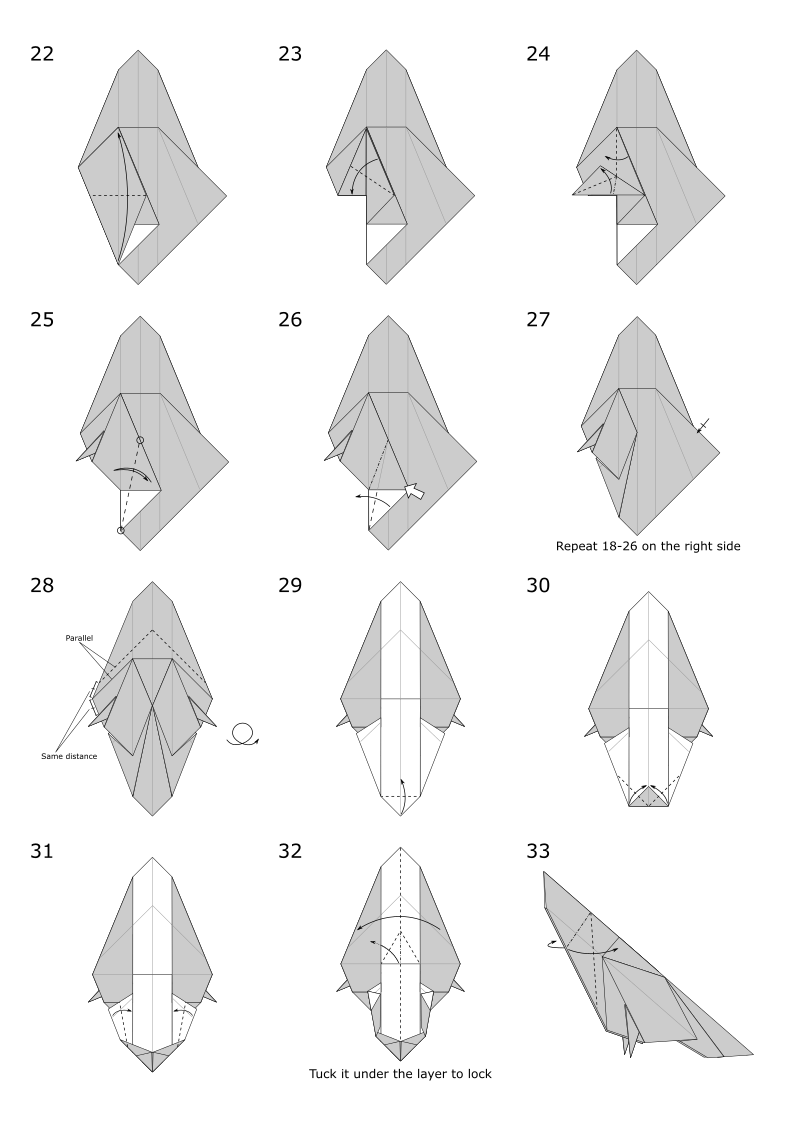
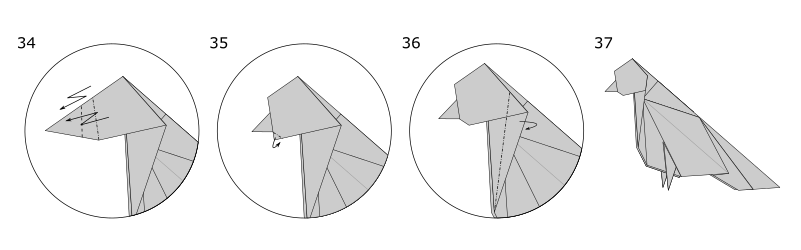
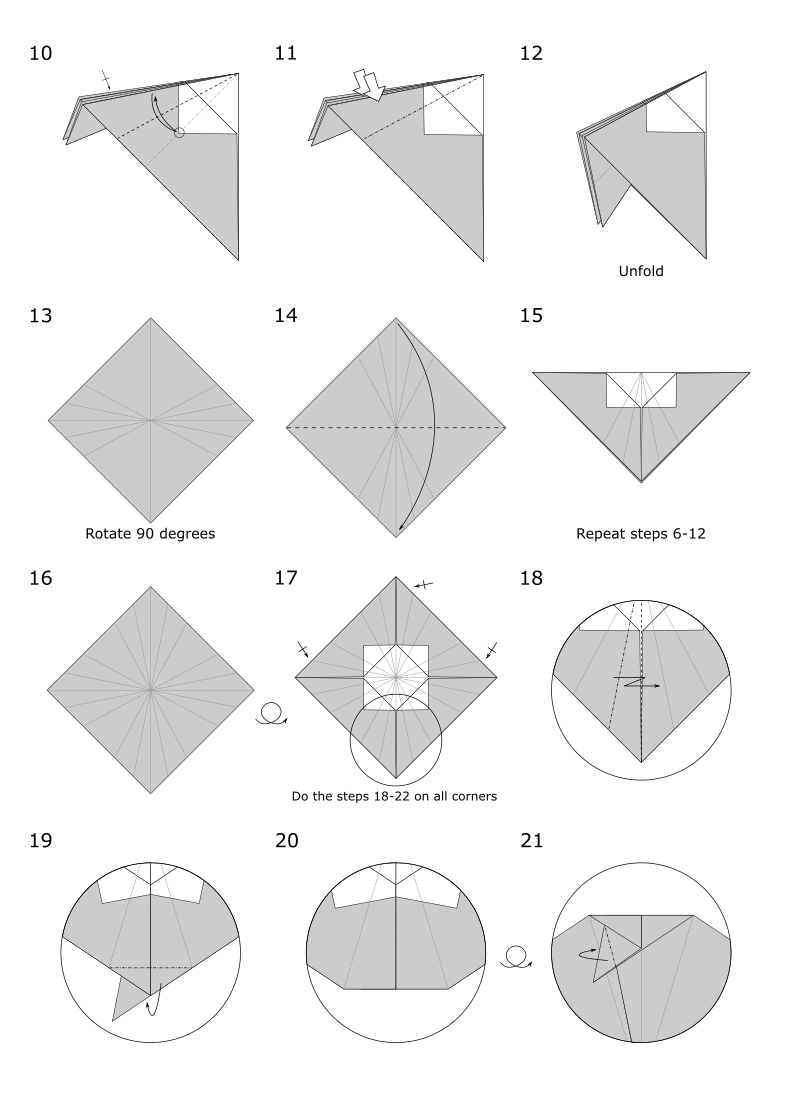
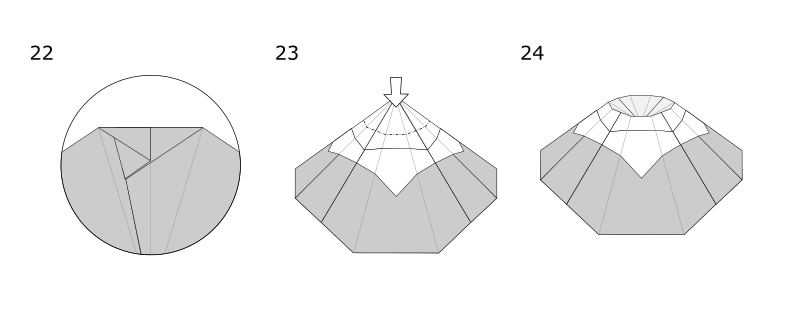
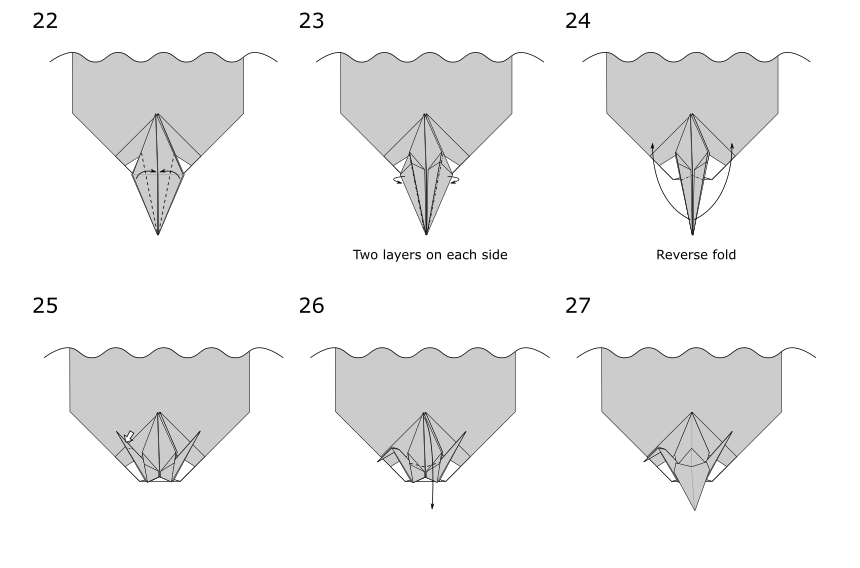
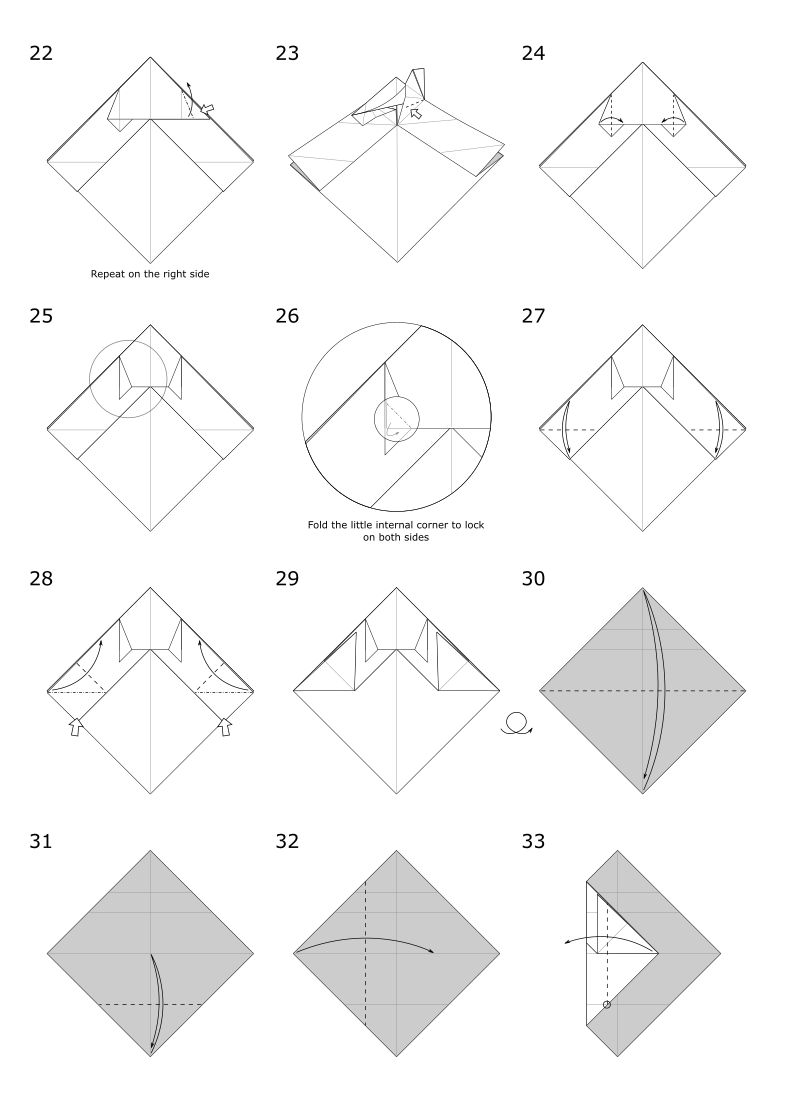
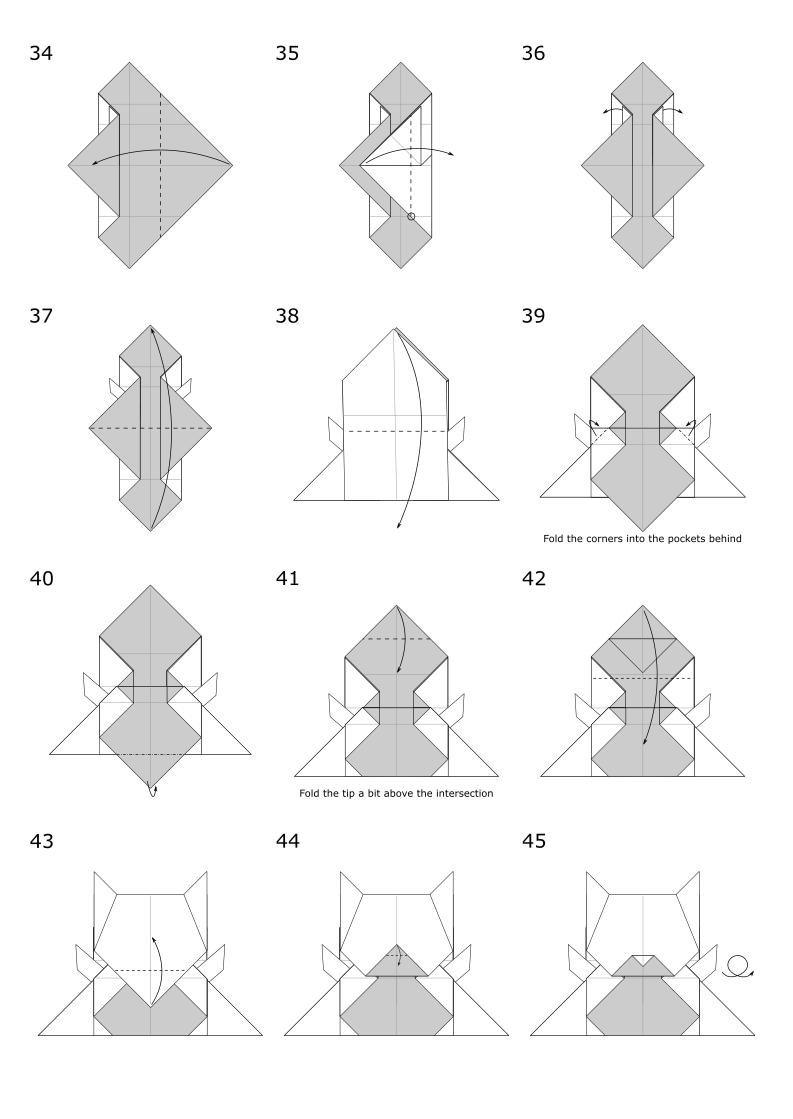
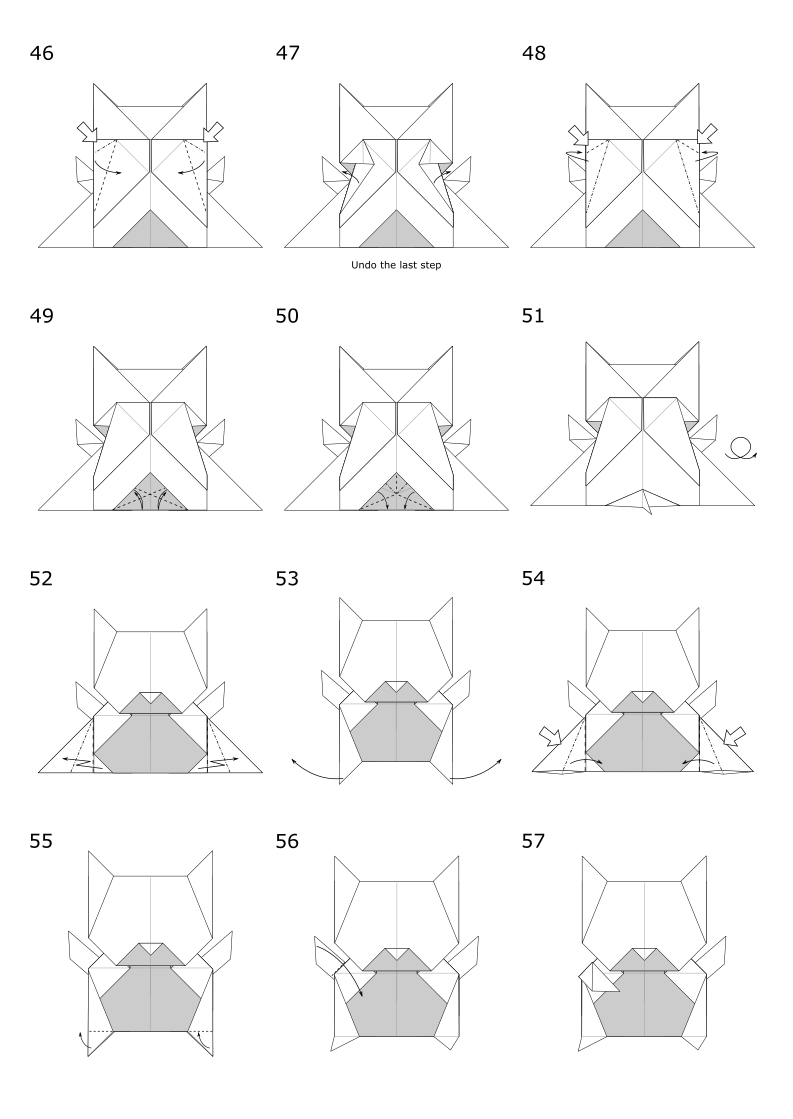
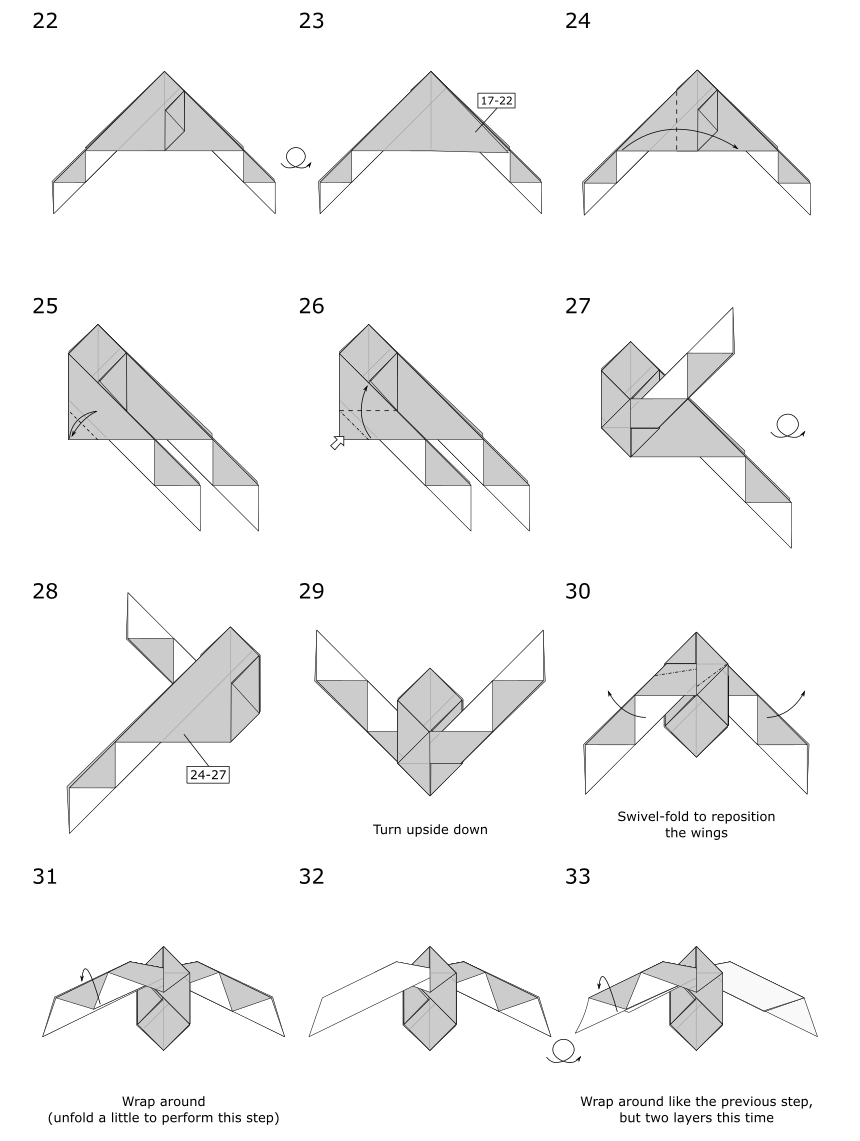
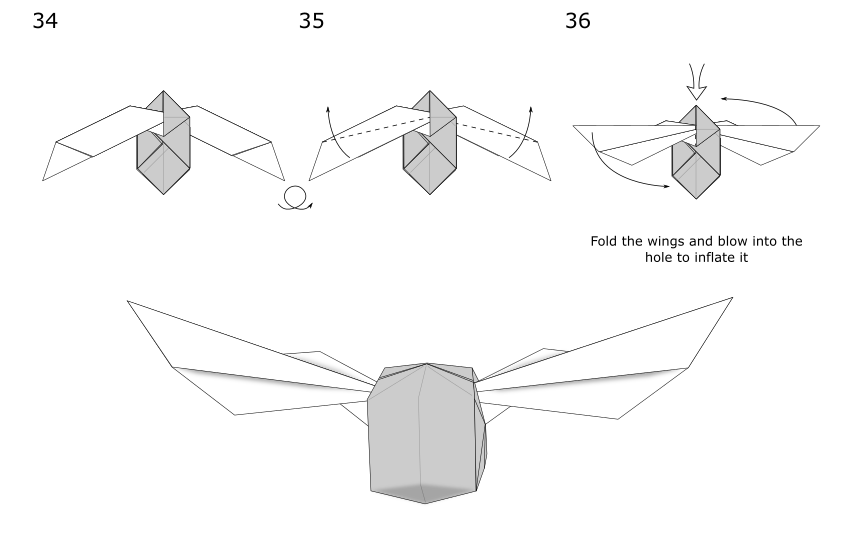
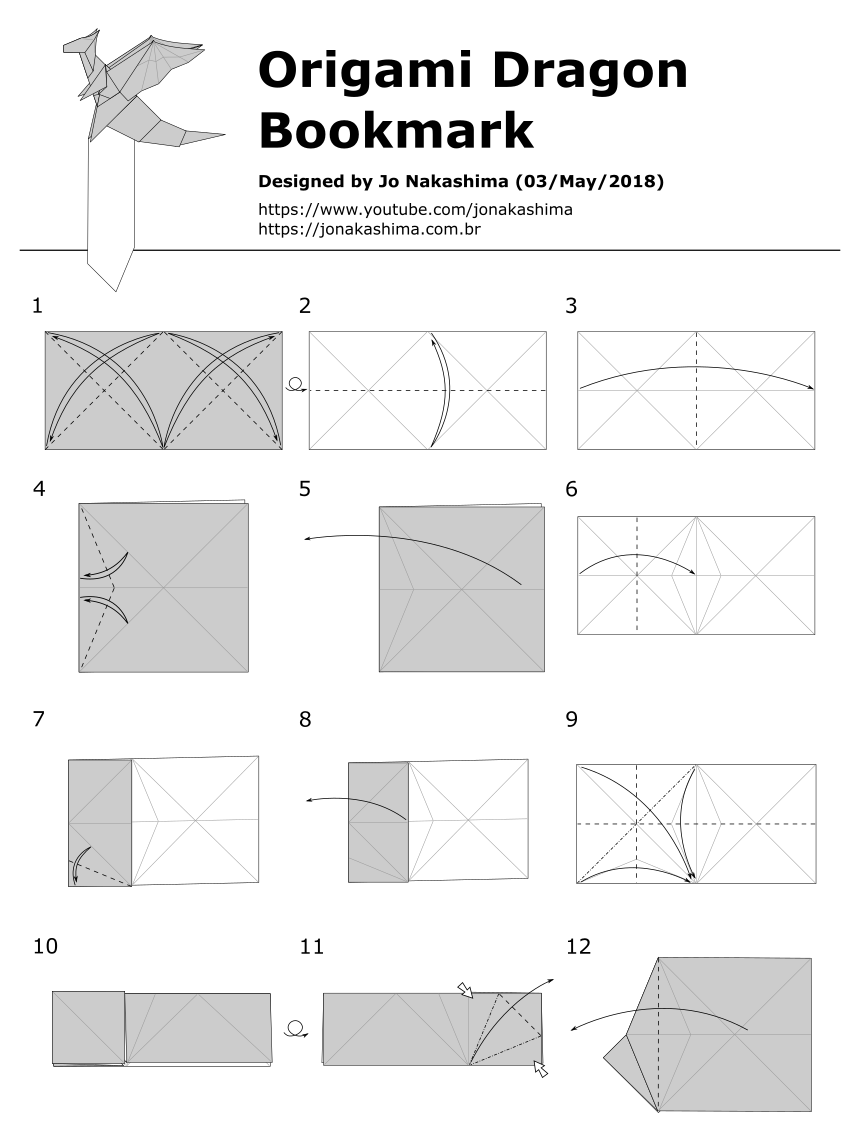
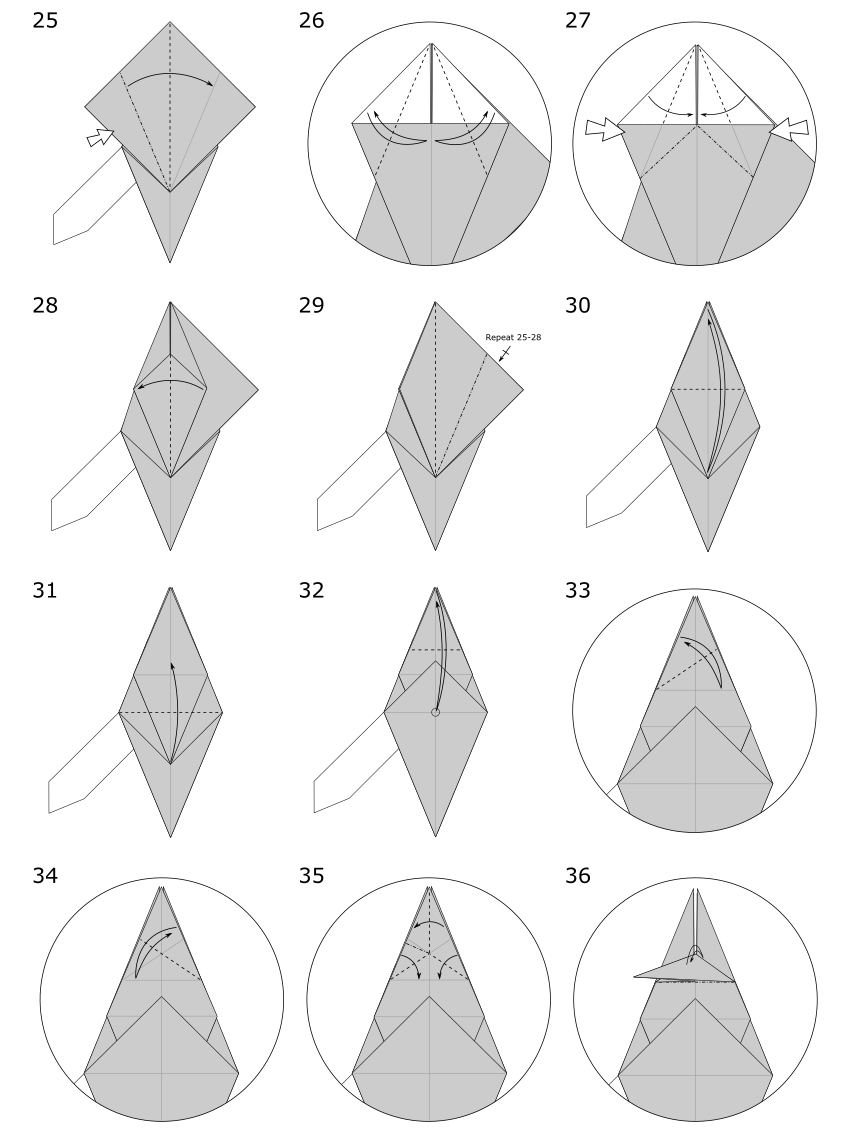
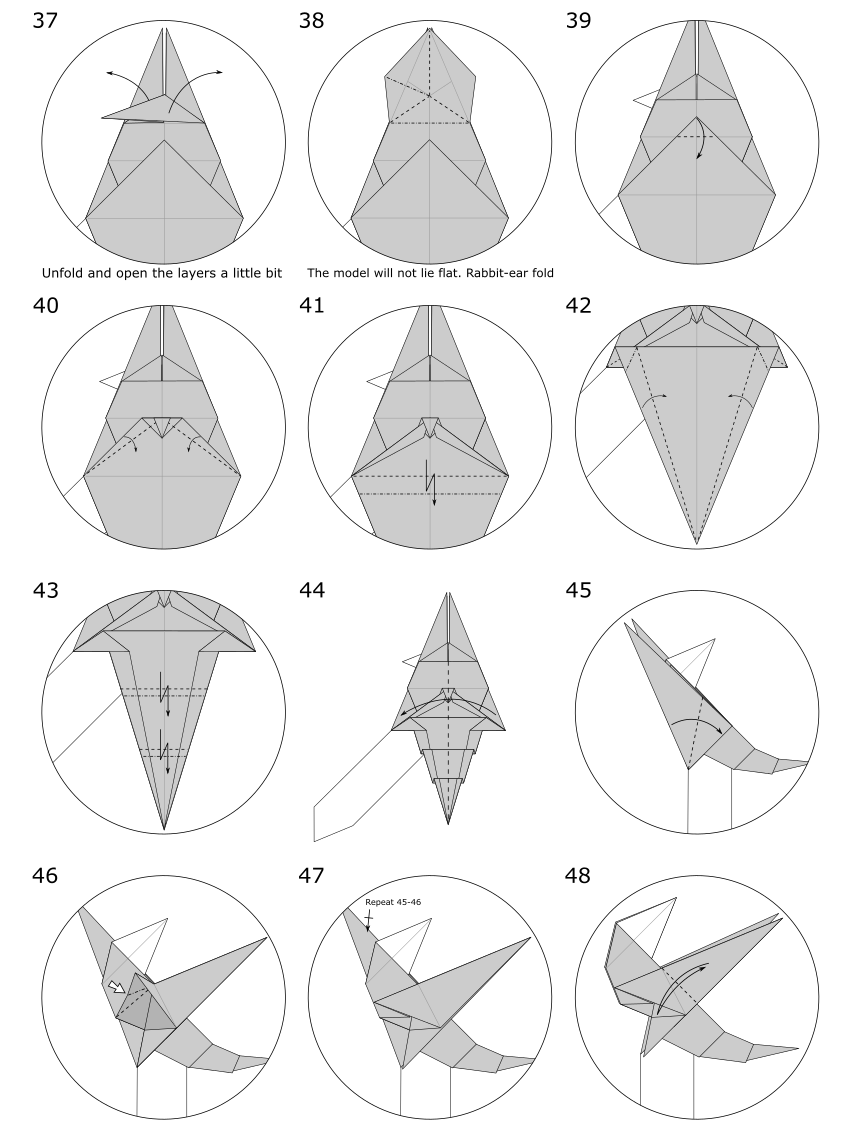
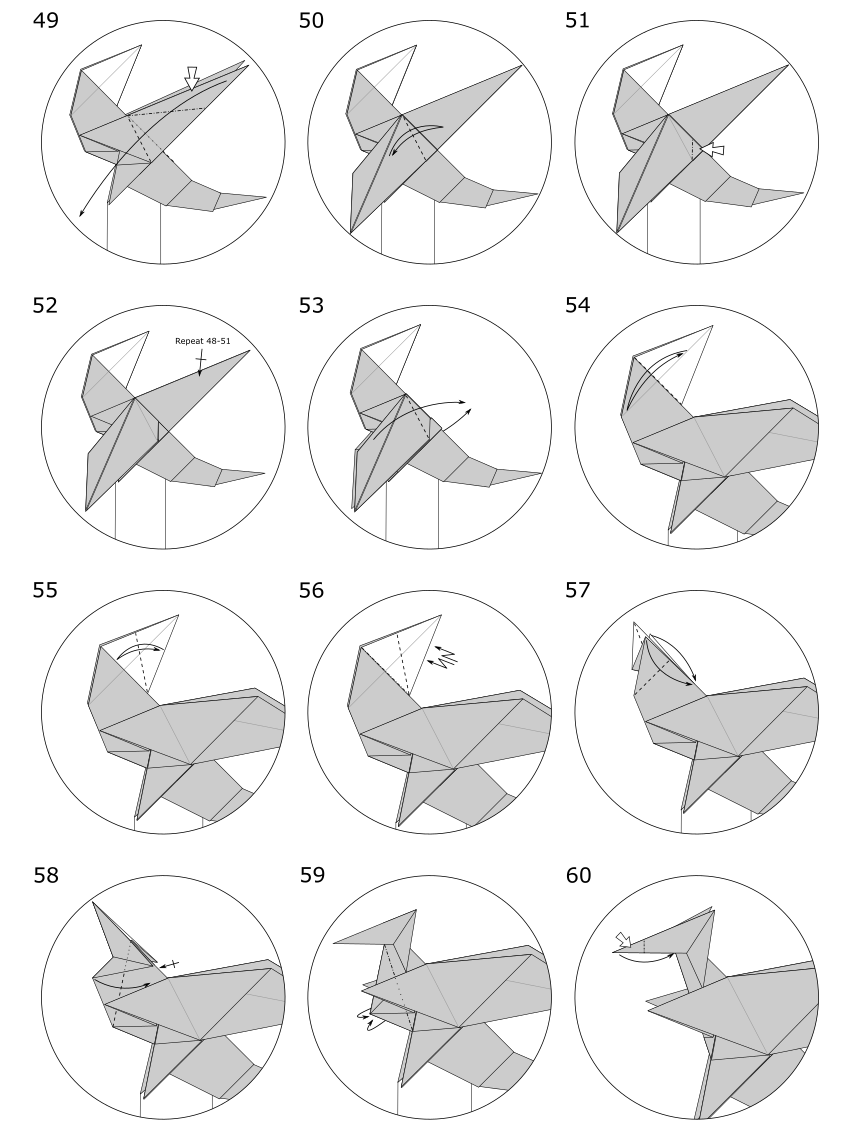
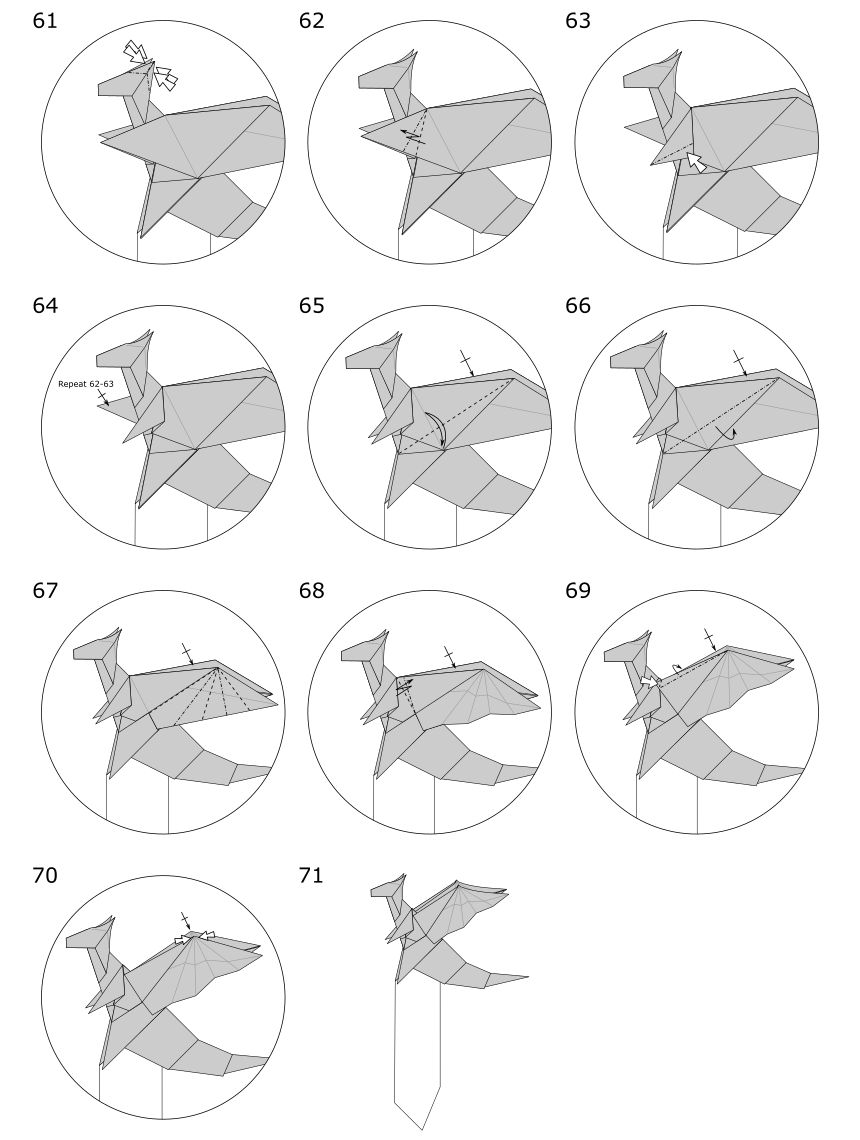
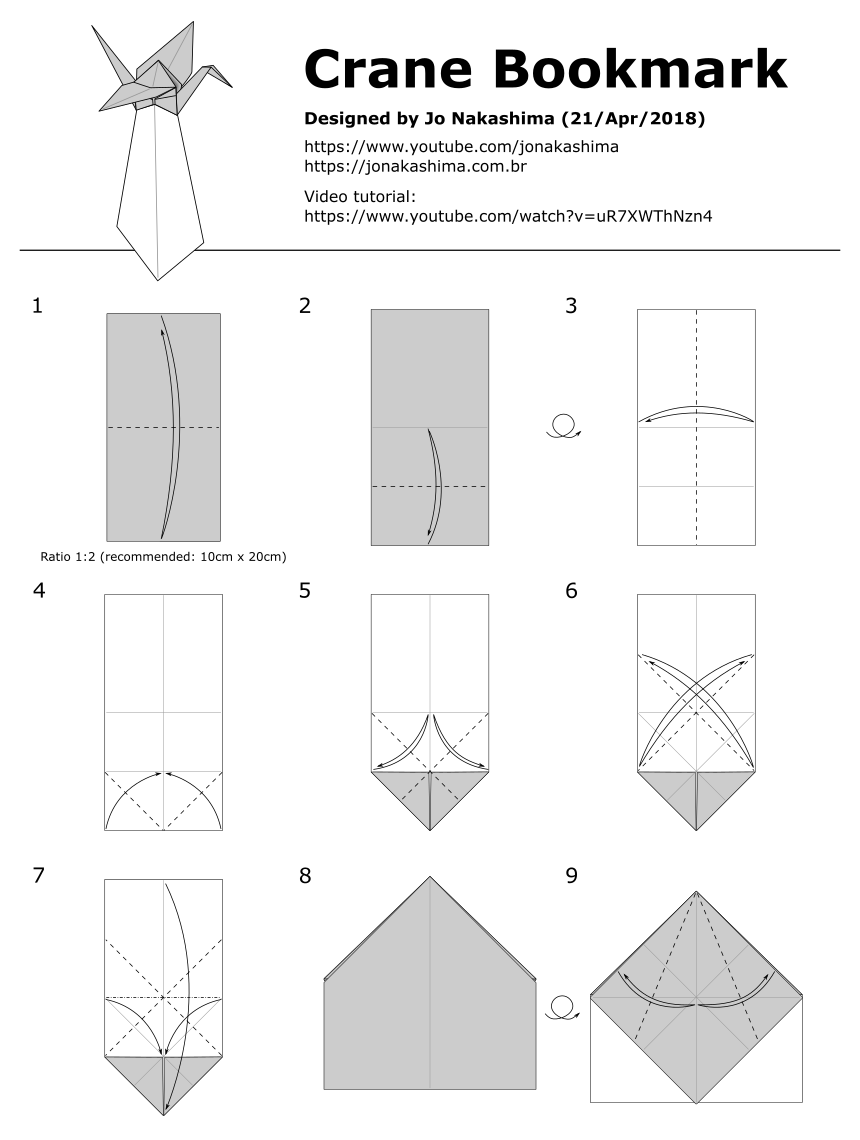
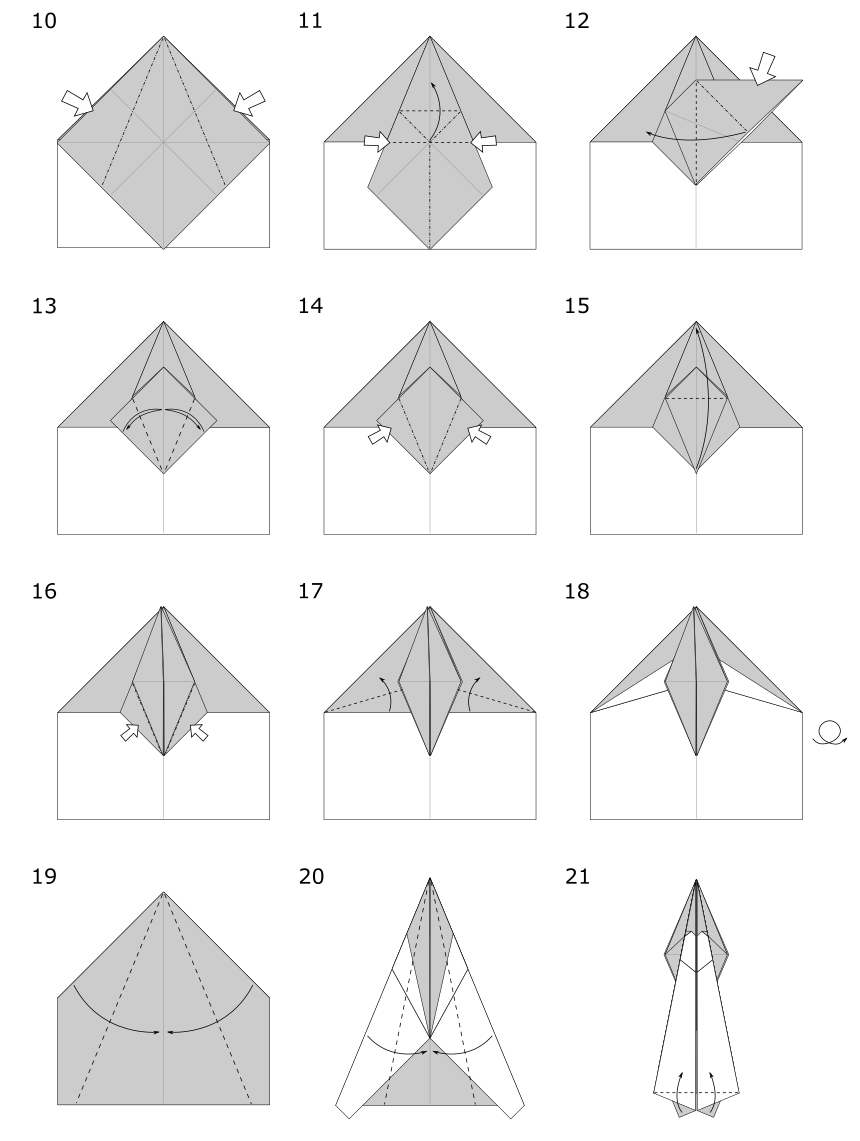
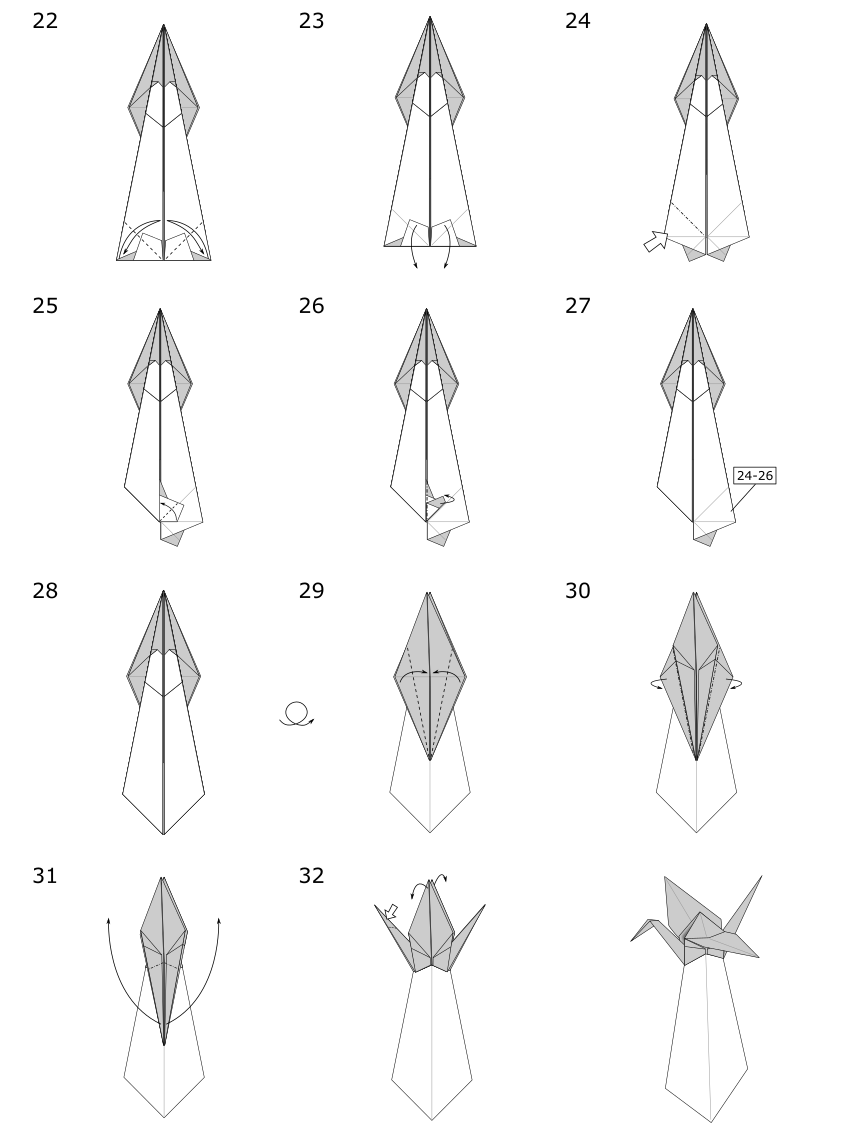
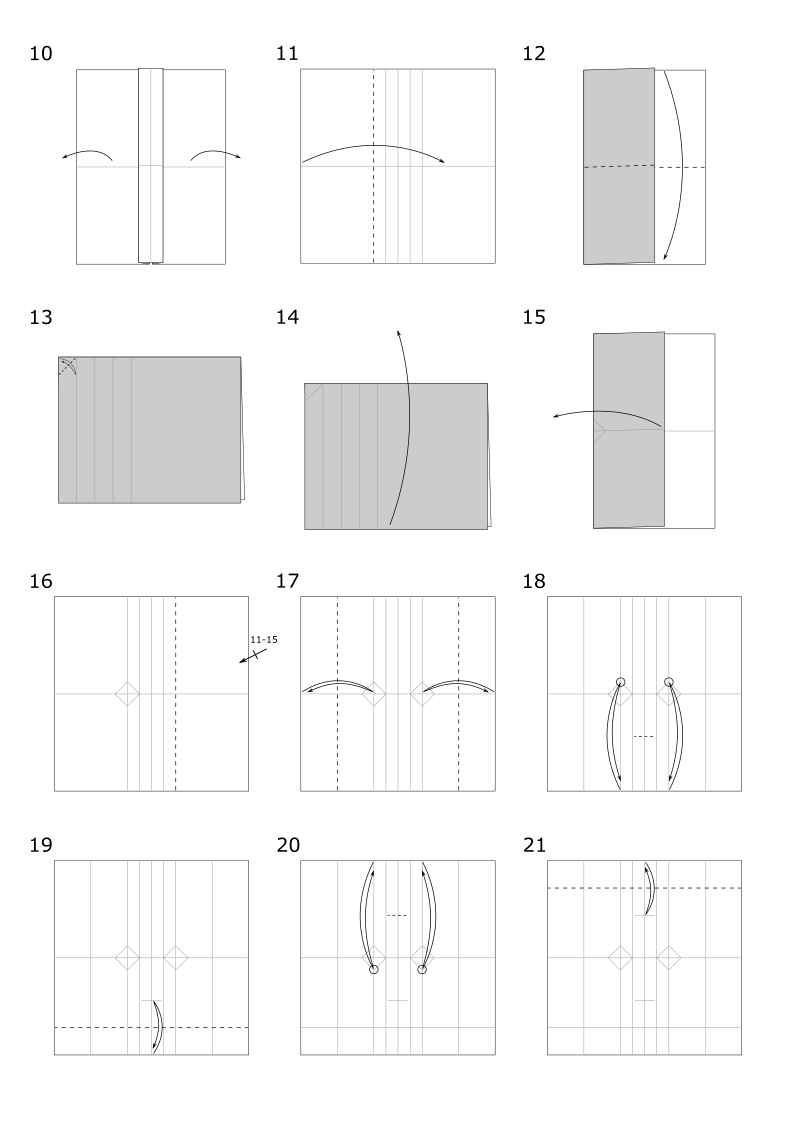
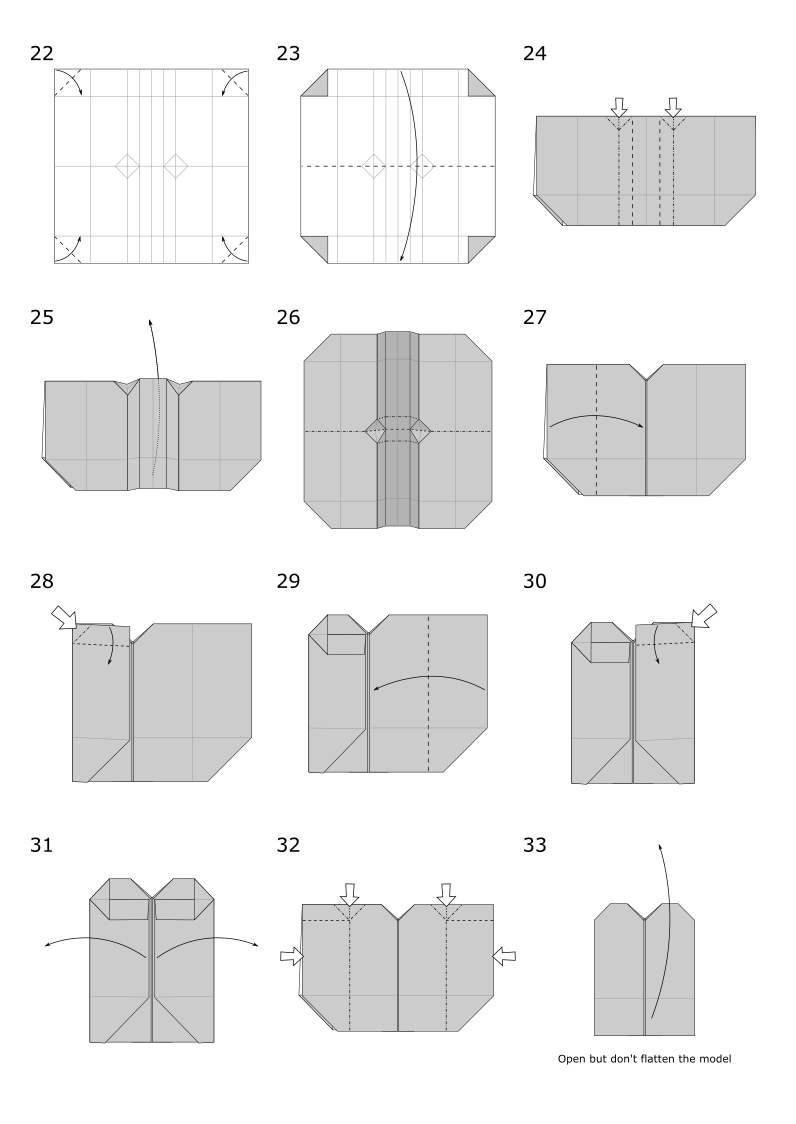
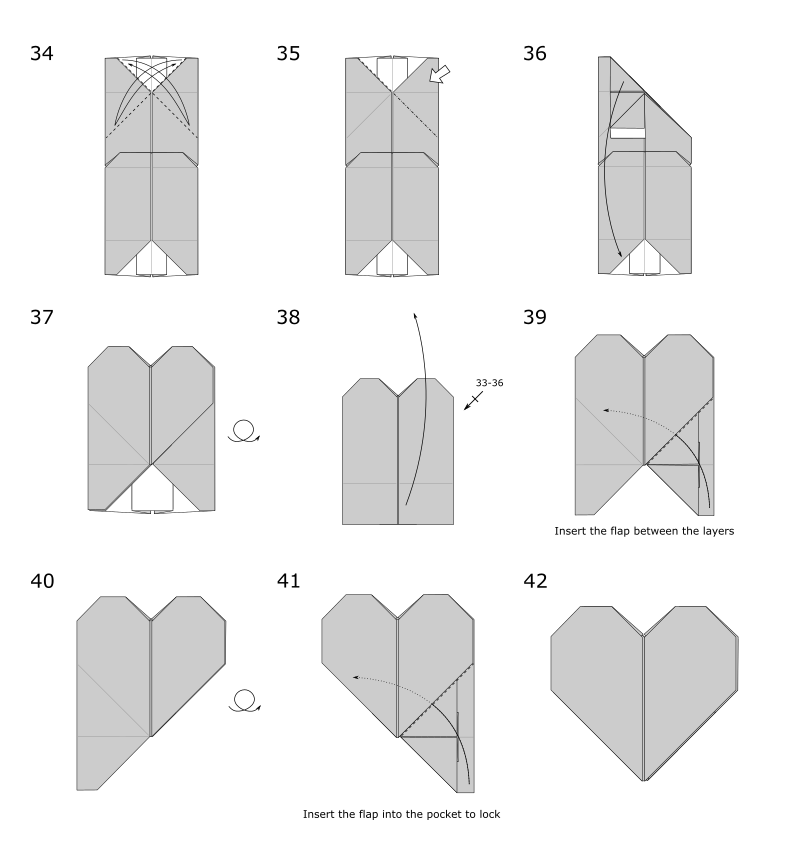
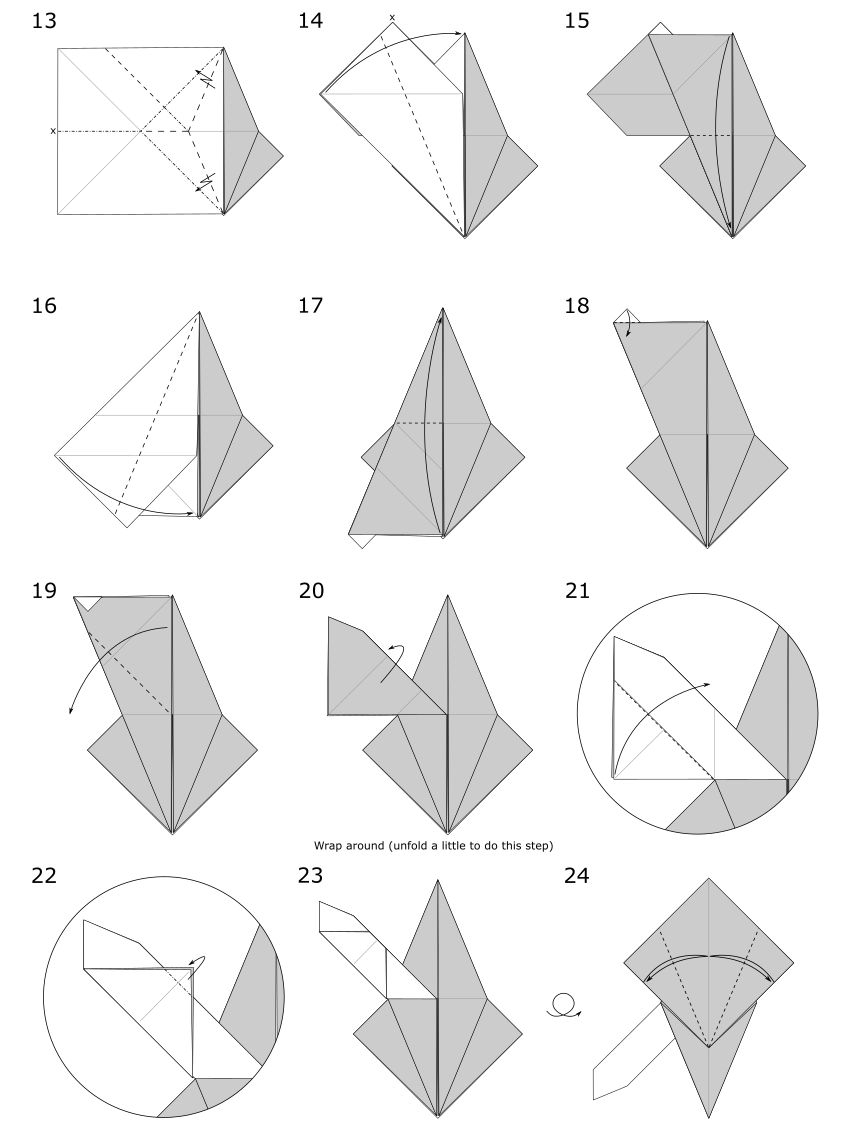
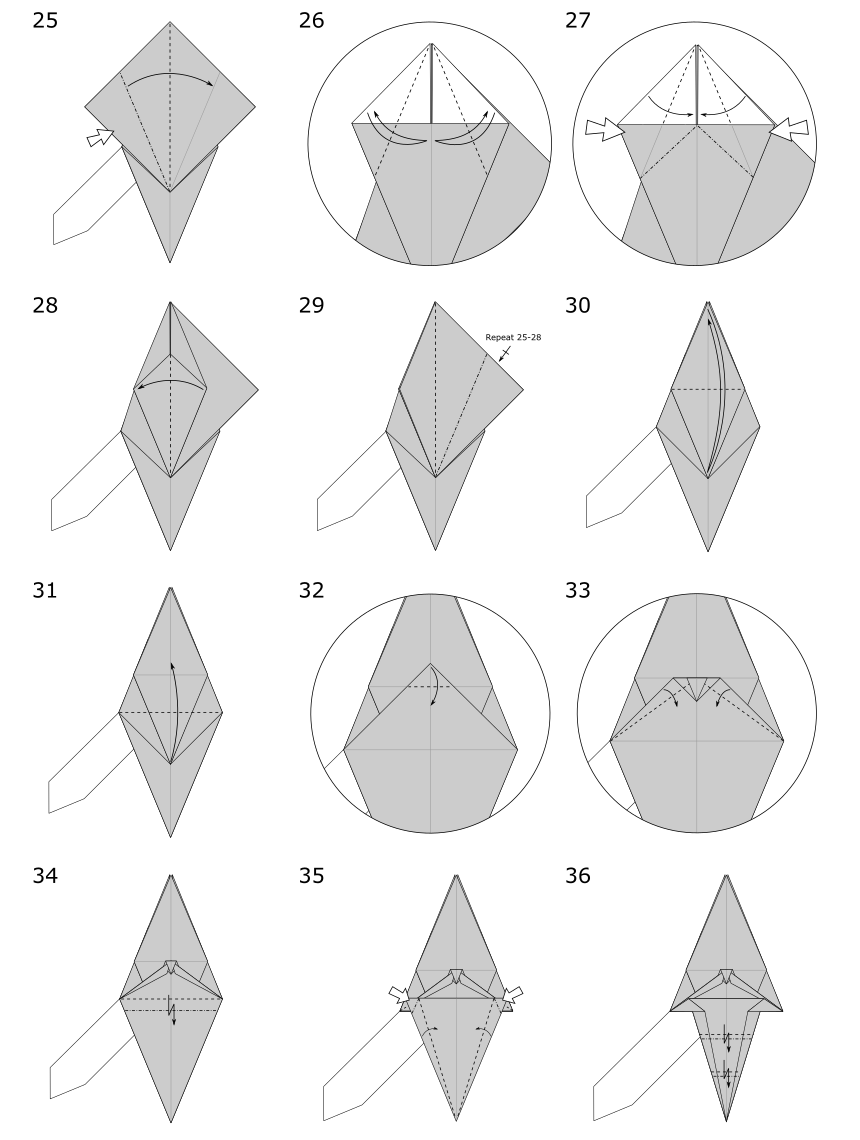
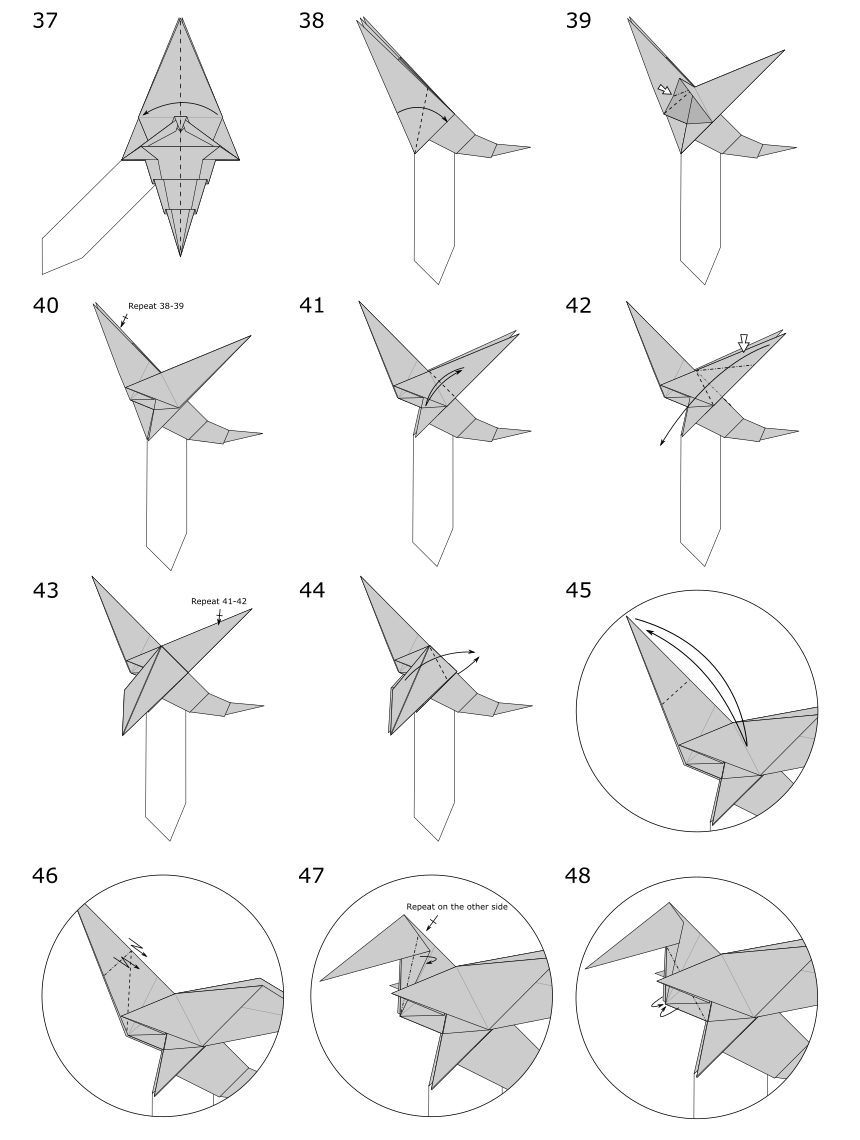
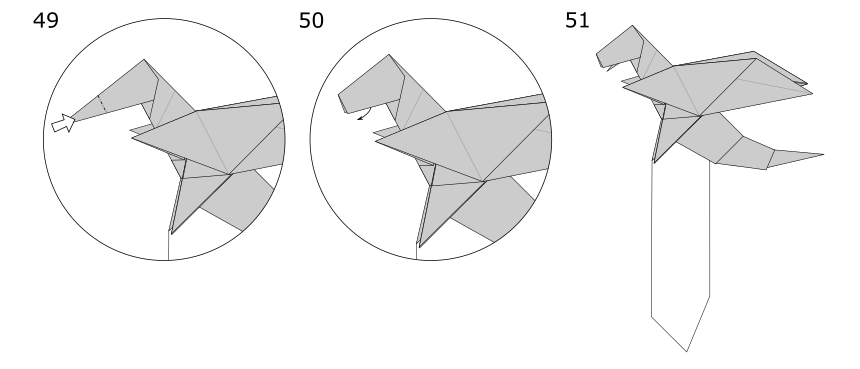
Diagrams


See also
The origami Chibi Dragon Bookmark has a very simple look, but if you want a more details like horns and nicely shaped wings, try my first Dragon Bookmark:
And there are also the original non-bookmark versions of both Chibi Dragon and Dragon v1: